Create a Workflow from a Template
Creating a workflow from scratch can be complex, especially for first-time users. AI/Run CodeMie provides predefined templates that can perform various tasks out of the box, making it easy to get started quickly.
Steps to Create from Template
-
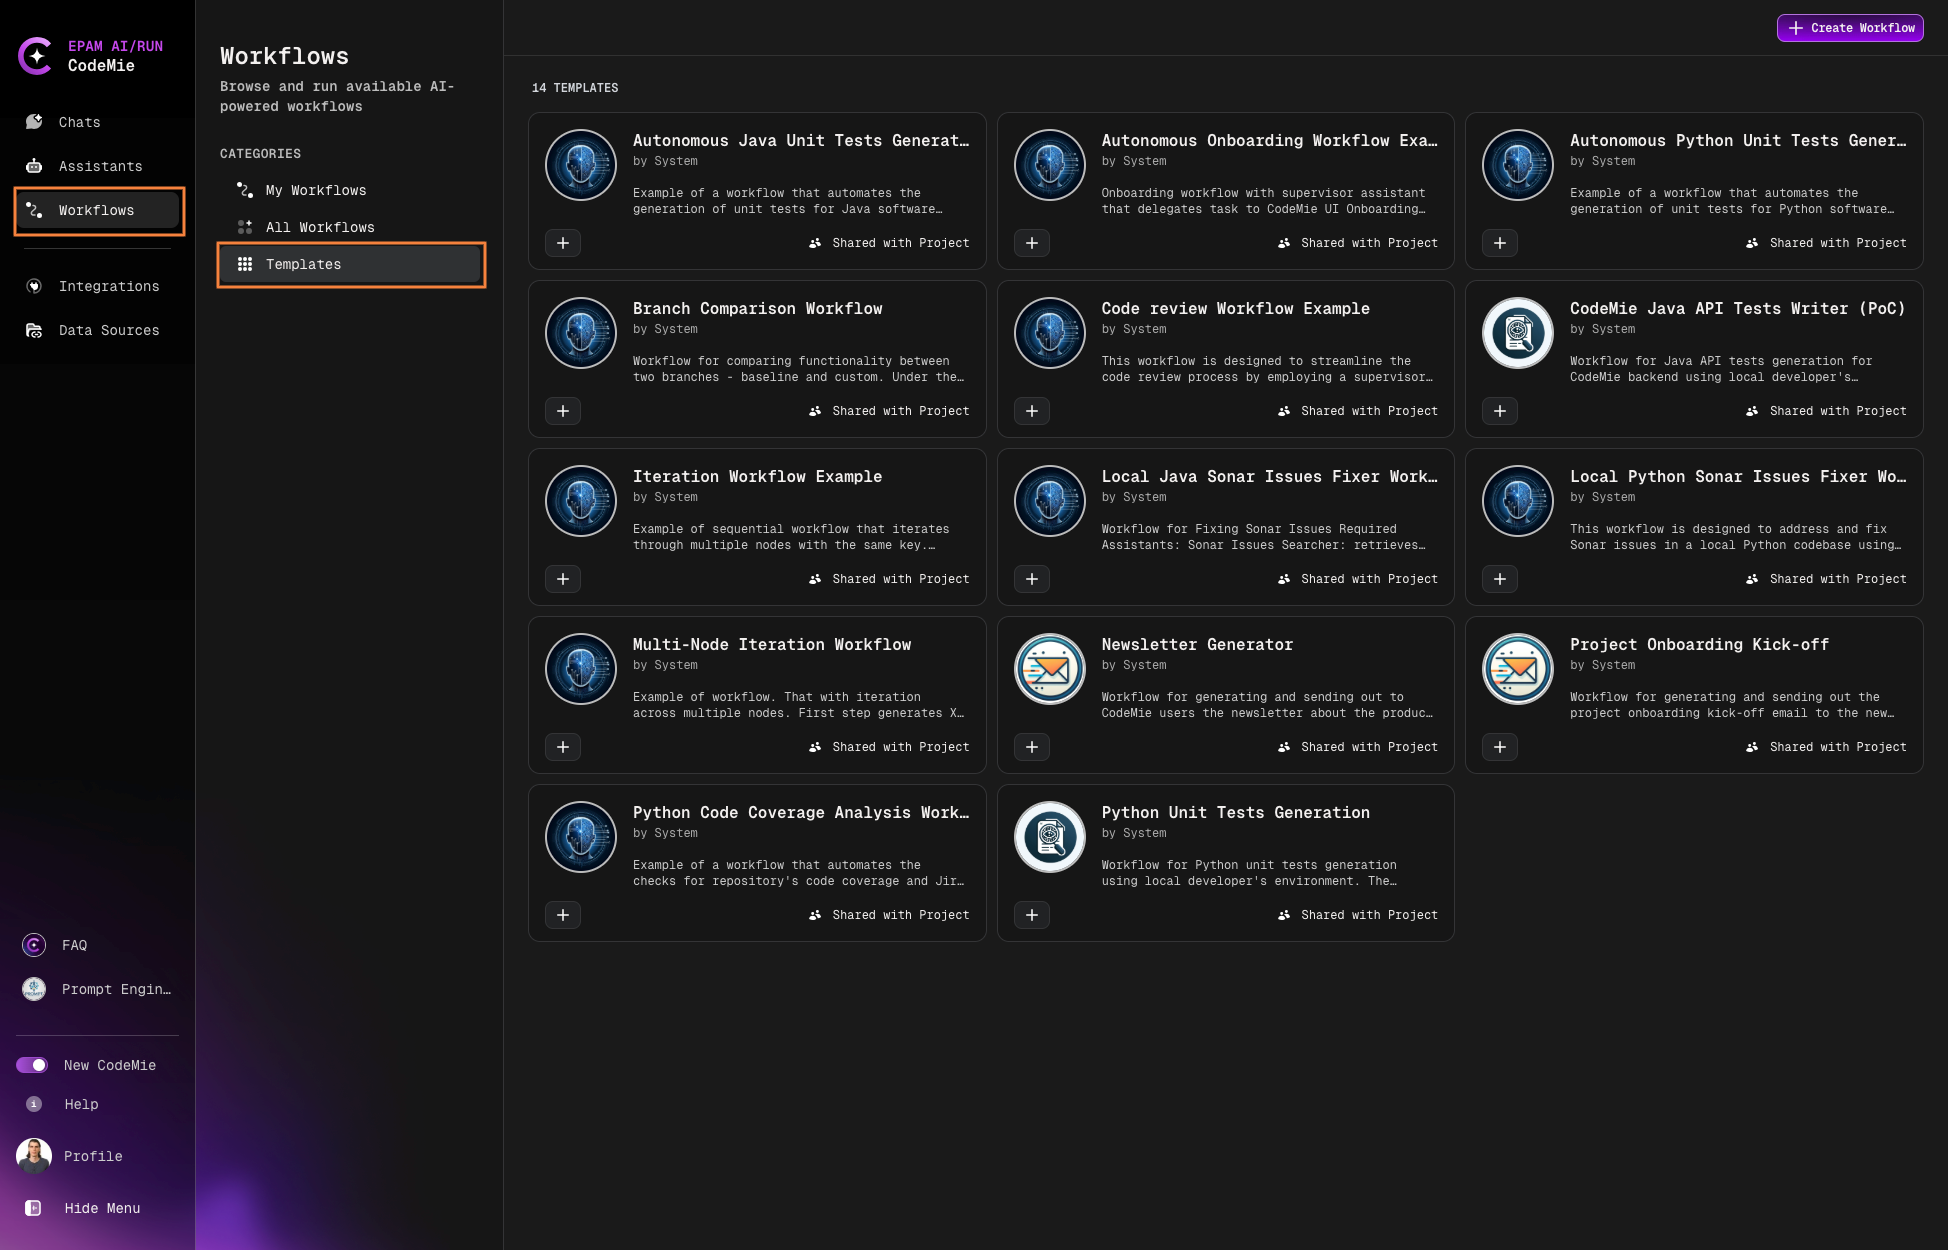
Navigate to the Workflows section in the main navigation.
-
Select the Templates tab:
-
Browse available templates and click on a template card to view its details and configuration.
-
Click the + button to create a workflow from the selected template.
-
If the template contains placeholder variables (see Using Placeholder Variables in Templates below), a Configure Template Variables dialog appears first, prompting for a value for each unique placeholder found in the template:
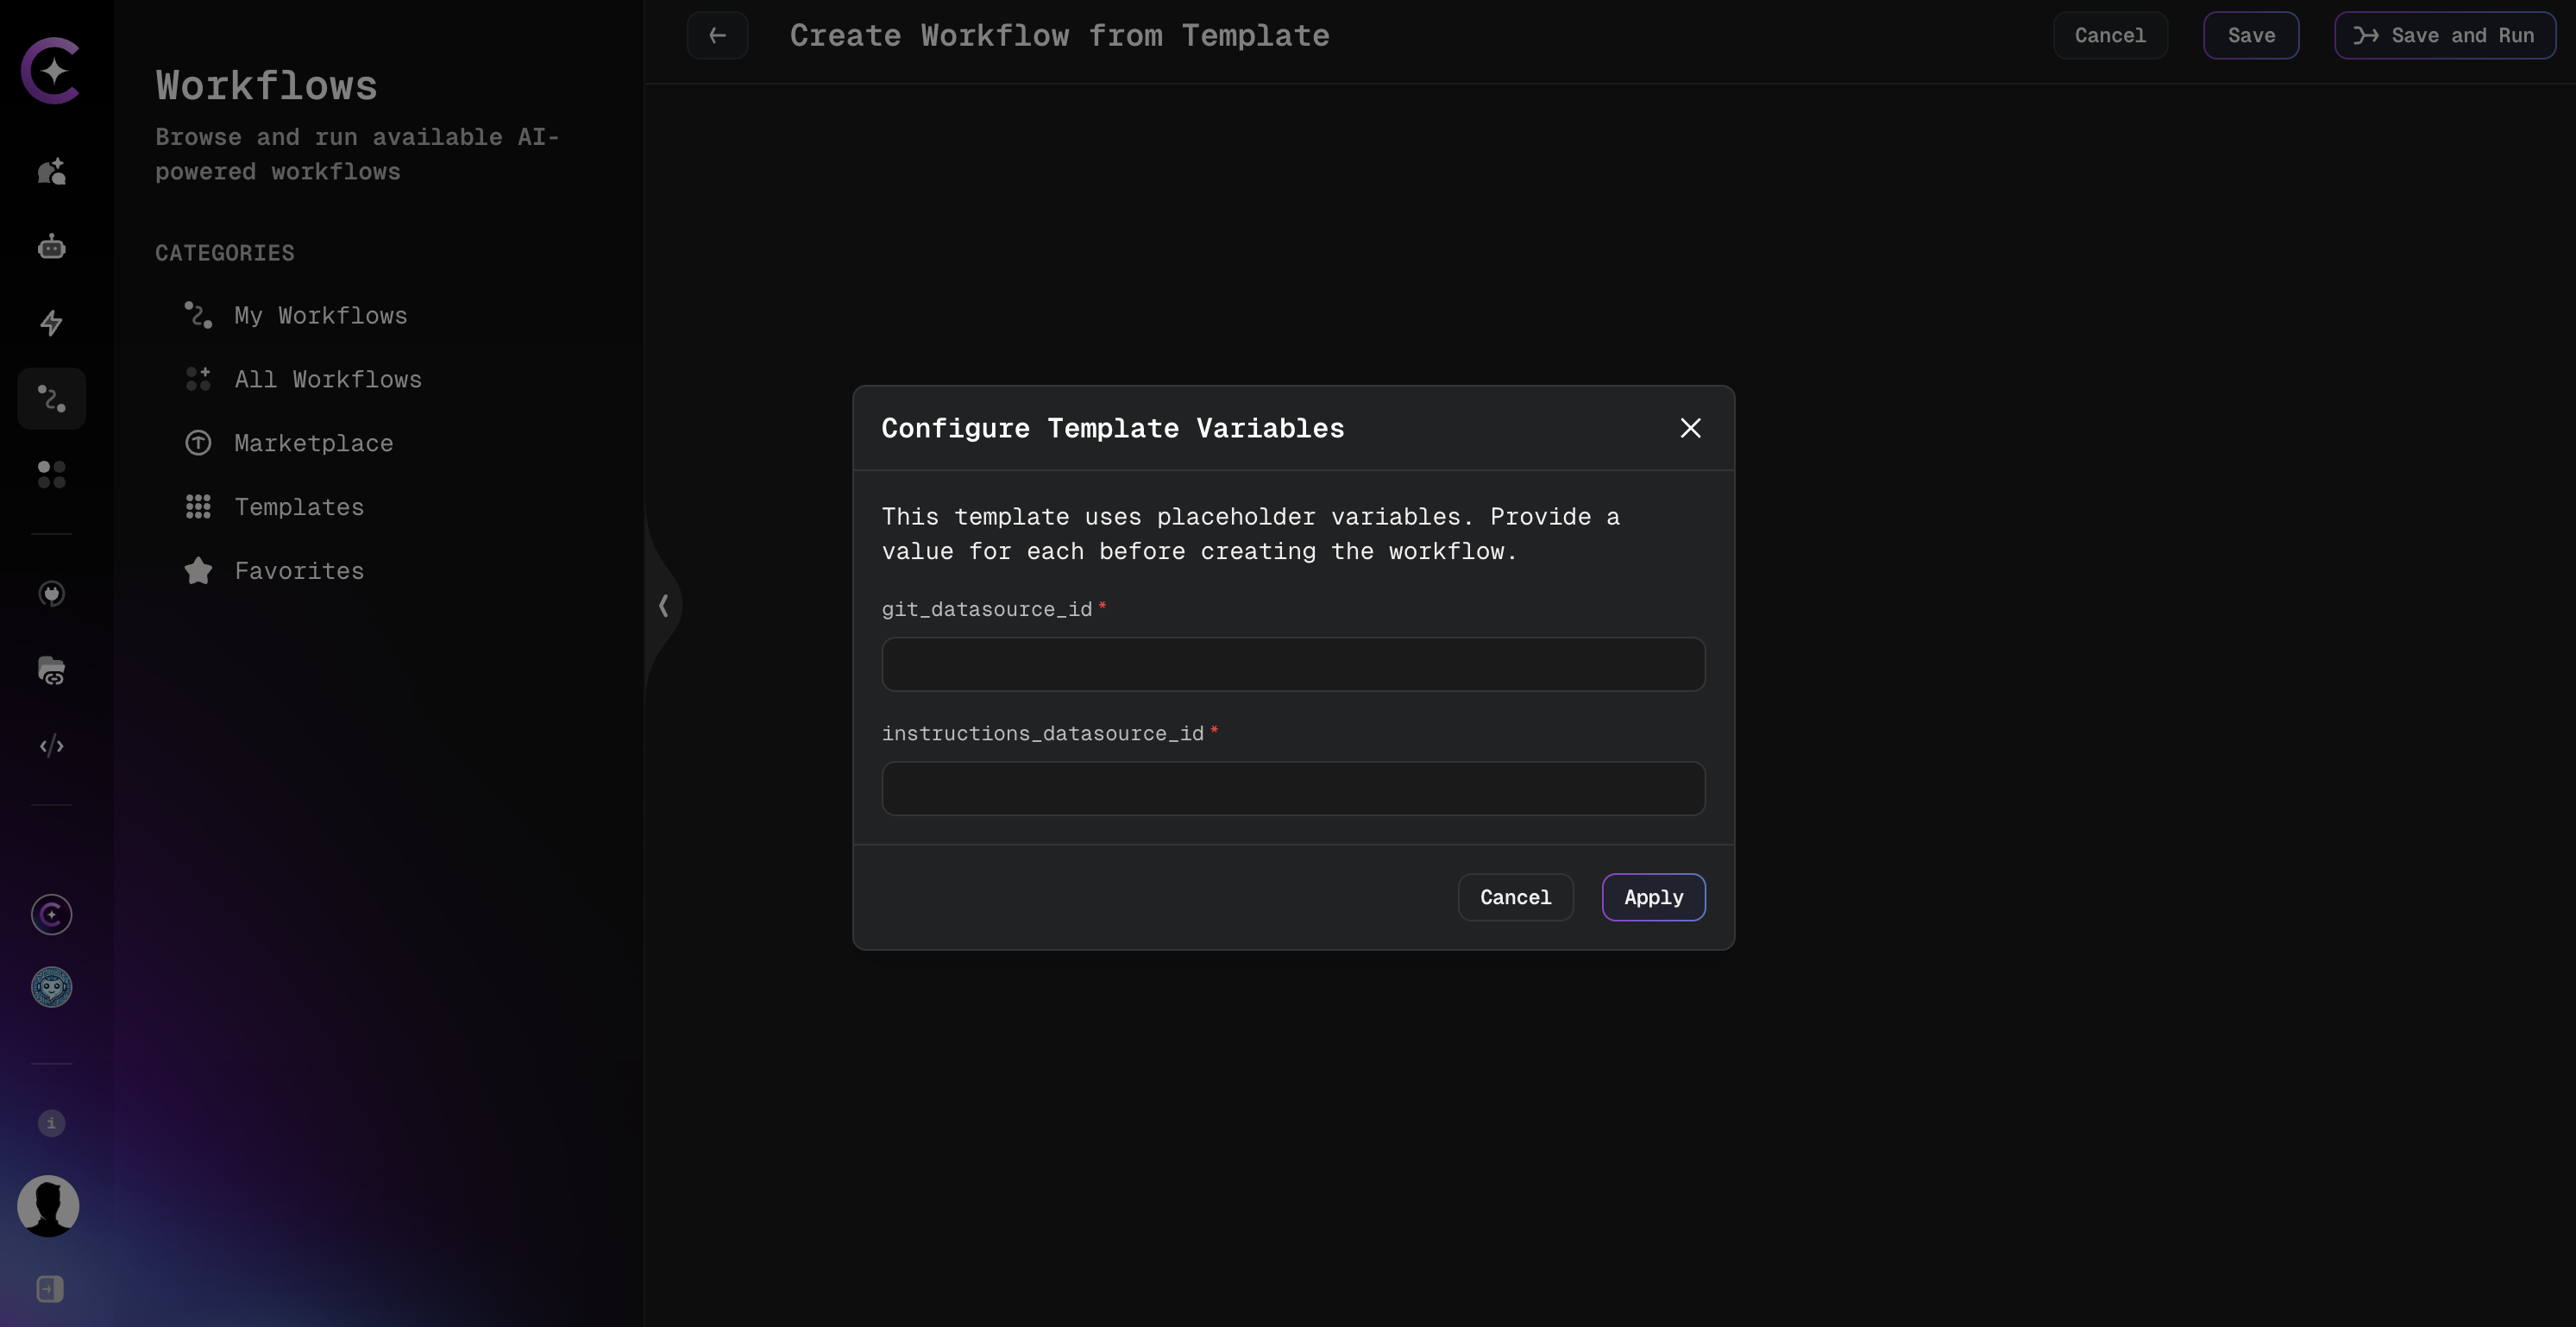
Provide a value for every field and click Apply. The template's YAML configuration, description, and start hint are filled in automatically with the provided values before the create form opens.
Clicking Cancel on this dialog exits the create-from-template flow and returns to the templates list, without opening a blank workflow form.
Templates without placeholder variables skip this dialog entirely, and the create form opens pre-filled from the template as before.
-
Configure the workflow settings:
Workflow Configuration
| Field | Description |
|---|---|
| Project name | Your AI/Run CodeMie project (pre-populated by default) |
| Shared with Project | Enable to allow teammates to view and use the workflow |
| Name | Unique name for the workflow |
| Description | Brief description of the workflow's features and purpose |
| Icon URL | URL to an icon image for the workflow avatar |
| Supervisor Prompt | Global context shared across all assistants; can include variables like date, time, etc. |
- Click Create to save your workflow.
Using Placeholder Variables in Templates
Some templates use placeholder variables to mark values that must be provided before the workflow can run — for example, a datasource ID or assistant ID that is specific to each project. Placeholders can appear anywhere in the template's YAML configuration: in assistant IDs, datasource IDs, transform node parameters, titles, and other fields.
A placeholder uses the syntax:
${input:variable_name}
For example, a template might reference a datasource this way:
datasource_ids: [ ${input:git_datasource_id} ]
If the same placeholder name appears multiple times in a template, it is treated as a single variable — a value is requested for it only once, and that value is substituted everywhere the placeholder appears.
When creating a workflow from a template that contains placeholders, the Configure Template Variables dialog lists every unique placeholder found in the template and requires a value for each before continuing. All values are substituted into the template's YAML configuration, description, and start hint before the workflow create form opens.
Placeholder variables (${input:variable_name}) are resolved once, when a workflow is created from a template. This is different from the {{variable_name}} syntax described in Workflow Configuration Introduction, which is resolved at workflow execution time.
Customizing Your Workflow Template
After creating a workflow from a template, you can customize it using the Visual Workflow Editor. The template provides a solid foundation, and you can modify it to match your specific needs.
Using the Visual Workflow Editor
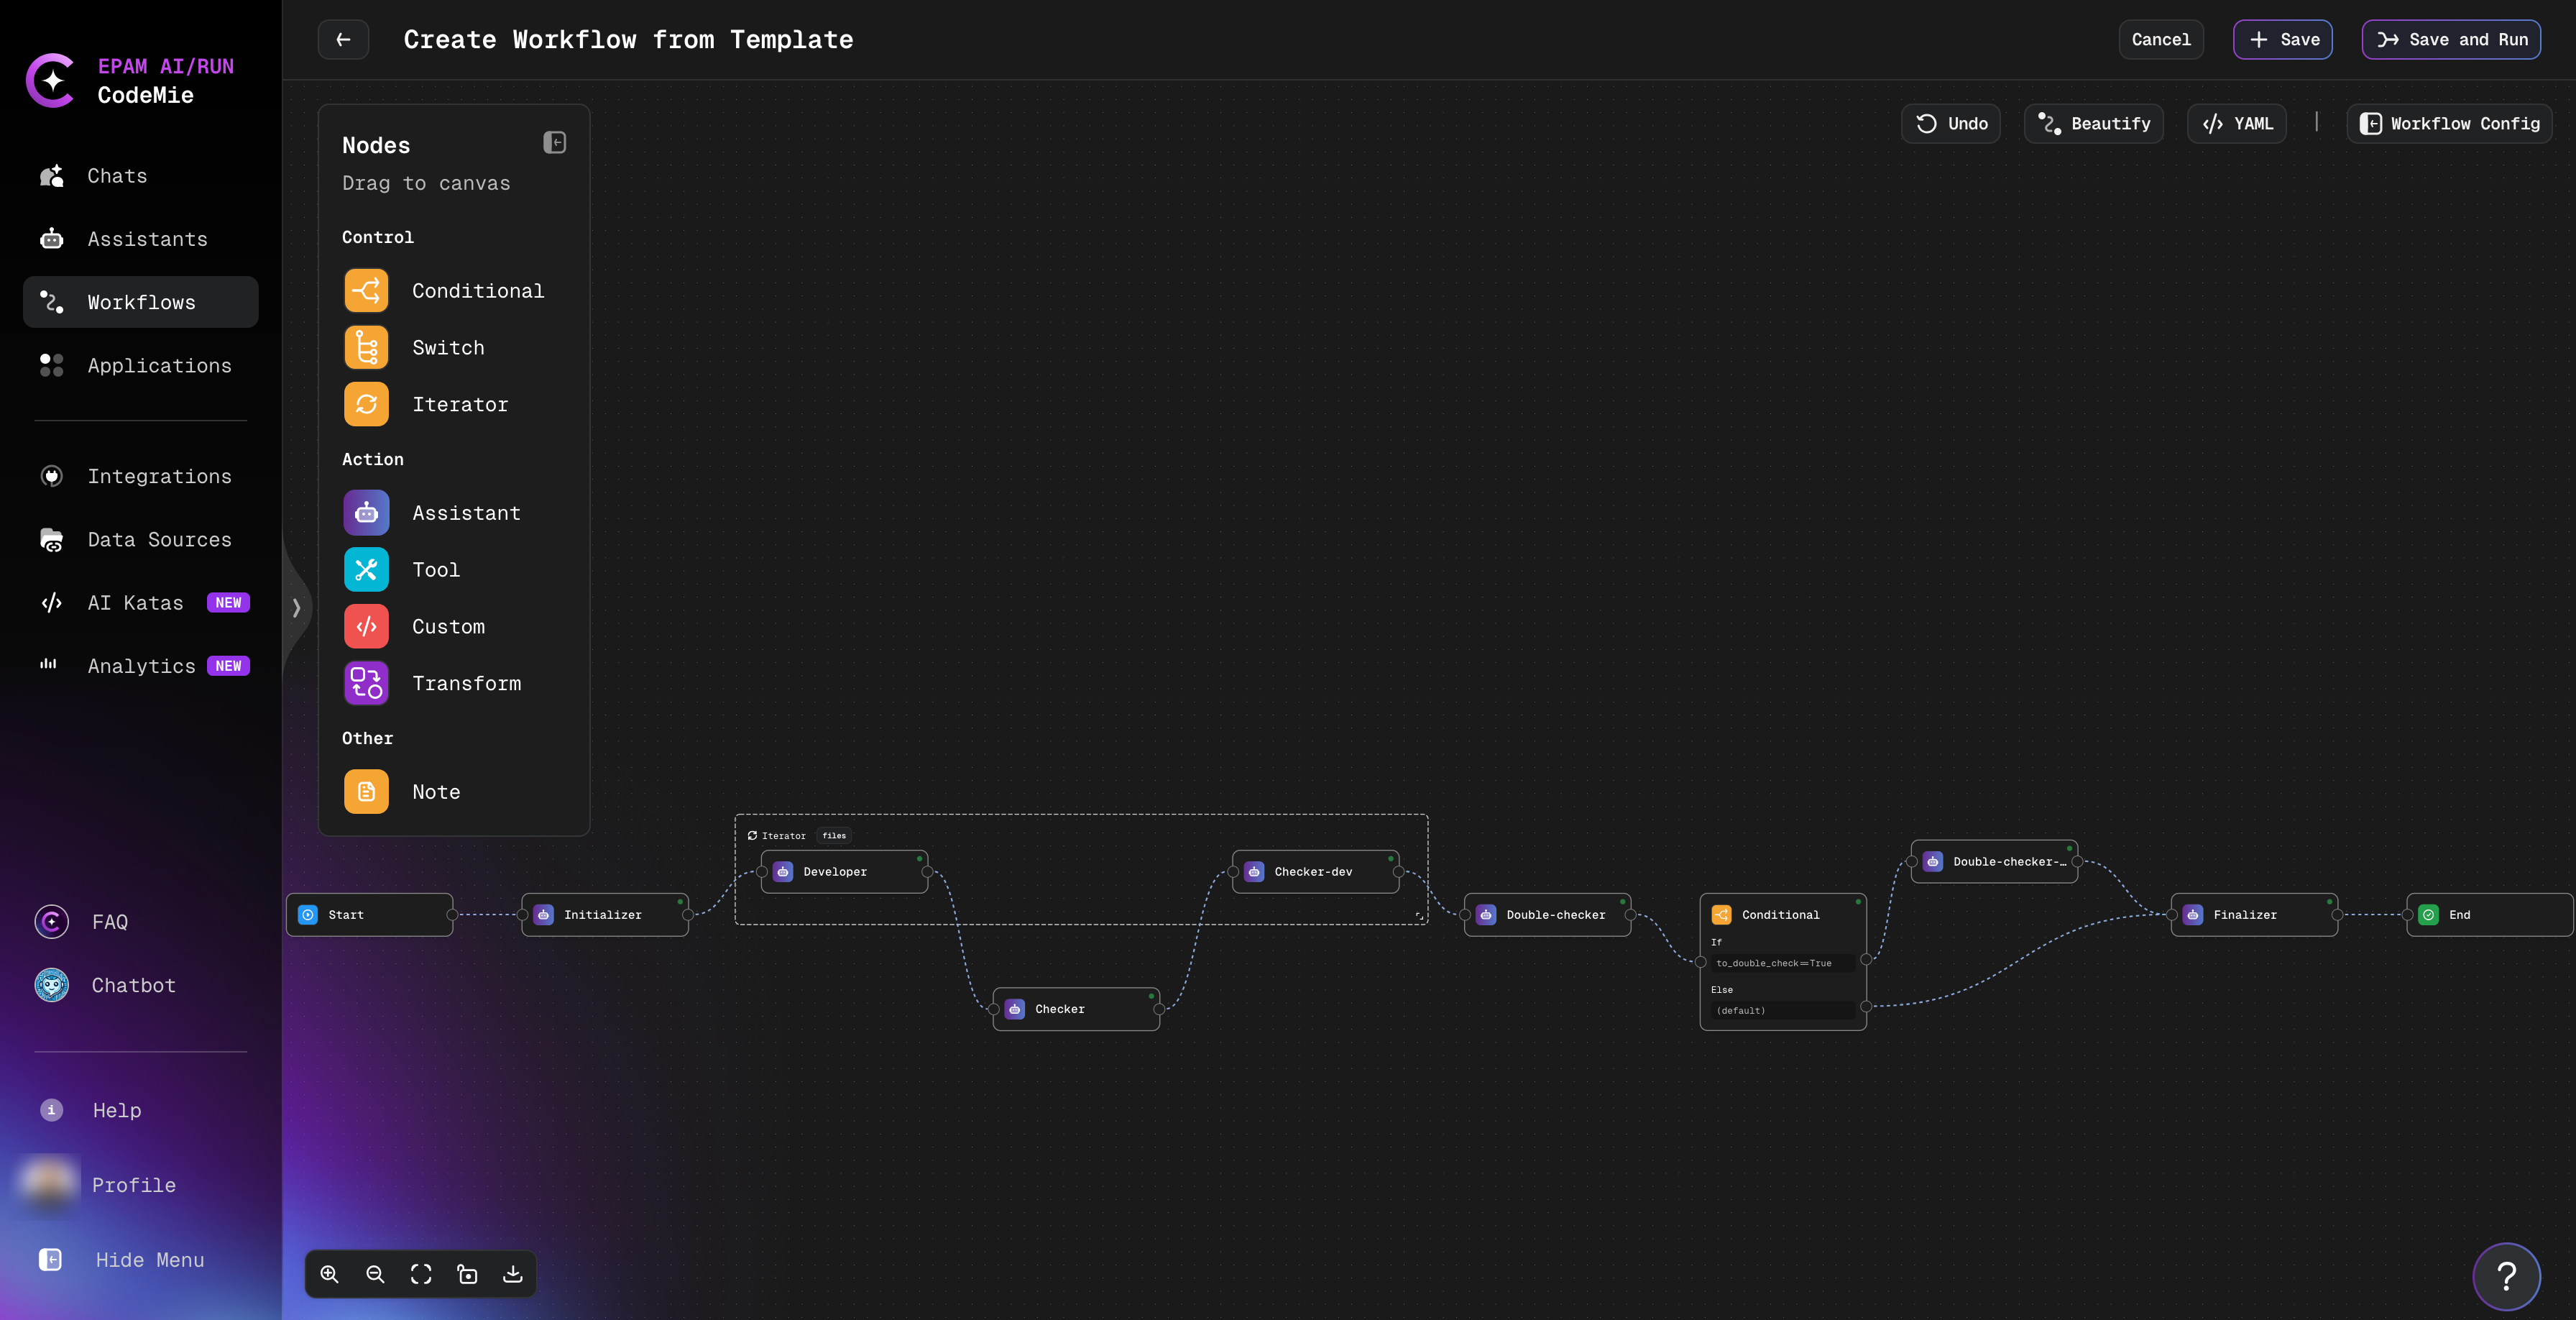
The Visual Workflow Editor provides an intuitive drag-and-drop interface for customizing your template. You can add, remove, and configure workflow states visually without writing YAML code.
For detailed information about the Visual Workflow Editor interface and features, see the Create Workflow guide.
Editing the Template
To customize the template workflow:
-
Add Nodes: Drag nodes from the left palette to the canvas
-
Remove Nodes: Select a node and delete it
-
Edit Nodes: Click any node to configure its properties:
- Assistant selection
- Task prompt
- Output schema
- Integration settings
-
Connect Nodes: Drag from one node's output to another node's input
-
Rearrange Layout: Drag nodes to reposition, or click Beautify for auto-layout
-
Add Branching: Use Conditional or Switch nodes for decision logic
-
Configure Loops: Use Iterator nodes to process collections
Switching Between Editor Modes
You can switch between Visual Editor and YAML editing by clicking Yaml button in the top right corner
Start with the Visual Editor for initial design, then switch to YAML only if you need fine-grained control over advanced features like Jinja templating or complex conditional logic.
Saving Your Changes
After customizing the template:
- Click Save to preserve your changes
- Or click Save and Run to immediately test the workflow
- Use Cancel to discard changes and return to the previous version
Ensure that assistants have the necessary permissions for their tasks. For example, if a workflow includes a Jira integration, the assistant must have access permissions to your Jira instance.