Scheduler
Overview
The Scheduler feature allows you to automatically trigger CodeMie workflows, assistants, and data source reindexing at specified times using cron expressions. The scheduler is available to all users and can be configured in two ways:
- Data Source Scheduler - Built directly into the data source creation interface for automatic reindexing
- Integration-based Scheduler - Created via Integrations tab for workflows, assistants, and data sources
Scheduled runs require the Trigger Engine to be enabled on the CodeMie API (TRIGGER_ENGINE_ENABLED=true). Contact your administrator if scheduled runs do not start. See Trigger Engine configuration.
Data Source Scheduler
The scheduler is now integrated directly into the data source creation and update interface, making it easy to set up automatic reindexing schedules.
Setting Up Data Source Scheduler
When creating or updating a data source (except Provider and File data sources), you'll see a Reindex Type section with a Scheduler dropdown:
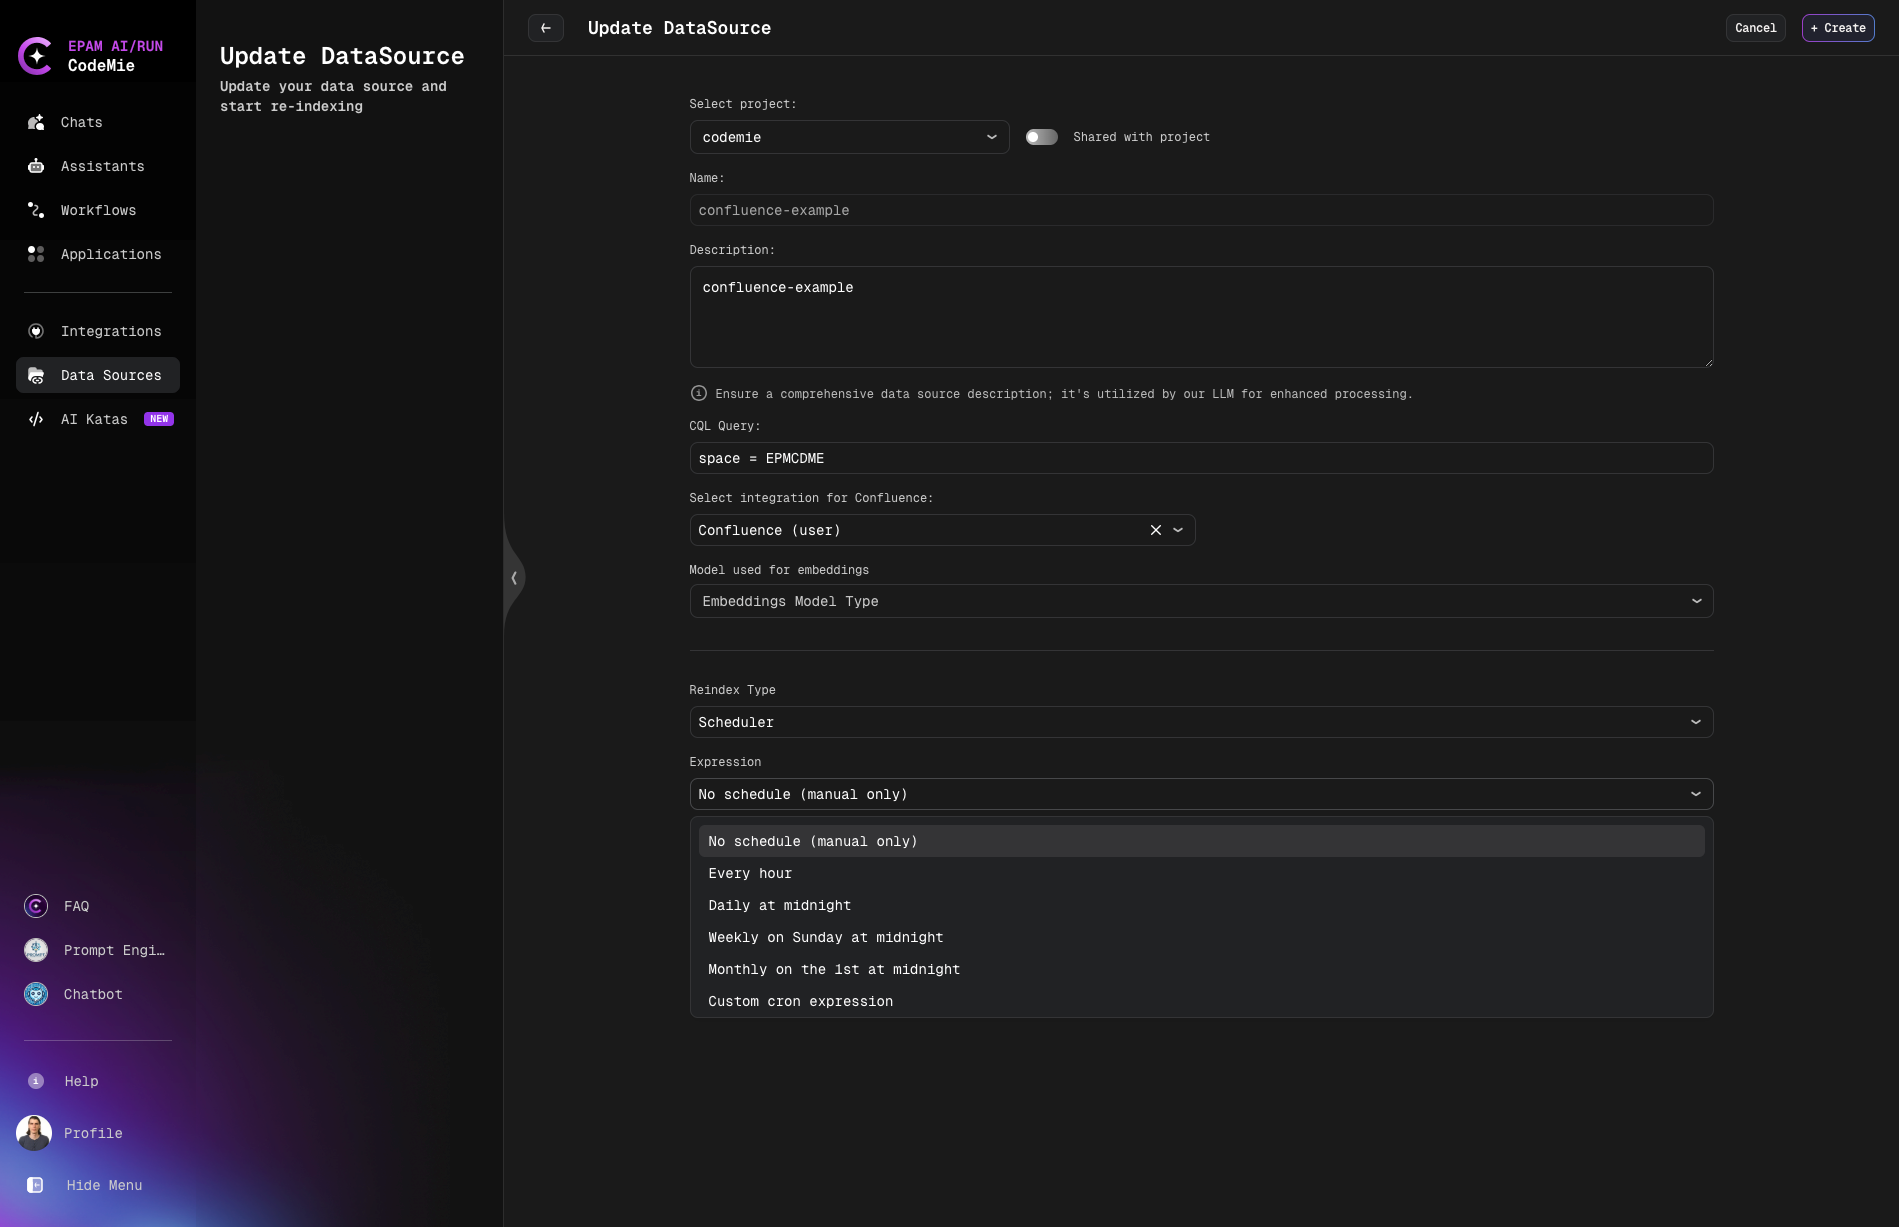
Available Schedule Options
- No schedule (manual only) - Default option, reindexing must be triggered manually
- Every hour - Reindex automatically every hour
- Daily at midnight - Reindex once per day at midnight
- Weekly on Sunday at midnight - Reindex once per week on Sunday
- Monthly on the 1st at midnight - Reindex once per month on the first day
- Custom cron expression - Enter your own cron expression (e.g.,
0 9 * * MON-FRIfor weekdays at 9 AM)
Data Sources with Scheduler Support
The built-in automatic reindexing scheduler availability by data source type:
| Data Source Type | Automatic Scheduler |
|---|---|
| Git Repositories | ✅ Available |
| Confluence | ✅ Available |
| Jira | ✅ Available |
| Google Docs | ✅ Available |
| AWS Knowledge Bases | ✅ Available |
| X-ray | ✅ Available |
| File | ❌ Not available |
| Provider | ❌ Not available |
Example Configuration
When creating a Confluence data source with automatic daily reindexing:
- Fill in all required fields (name, description, CQL query, etc.)
- Select integration for Confluence
- In the Reindex Type section:
- Set Scheduler to Daily at midnight
- Click + Create
The data source will now automatically reindex every day at midnight, ensuring your assistants always have access to the latest content.
Integration-based Scheduler
For more advanced use cases, you can create Scheduler integrations that trigger workflows, assistants, or data sources with custom prompts.
Setting Up CRON Integration
1. Navigate to Integrations
- Go to Integrations → Project Integrations
- Click + New Integration
2. Configure Integration Settings
- Project: Select your target project
- Is Enabled: Status of integration on/off
- Credential Type: Select Scheduler
- Alias: Provide a descriptive name for your integration
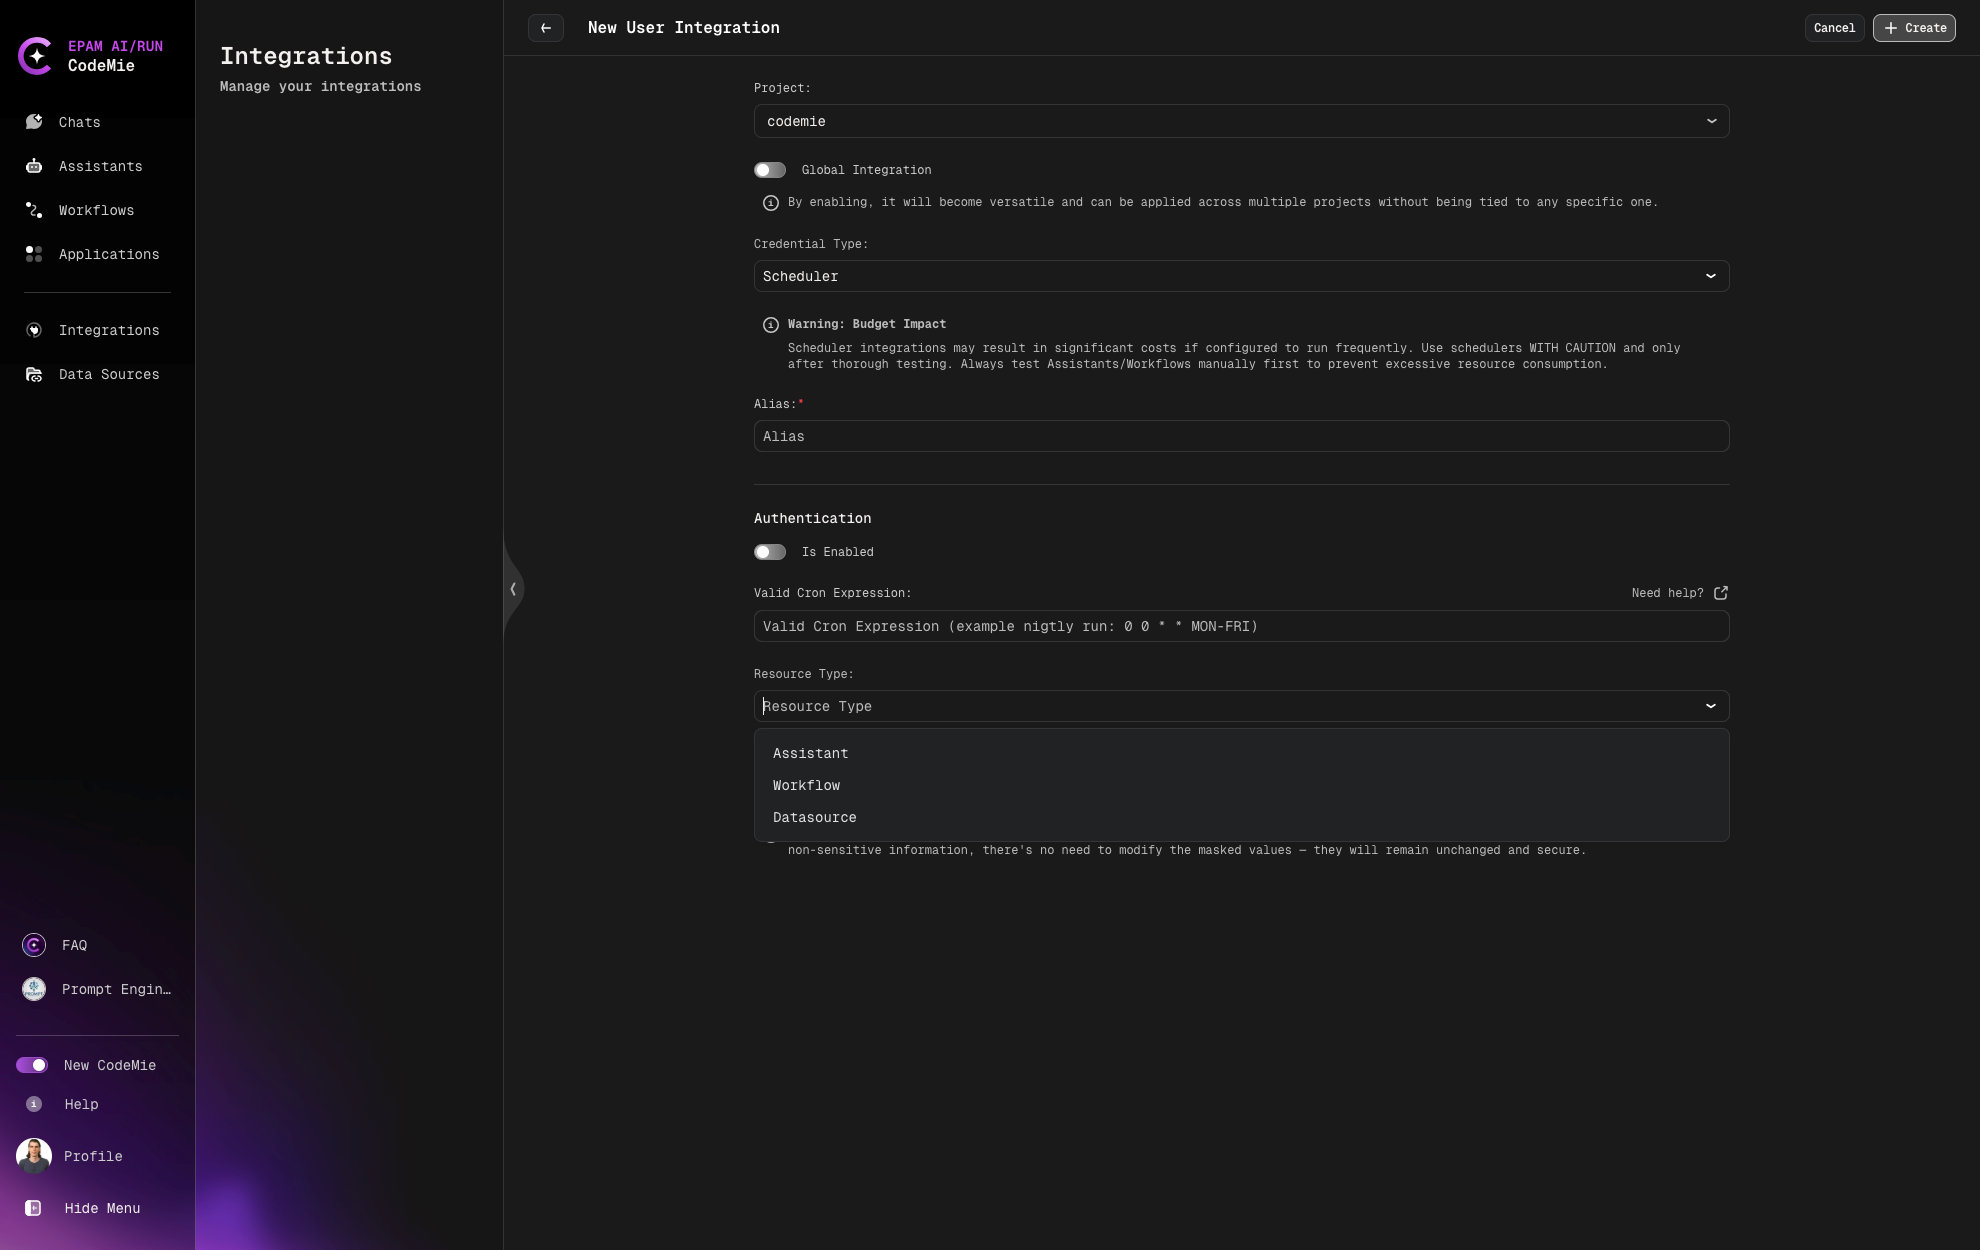
The enabled/disabled state of each scheduler integration is visible directly in the Integrations list — no need to open individual records to check whether a scheduler is active. See Scheduler State in the Integrations List for details.
3. Set Up Authentication & Scheduling
- Valid Cron Expression: Enter your cron schedule (e.g.,
0 0 * * MON-FRIfor daily at midnight, weekdays only) - Use the "Need help?" link for cron expression guidance
- Timezone: Select the timezone in which the cron expression is interpreted (e.g.,
Europe/Warsaw,UTC). A default timezone is preselected and can be changed before saving.
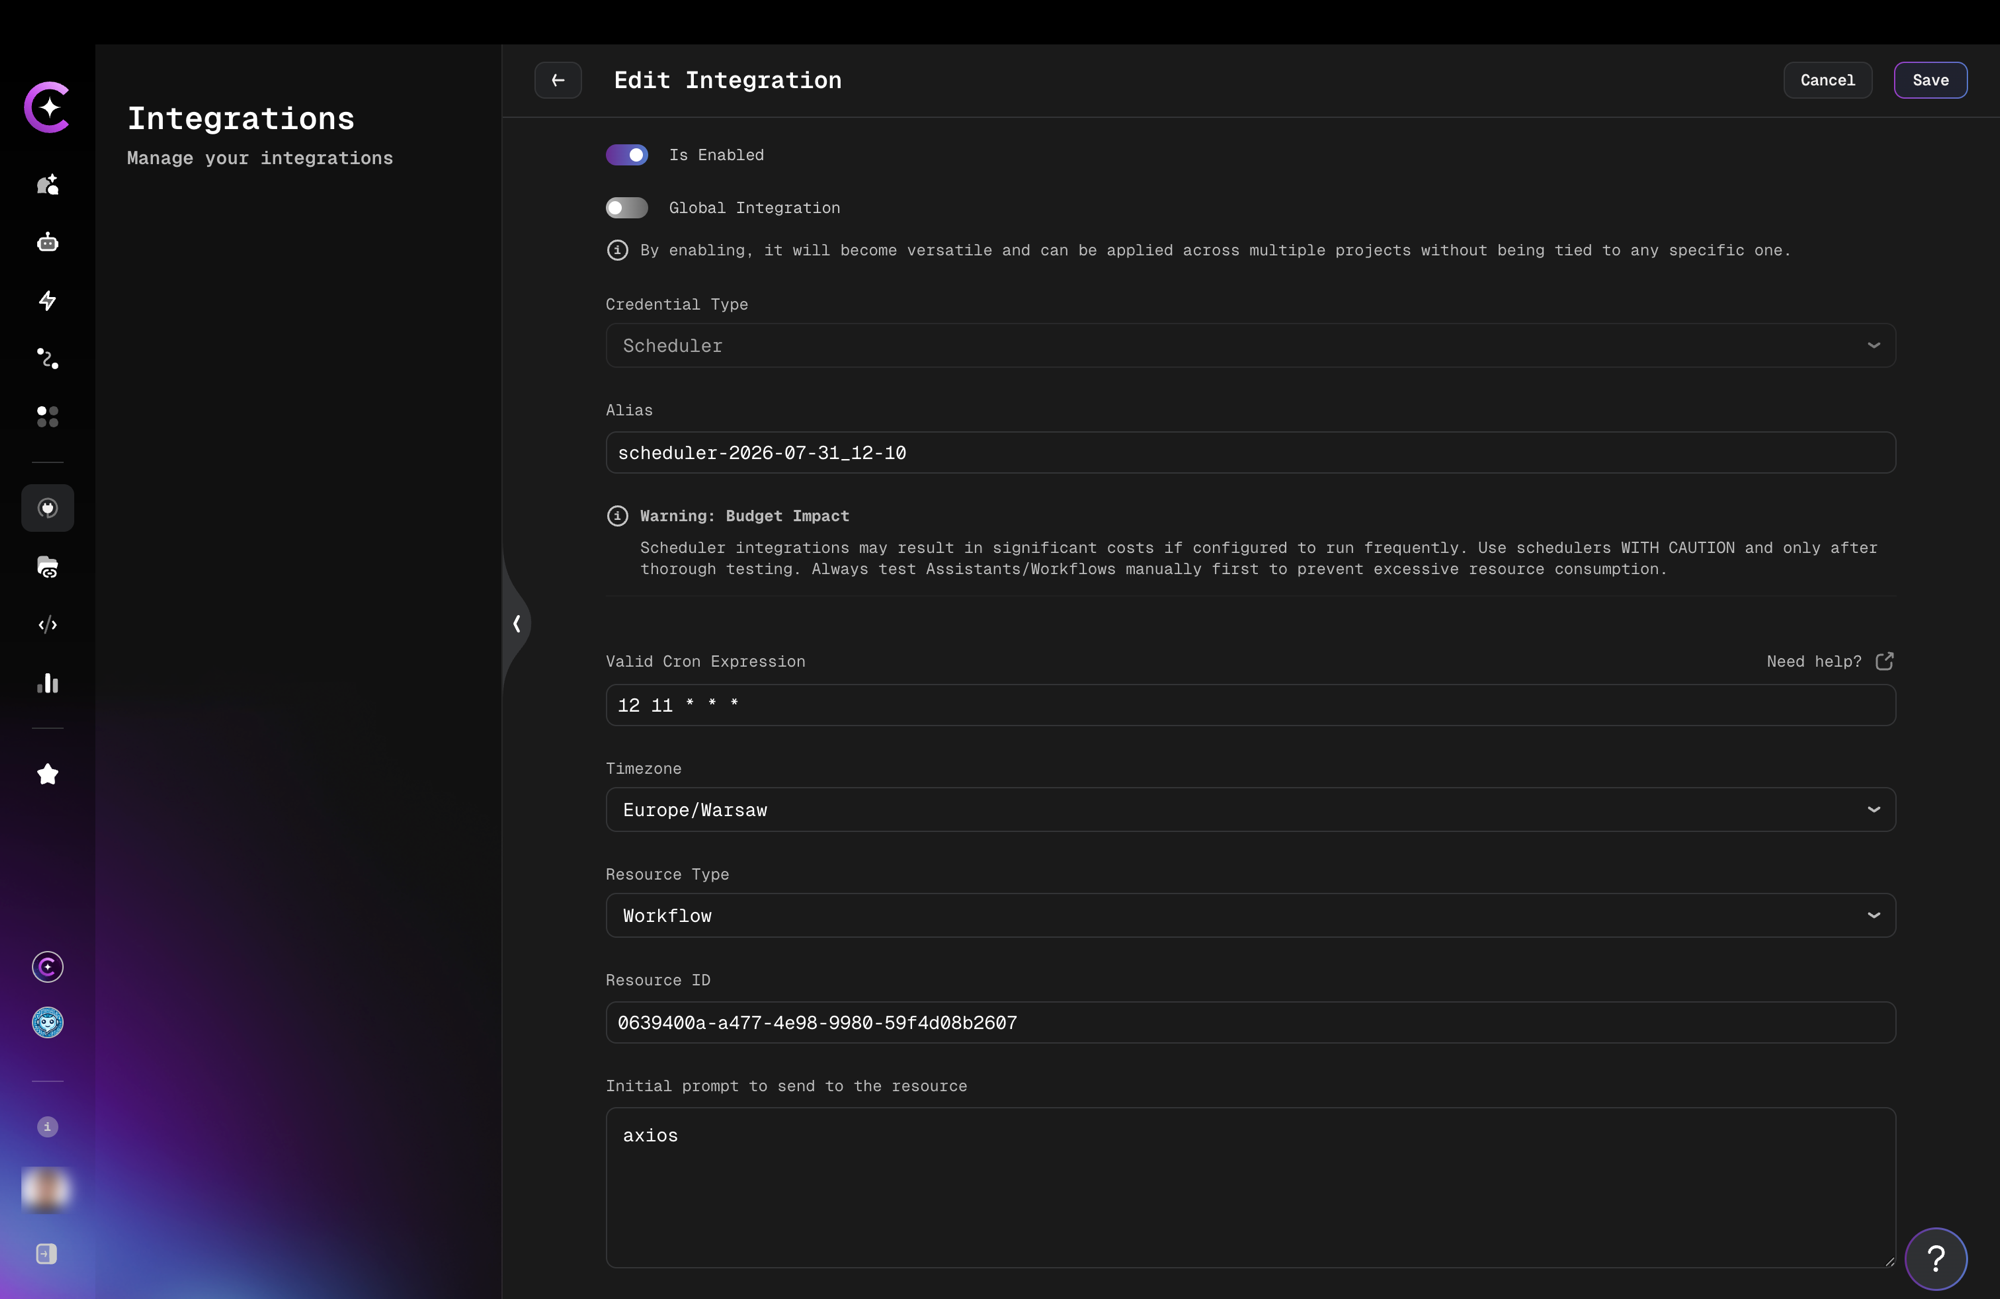
The cron schedule is evaluated in the selected timezone. For example, 12 11 * * * with Europe/Warsaw fires at 11:12 Warsaw local time each day. If you change the timezone after the integration is created, the schedule shifts accordingly.
4. Configure Resource Settings
- Resource Type: Select Workflow (can also be Assistant or Datasources)
- Resource ID: Enter the ID of your workflow
5. Add Starting Prompt (Optional)
- In the integration setup, you can specify a starting prompt
- This prompt will be used as the initial input when the CRON triggers the workflow
- Example: "Analyze today's pull requests and generate a summary report"
How Starting Prompts Work
- When the CRON schedule triggers, the workflow or assistant begins with your specified starting prompt
- The prompt provides context and initial instructions to the workflow
- If no starting prompt is provided, the workflow will start with its default configuration
- Starting prompts enhance automation accuracy and provide better task context
Cron Expression Examples
Both the Data Source Scheduler (Custom cron expression option) and Integration-based Scheduler support standard cron syntax:
# Every day at 9:00 AM
0 9 * * *

# Every weekday at 6:00 PM
0 18 * * MON-FRI

# Every hour during business hours (9-5, weekdays)
0 9-17 * * MON-FRI

# Every 15 minutes
*/15 * * * *
Use the "Need help?" link in the scheduler interface for cron expression guidance and validation.