Git AzureDevops
CodeMie supports two authentication methods for Azure DevOps Git repositories depending on your deployment type:
| Method | When to use |
|---|---|
| URL-based (default) | Azure DevOps Services (cloud, dev.azure.com) |
| Header-based | Azure DevOps Server (on-premises) |
To integrate the Azure DevOps Git tool in CodeMie, follow the steps below.
1. Generate Access Token for Azure DevOps GIT
1.1 Navigate to Personal Access Tokens
Log in to your Azure DevOps account:
- Cloud:
https://dev.azure.com/{your-organization} - On-premises:
https://{server}/{collection}
Then:
- Click on your settings icon in the top-right corner
- Click Personal Access Tokens
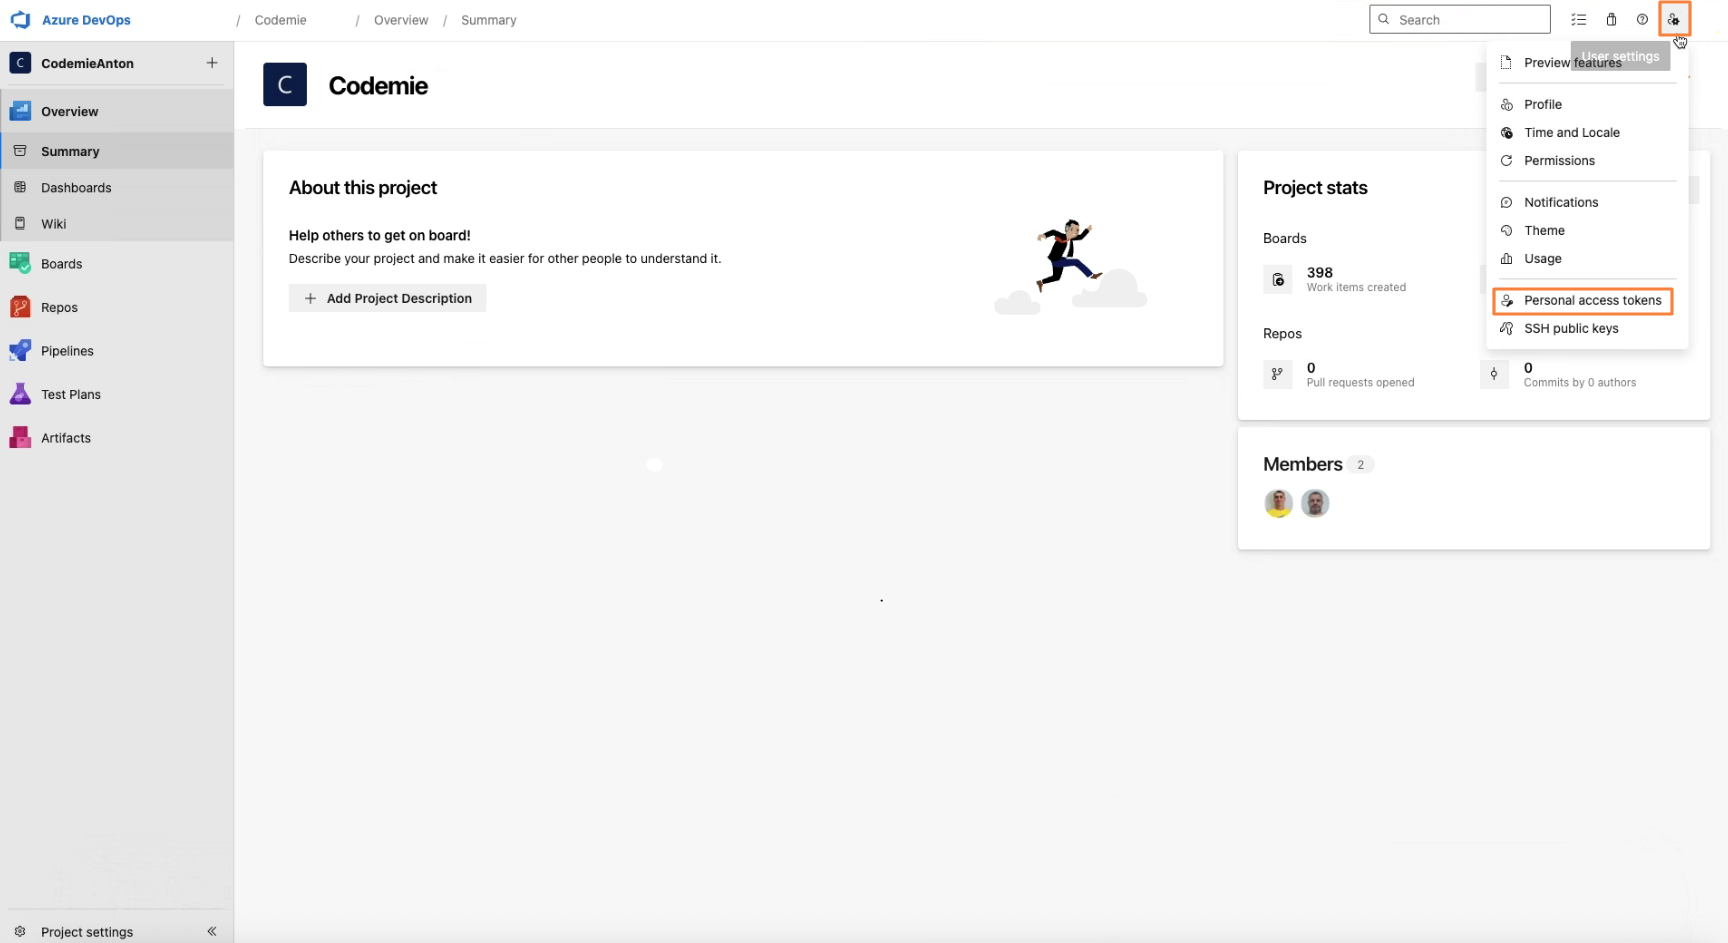
- In the right sidebar, navigate to Security → Personal Access Tokens
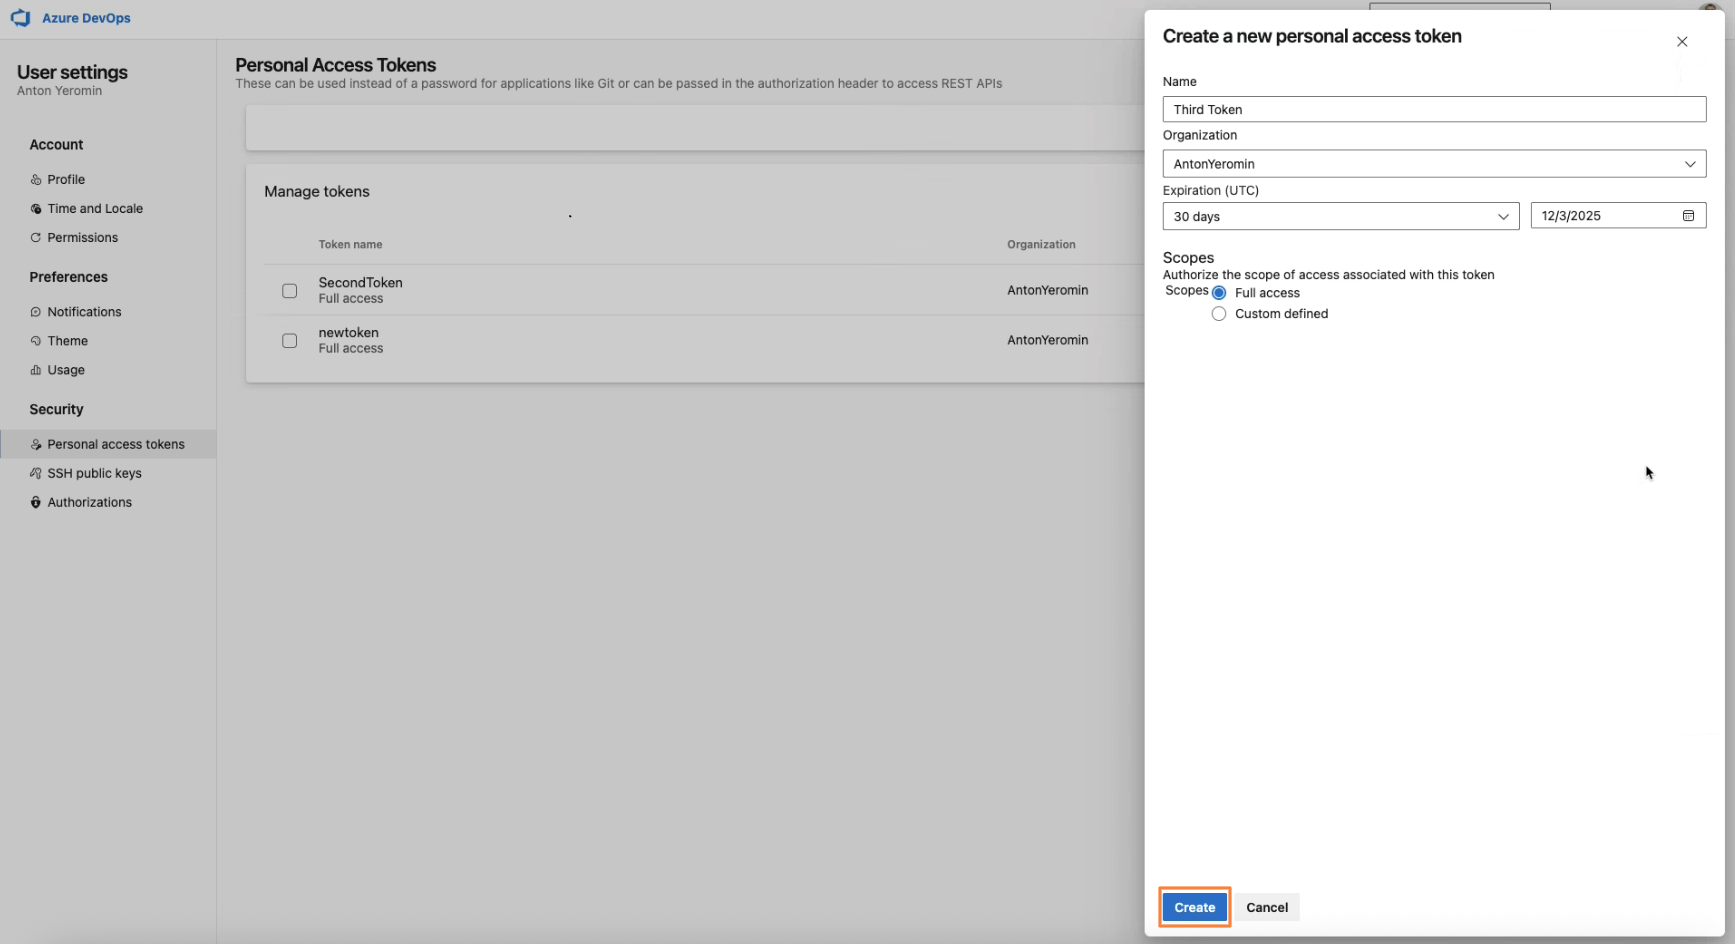
1.2 Create New Token
Click the + New Token button. Fill in the token creation form:
- Name: Enter a descriptive name (e.g., "CodeMie Integration Token")
- Organization: Select your organization from the dropdown
- Expiration (UTC): Set expiration date
- Scopes: Select Code (Read & Write) for Git repository access
- Click the Create button
- IMPORTANT: Immediately copy the generated token from the success dialog
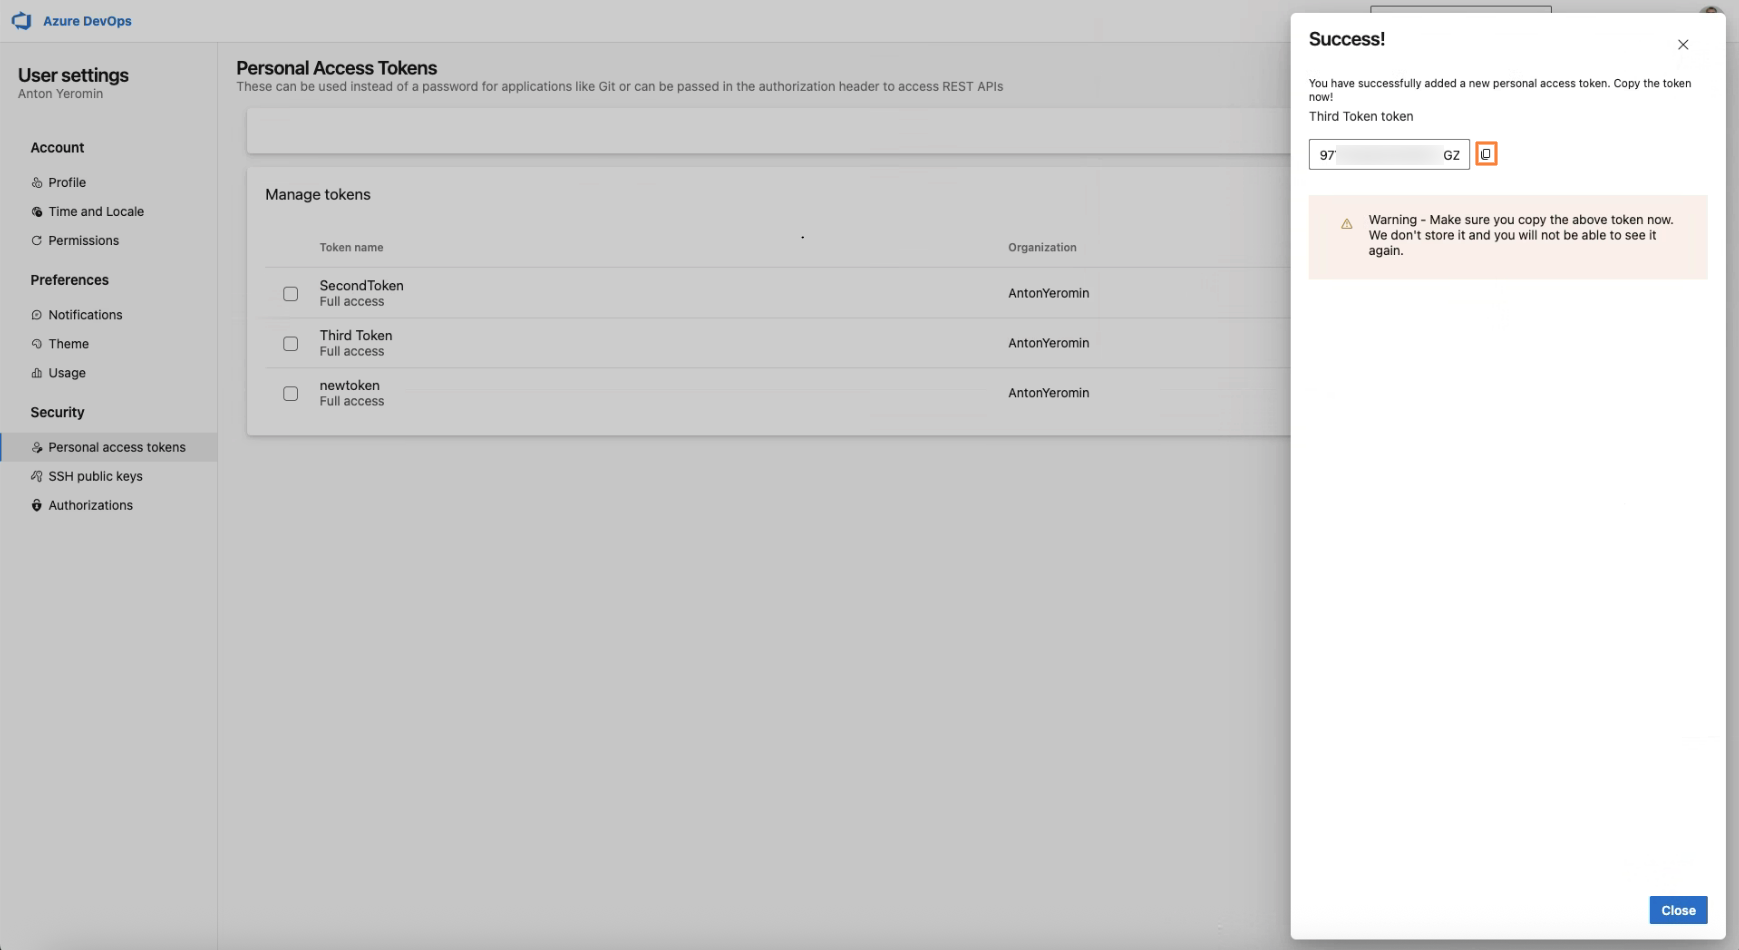
- Store the token securely — it will not be displayed again
For full details on PAT creation and management, see the official Microsoft documentation.
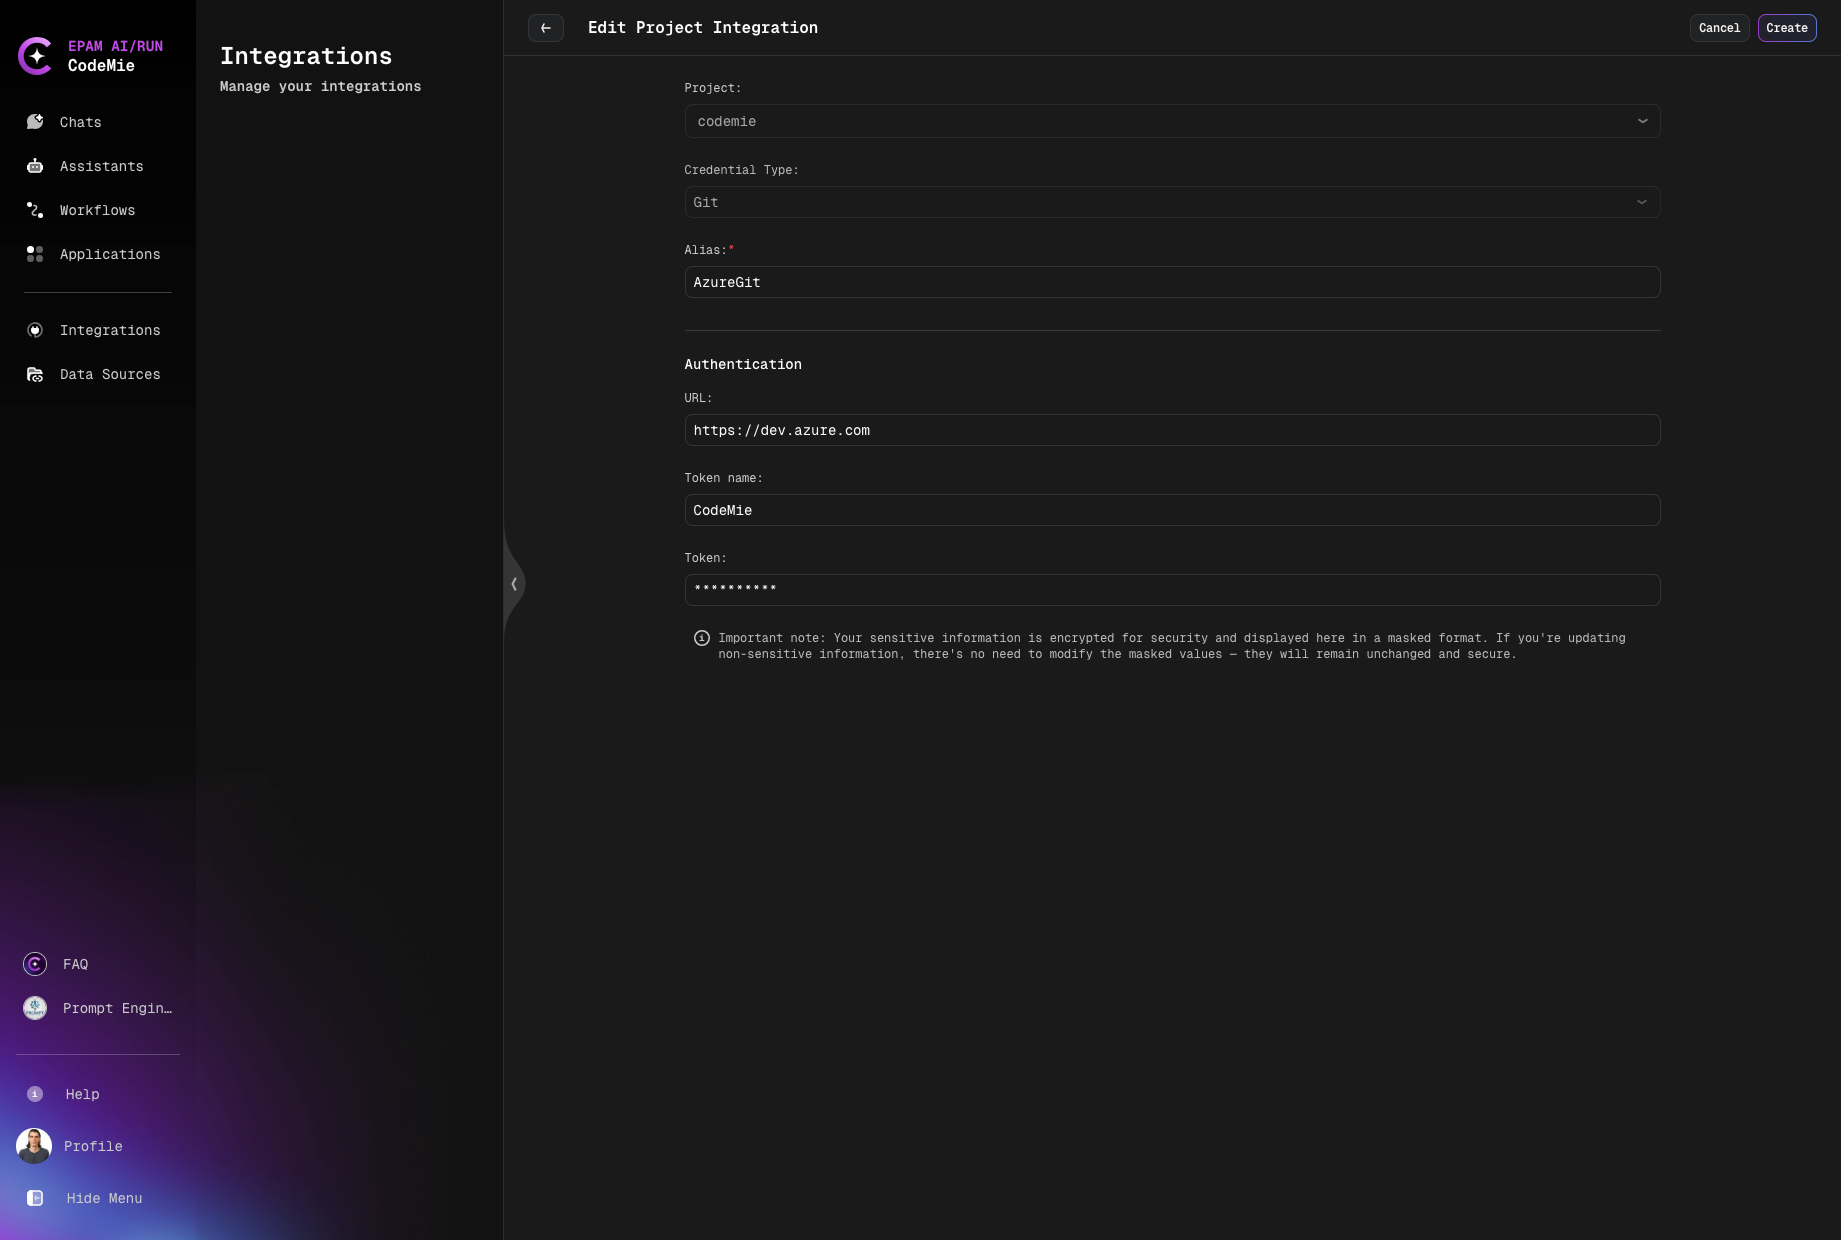
2. Configure Integration in CodeMie
- In the CodeMie main menu, click the Integrations button.
- Select Integration Type: User or Project and click + Create.
- Select the Project Name.
- Select the Credential Type: Git.
- Fill in the Alias field — a label to identify this integration.
- Select Personal Access Token as the Authentication Type.
Option A: Azure DevOps Services (cloud)
Use this option if your repositories are hosted on dev.azure.com.
- Fill in the URL field:
https://dev.azure.com - Fill in the Token name field (e.g.,
oauth2). - Fill in the Token field with the token created at step 1.
- Click + Create.
Option B: Azure DevOps Server (on-premises)
Use this option if your repositories are hosted on your own infrastructure (Azure DevOps Server, formerly TFS). On-premises installations typically reject URL-embedded credentials and require the token to be sent via an HTTP Authorization header instead.
- Fill in the URL field with your server address:
https://{server}/{collection}
When Authentication Type is set to Personal Access Token, an Extra Header info block appears in the form:
Most repositories use URL-based authentication, but some on-premise git servers (e.g., Azure DevOps Server) require header-based authentication.
- Enable the Use Header-Based Authentication toggle.
- Fill in the Token field with the token created at step 1.
When Use Header-Based Authentication is enabled, the Token Name field is not used — you may leave it blank, it will be ignored.
- Click + Create.

When Use Header-Based Authentication is enabled, CodeMie encodes your token using
Base64 and sends it via the Authorization: Basic HTTP header during the git clone
operation. The token is never embedded in the repository URL.
3. Create Assistant
- Click Explore Assistant, select Templates and choose for example [Template] Coder.
- Select your Project and type Name and Datasource Context.
- In the Available tools section, select Git integration and choose your credentials from the dropdown list.
- Click Create.
4. Use Your Assistant
Click Explore Assistant, select My Assistant and choose by Name your assistant.
Tokens have an expiration date.