Creating a Scheduler
Schedulers can be created directly from the Schedulers page using the + Create button in the top-right corner.
User and Project Schedulers
The Scheduler Type switch distinguishes two kinds of schedulers:
- User schedulers — owned by and visible only to the creating user; available to all users.
- Project schedulers — shared across the project; available to project administrators and platform administrators only.
The + Create button behavior depends on the current user's role:
- Regular users — clicking + Create opens the creation form immediately, set to User scheduler type.
- Administrators — clicking + Create opens a dropdown offering Create User Scheduler or Create Project Scheduler.
Scheduler Creation Form
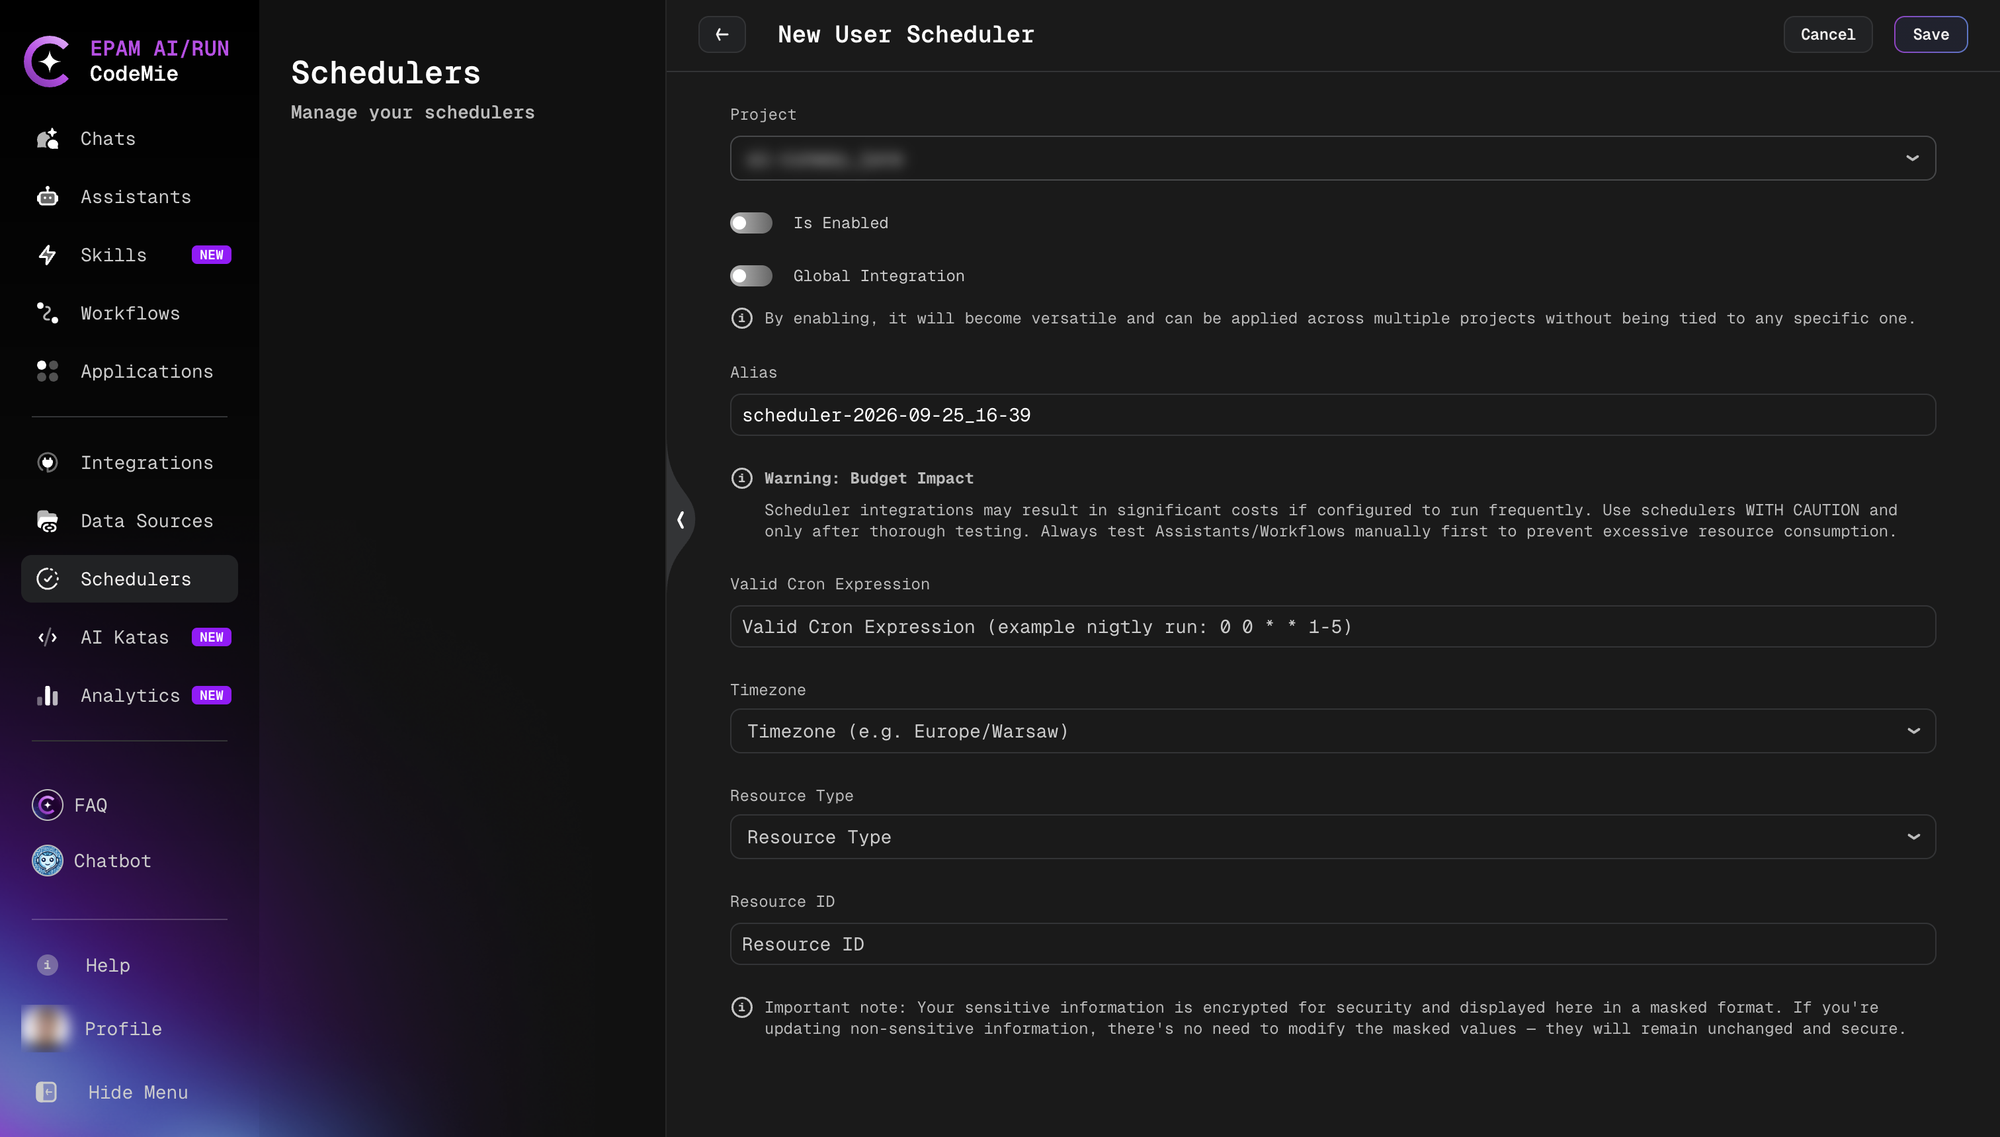
The form contains the following fields:
Project
Select the project under which the scheduler will operate. The dropdown lists all projects accessible to the user.
Is Enabled
Toggle to control whether the scheduler begins running immediately after saving. Disabled schedulers are saved but do not fire until explicitly enabled.
Global Integration
When enabled, the scheduler is not tied to a specific project and can be applied across multiple projects. Leave this off for project-specific automation.
Alias
A human-readable name for the scheduler. An alias is auto-generated in the format scheduler-YYYY-MM-DD_HH-MM but can be replaced with a custom name.
Valid Cron Expression
The schedule defined using standard cron syntax. The field accepts five-field cron expressions.
Common examples:
# Every hour
0 * * * *

# Every day at midnight
0 0 * * *

# Every weekday at 9:00 AM
0 9 * * MON-FRI

# Every 15 minutes
*/15 * * * *

# Nightly run (weekdays only)
0 0 * * 1-5
Schedulers must run no more frequently than once per hour. Expressions that exceed this frequency are rejected at save time.
Schedulers may incur significant costs if configured to run frequently. Always test Assistants and Workflows manually before enabling an automated schedule to prevent excessive resource consumption.
The schedule is displayed in the schedulers list as a human-readable description (e.g., "At 45 minutes past the hour") rather than the raw cron expression.
Timezone
The timezone in which the cron expression is evaluated. For example, 0 9 * * * with Europe/Warsaw fires at 9:00 AM Warsaw local time. Changing the timezone after creation shifts the schedule accordingly.
Resource Type
The type of resource to trigger on each execution. Available options:
- Assistant — sends an initial prompt to a CodeMie assistant and creates a new chat session.
- Workflow — triggers a workflow execution, optionally with a starting prompt.
- Datasource — triggers a data source reindex.
Resource ID
The identifier of the specific resource to trigger. After selecting a Resource Type, enter the ID of the target assistant, workflow, or data source.
Sensitive information in the Resource ID field is encrypted and displayed in masked format. Non-sensitive fields do not need to be re-entered when editing.
Saving the Scheduler
Click Save to create the scheduler. After saving, the Schedulers page reloads with the new scheduler visible in the list.
Click Cancel to discard the form and return to the Schedulers page without creating a scheduler.