Add and Index Provider Data Source
Index external data sources through third-party providers.
Overview
Provider data sources enable indexing external data through registered third-party provider configurations. Once indexed, assistants can use provider-specific tools to work with this data. Additionally, some provider tools can be used independently without requiring a data source.
This functionality is only available to users with the isAdmin role.
Provider Capabilities
Provider capabilities depend on their configuration. External providers might enable:
- Analyze code structure and patterns
- Explore repository contents
- Extract insights from indexed data
- Perform advanced code understanding tasks
How It Works
1. Manage Provider Configurations
Administrators register and manage third-party providers in Settings → Administration → Providers management.
Provider List
The Providers management page displays a table of all registered providers with their ID, Name, and a row-level actions menu.
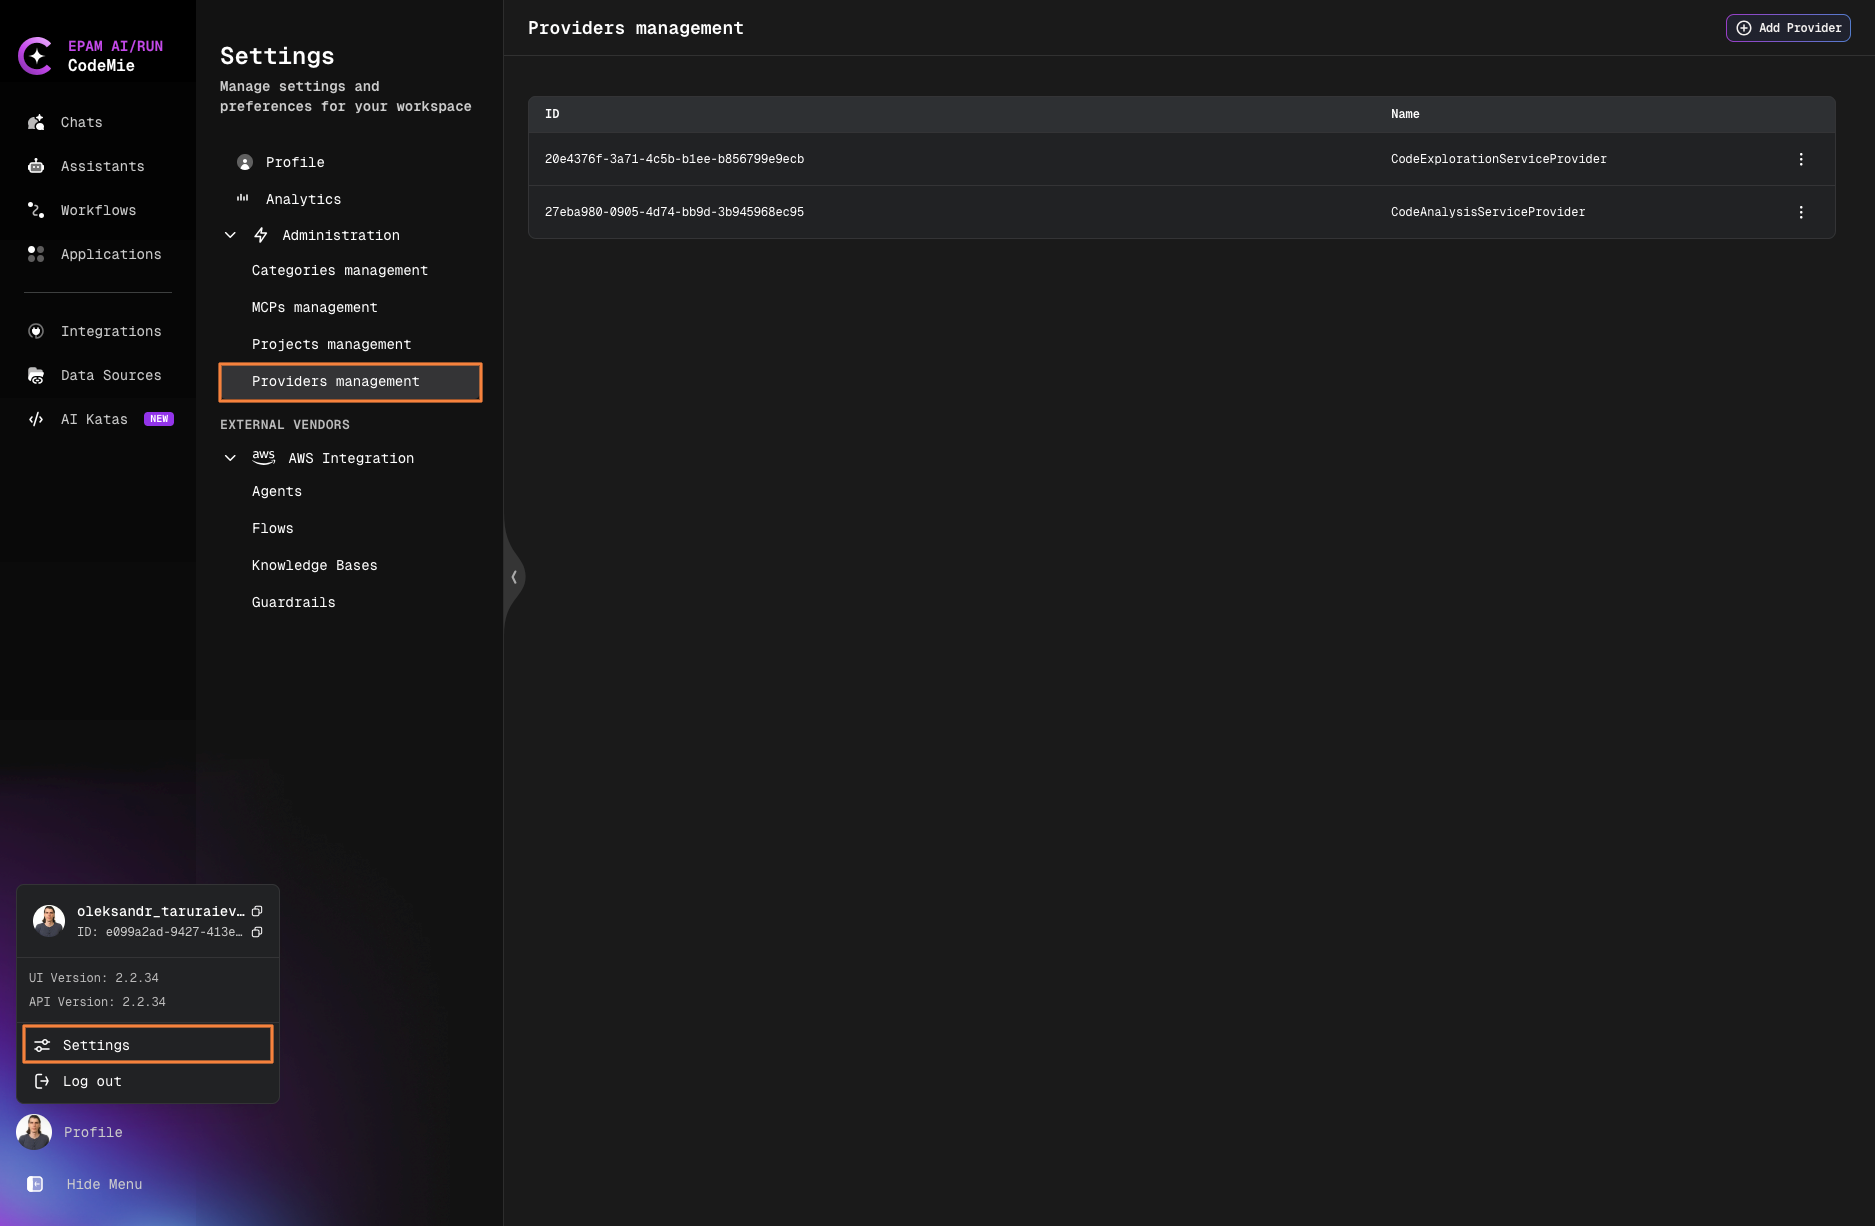
Add a Provider
- Click + Add Provider.
- Enter the provider configuration as a JSON object in the editor.
- Click Save.
A confirmation message appears when the provider is created successfully.
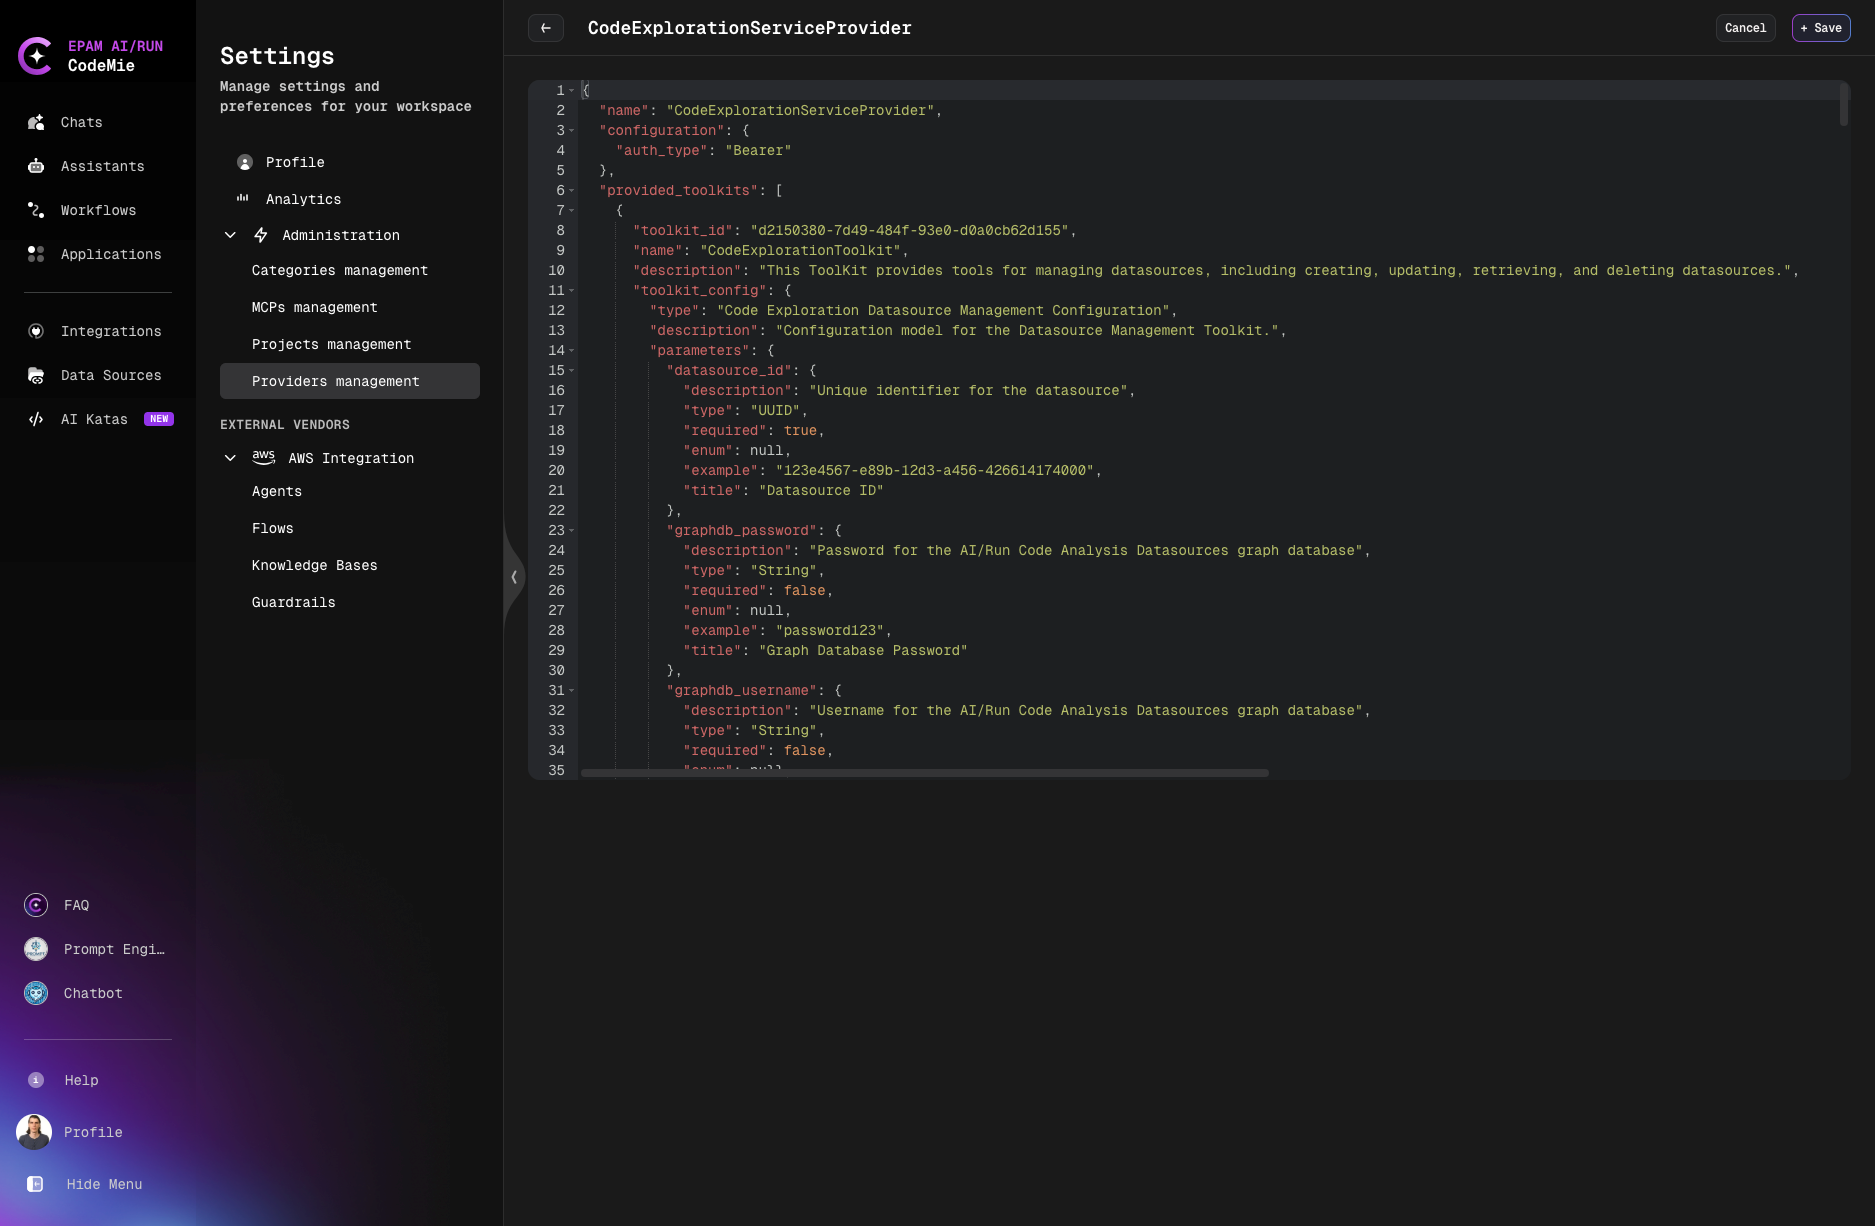
The provider configuration is entered as raw JSON. The required fields and structure depend on the specific provider type being registered.
View Provider Details
Open the actions menu on a provider row (the ⋮ icon) and select View Details to open a read-only view of all provider properties.
Edit a Provider
- Open the actions menu on a provider row and select Edit.
- Update the JSON configuration in the editor.
- Click Save.
A confirmation message appears when the provider is updated successfully.
Copy Provider ID
Open the actions menu on a provider row and select Copy ID to copy the provider's identifier to the clipboard. The ID is used when creating a Provider data source.
Delete a Provider
- Open the actions menu on a provider row and select Delete.
- In the confirmation dialog, review the provider name and click Delete to confirm.
This action cannot be undone. The provider will be permanently removed.
2. Creating Provider Data Source
Step 1: Navigate to Data Sources
Click Data Sources in the left navigation bar.
Step 2: Create New Data Source
Click + Create Datasource button.
Step 3: Fill Required Fields
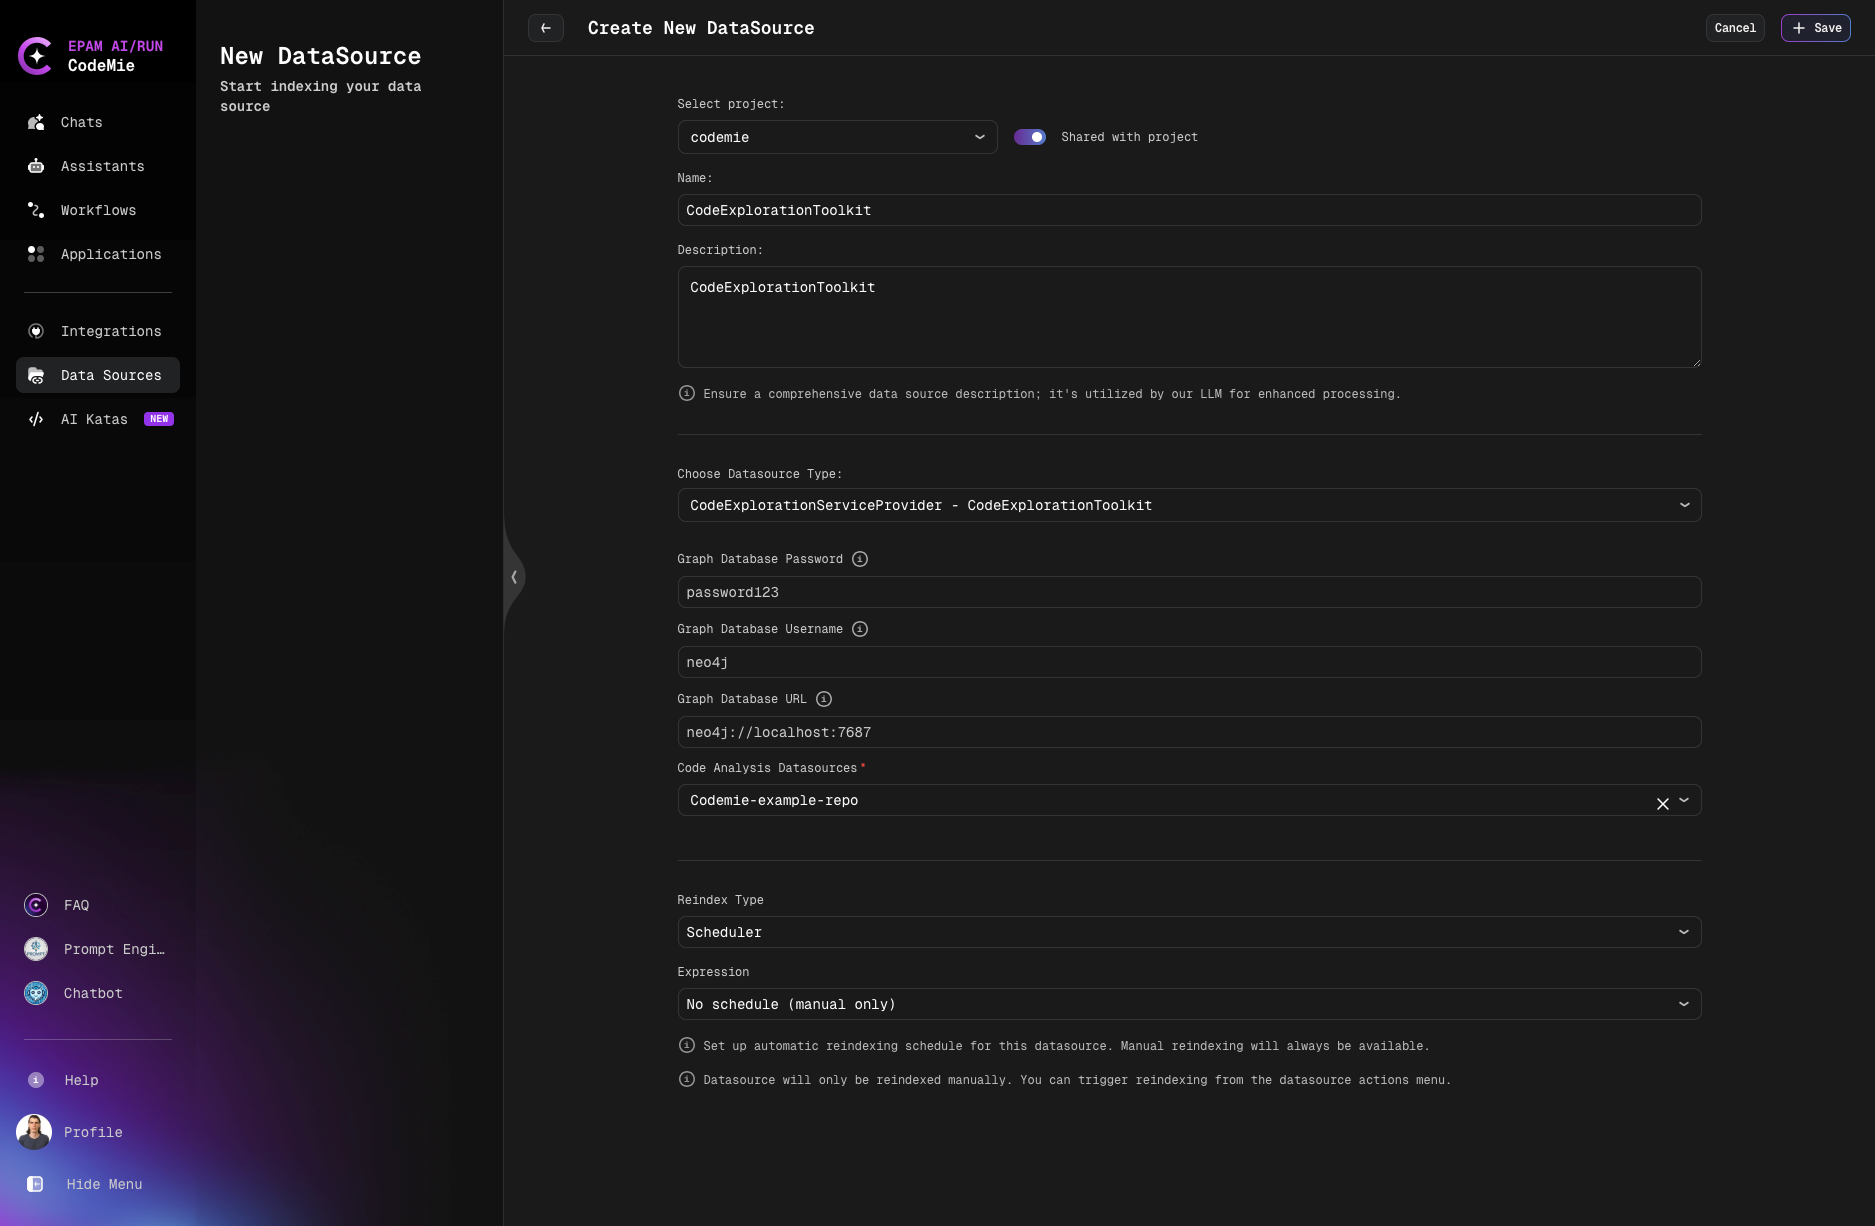
Select project: Choose the project from the dropdown.
Shared with project: Toggle to share the data source with project team members.
Name: Provide a descriptive name for the data source.
Description: Explain the data source purpose and what it will be used for.
Choose Datasource Type: Select the registered provider from the dropdown.
Provider-Specific Configuration: Depending on the selected provider, fill in additional fields:
- Graph Database Password: Password for graph database connection (if required by provider)
- Graph Database Username: Username for graph database (if required by provider)
- Graph Database URL: Connection URL for graph database (if required by provider)
- Code Analysis Datasources: Select existing datasources to analyze with provider tools (optional)
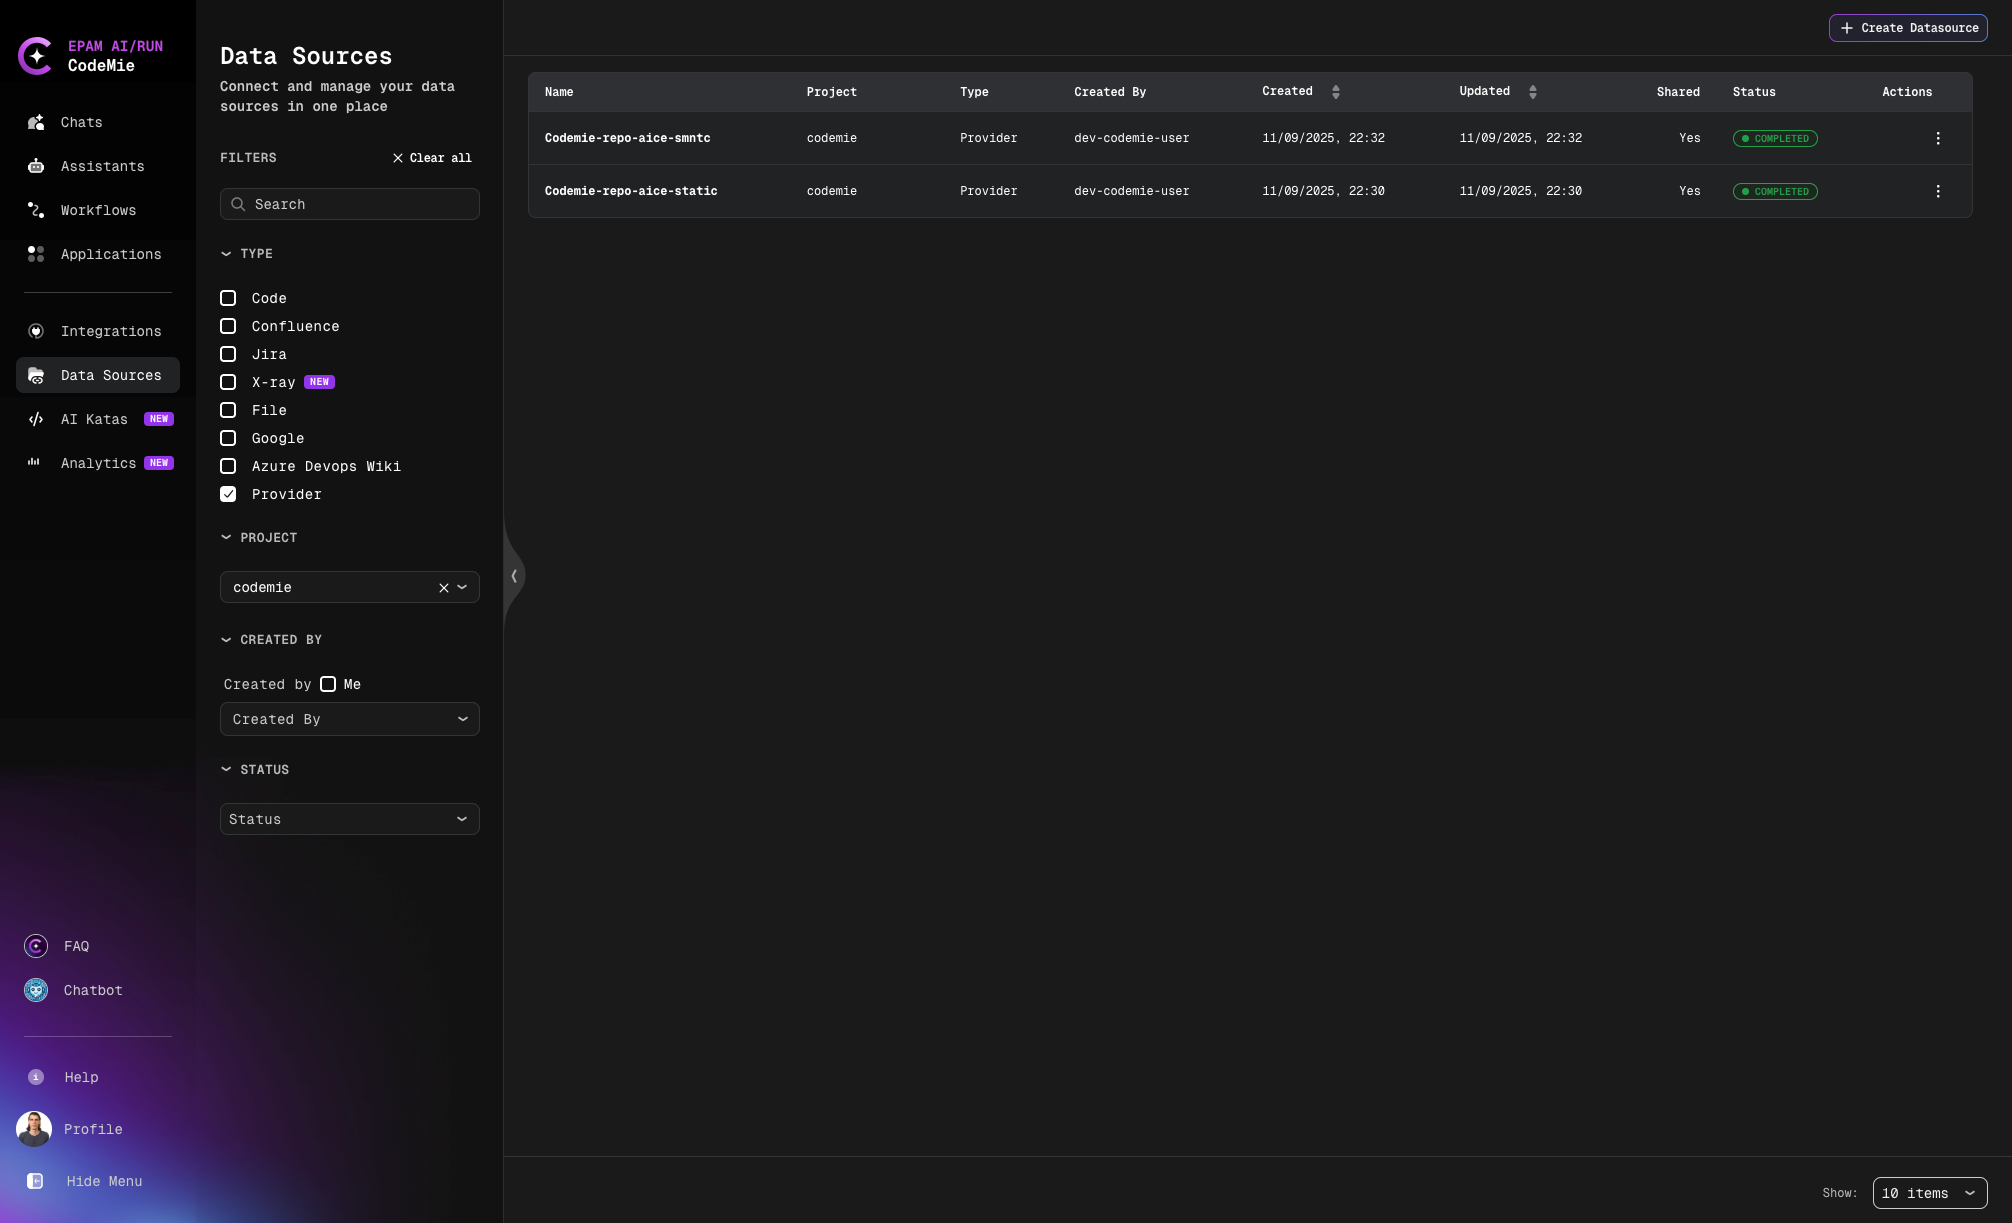
3. Index Provider Data Source
Select Provider as the data source type and index the data:
4. Use Provider Tools with Assistants
When configuring assistants, provider-specific tools become available in the External Tools section:
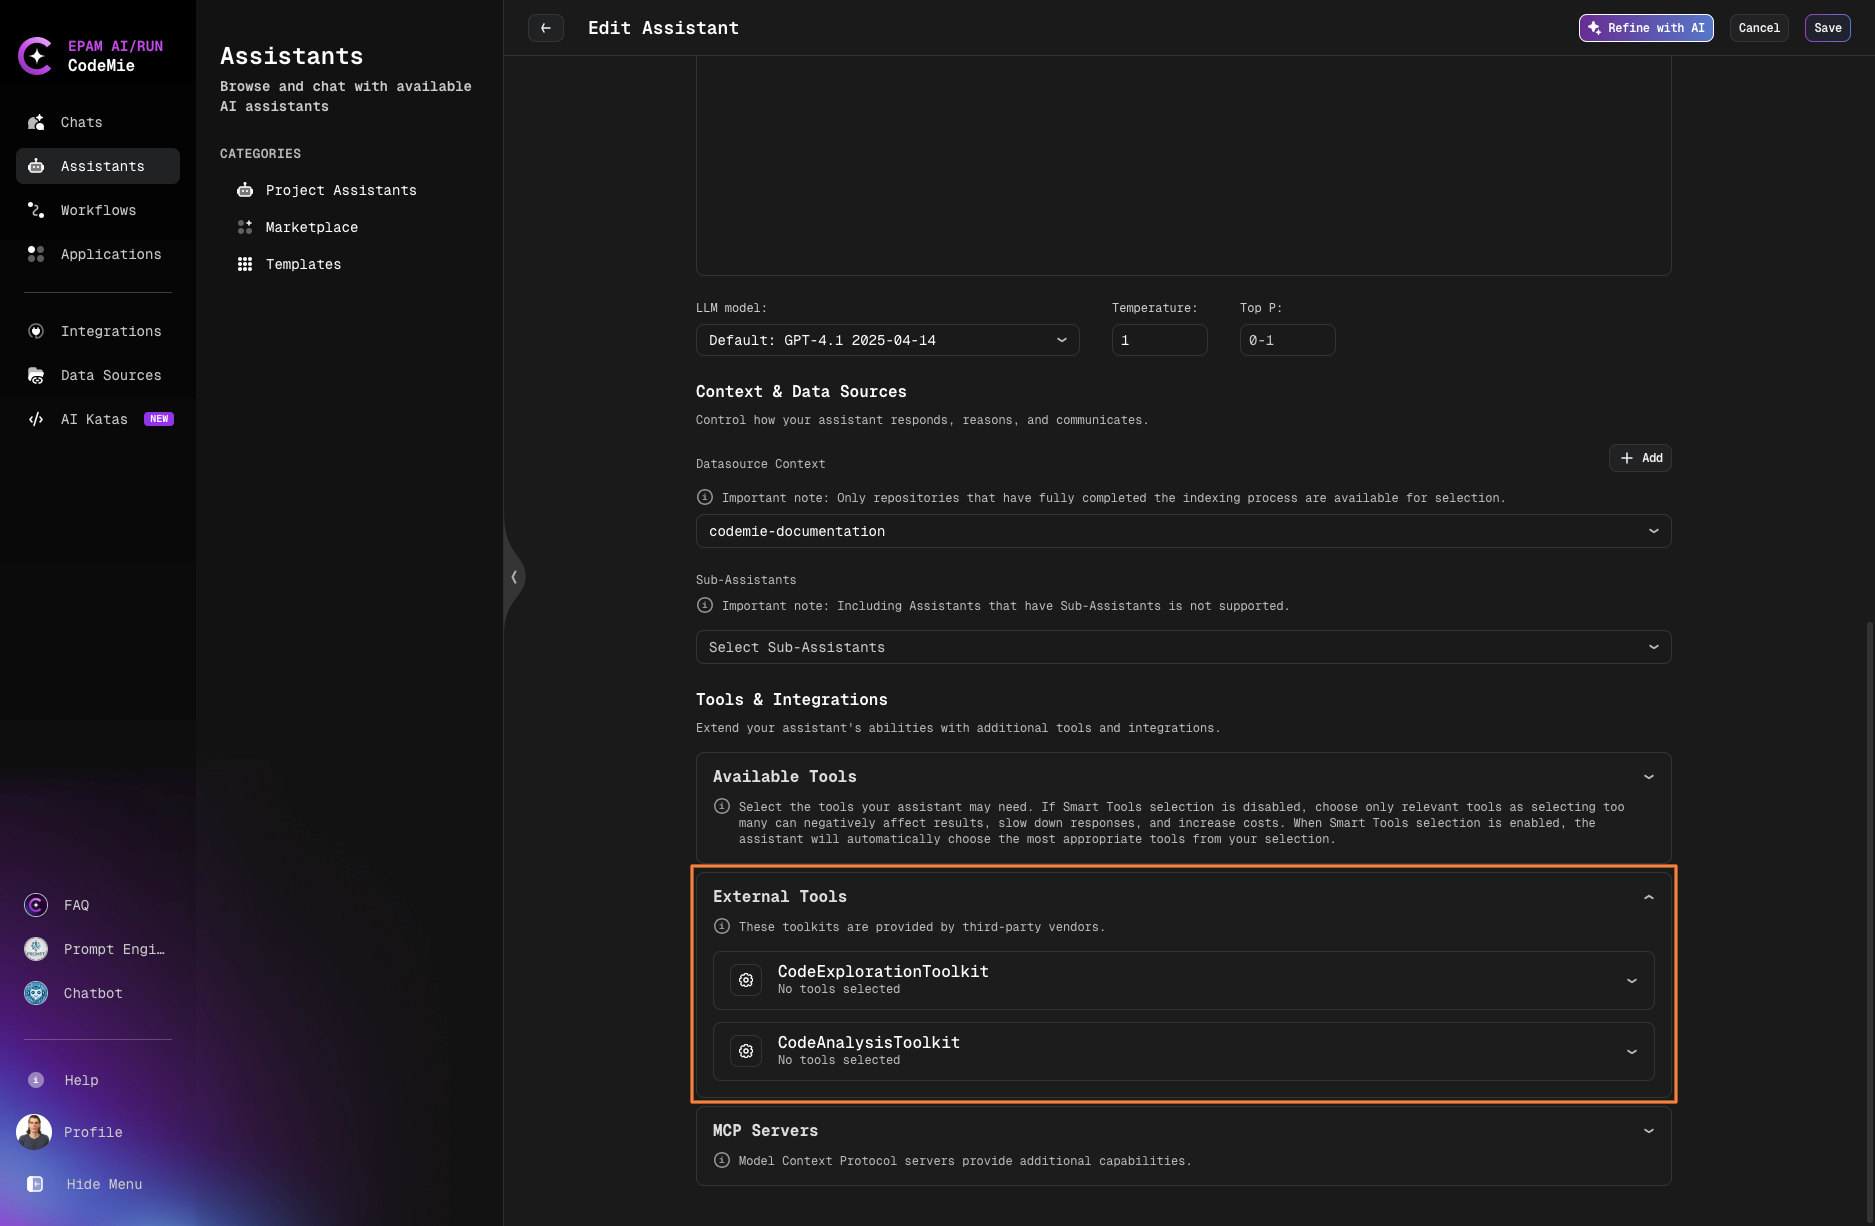
Provider tools can be used:
- With data source context: Tools work with indexed provider data
- Independently: Some tools don't require a data source and work standalone
Workflow
1. Administrator registers provider configuration
   ↓
2. User selects Provider as data source type
   ↓
3. User indexes data through provider
   ↓
4. User creates assistant with provider tools enabled
   ↓
5. Assistant uses provider tools with or without data source context
Using Provider Data Source in Assistants
After successfully creating and indexing a Provider data source, it can be connected to any assistant to provide access to external analysis capabilities.
Adding Data Source to Assistant
- Navigate to the Assistants section.
- Click + Create Assistant or edit an existing assistant.
- In the Data Source Context section, click the dropdown menu.
- Select the Provider data source from the list.
- In the Available tools section, enable the provider-specific tools.
- Save the assistant configuration.
The assistant can now access and analyze code through the provider's external tooling, enabling it to:
- Perform advanced code analysis with specialized tools
- Leverage external analysis engines and capabilities
- Access provider-specific insights and metrics
- Combine indexed data with real-time analysis
- Utilize both data source context and independent tool operations