Users Management
The Users Management page is only accessible to Platform Admins. Regular users can manage members within their own projects from the Projects Management page.
Users Management is only available when Platform-managed mode is enabled. If this tab is not visible, ask your administrator to follow the Platform-managed Mode Configuration guide.
The Users Management page gives Platform Admins a unified view of all users registered on the platform, their roles, and their project memberships. From here you can filter users, inspect individual user details, and manage project assignments.
To access Users Management, click the Profile icon in the bottom-left corner → Settings → Administration → Users management.
Users List
The users list displays all platform users in a searchable, filterable table.
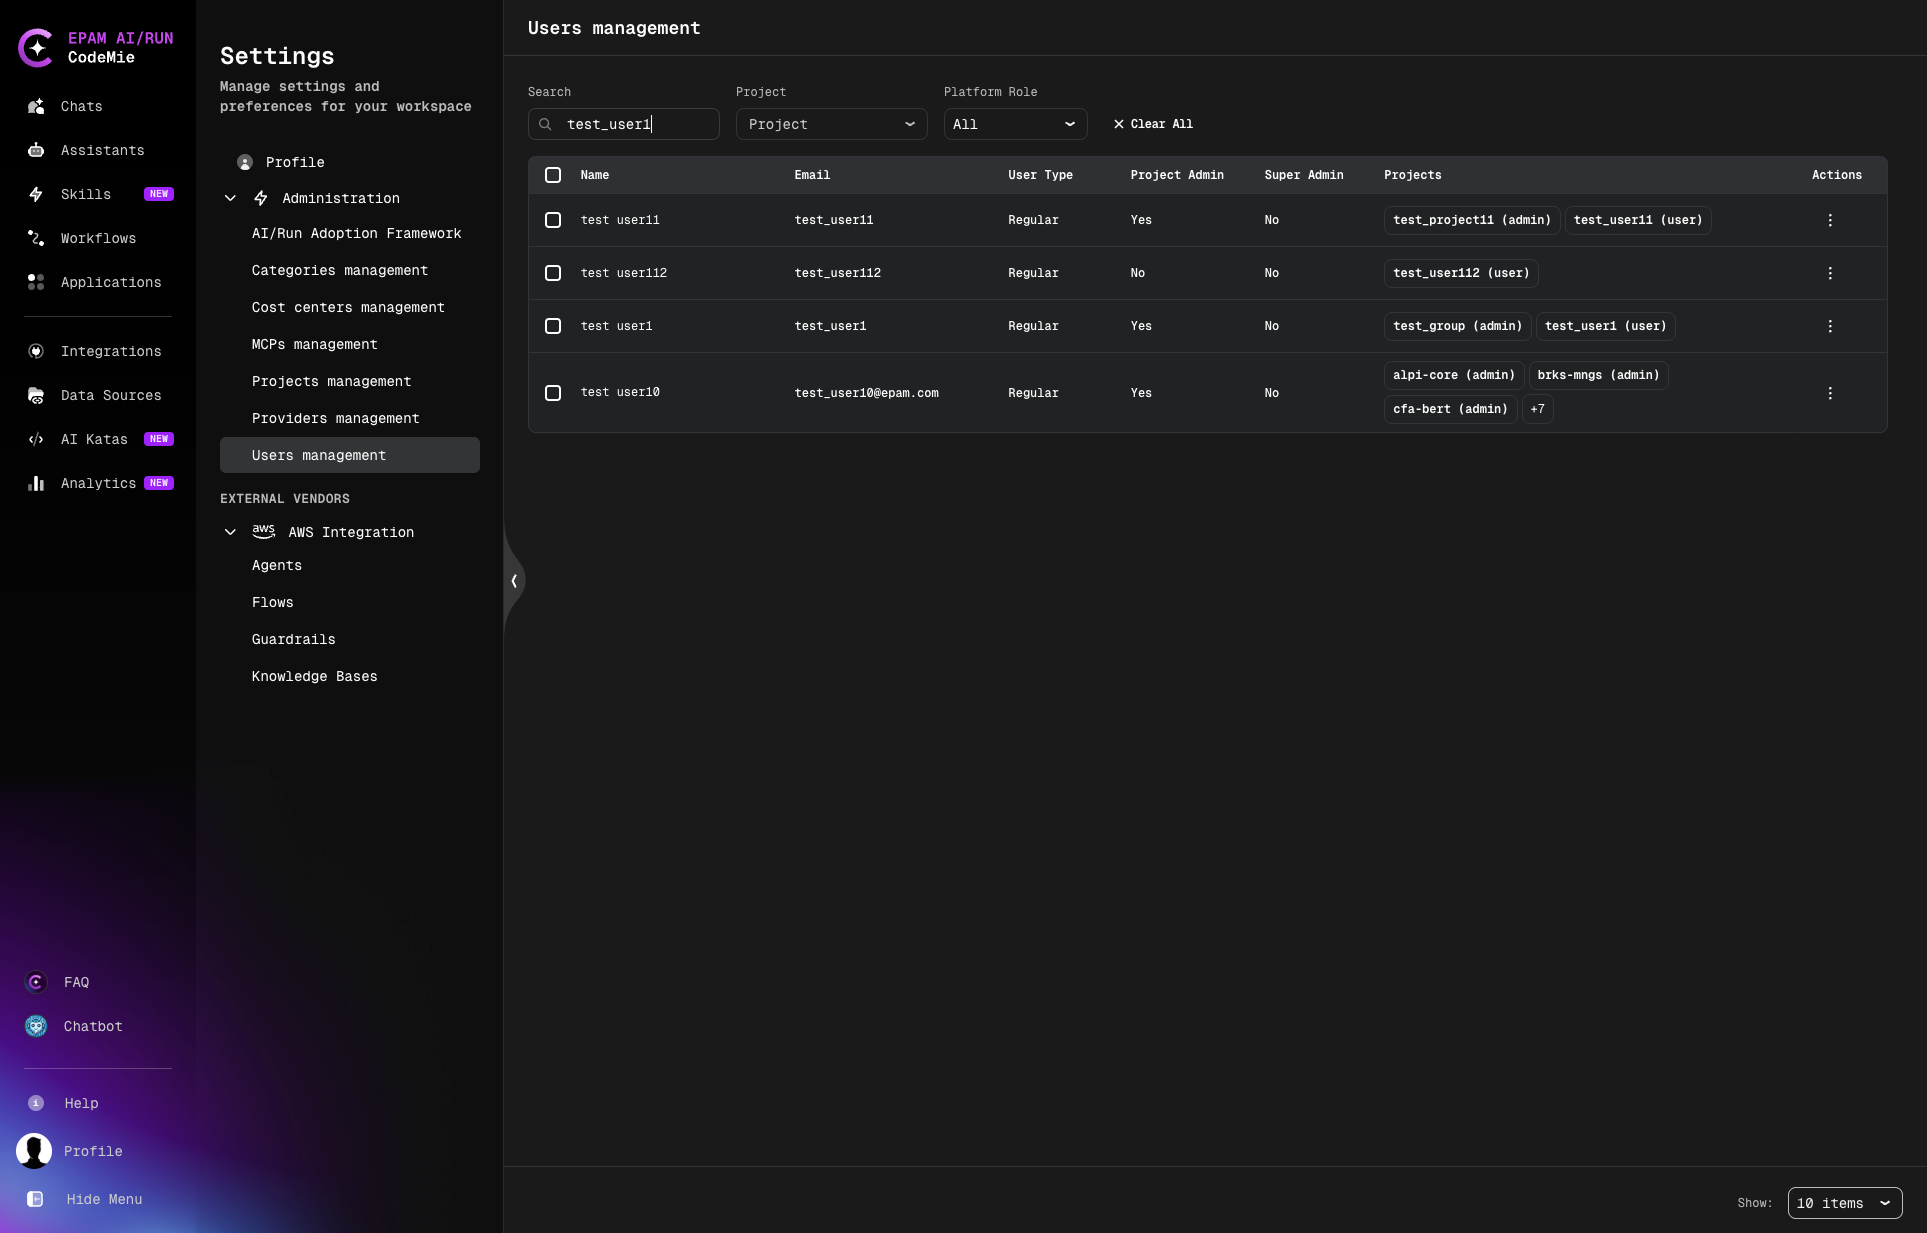
Columns
| Column | Description |
|---|---|
| Name | Display name |
| User's email address | |
| User Type | Regular or External — see External User |
| Project Admin | Whether the user holds Project Admin role in any project |
| Super Admin | Whether the user has platform-wide Super Admin privileges |
| Projects | Badge list of projects the user is assigned to |
| Actions | Row-level actions (edit, view details) |
Filtering
Use the filter bar at the top of the list to narrow results:
- Search — filter by name
- Project — show only users assigned to a specific project
- Platform Role — filter by
User,Project Admin, orSuper Admin
Click Clear All to reset all active filters.
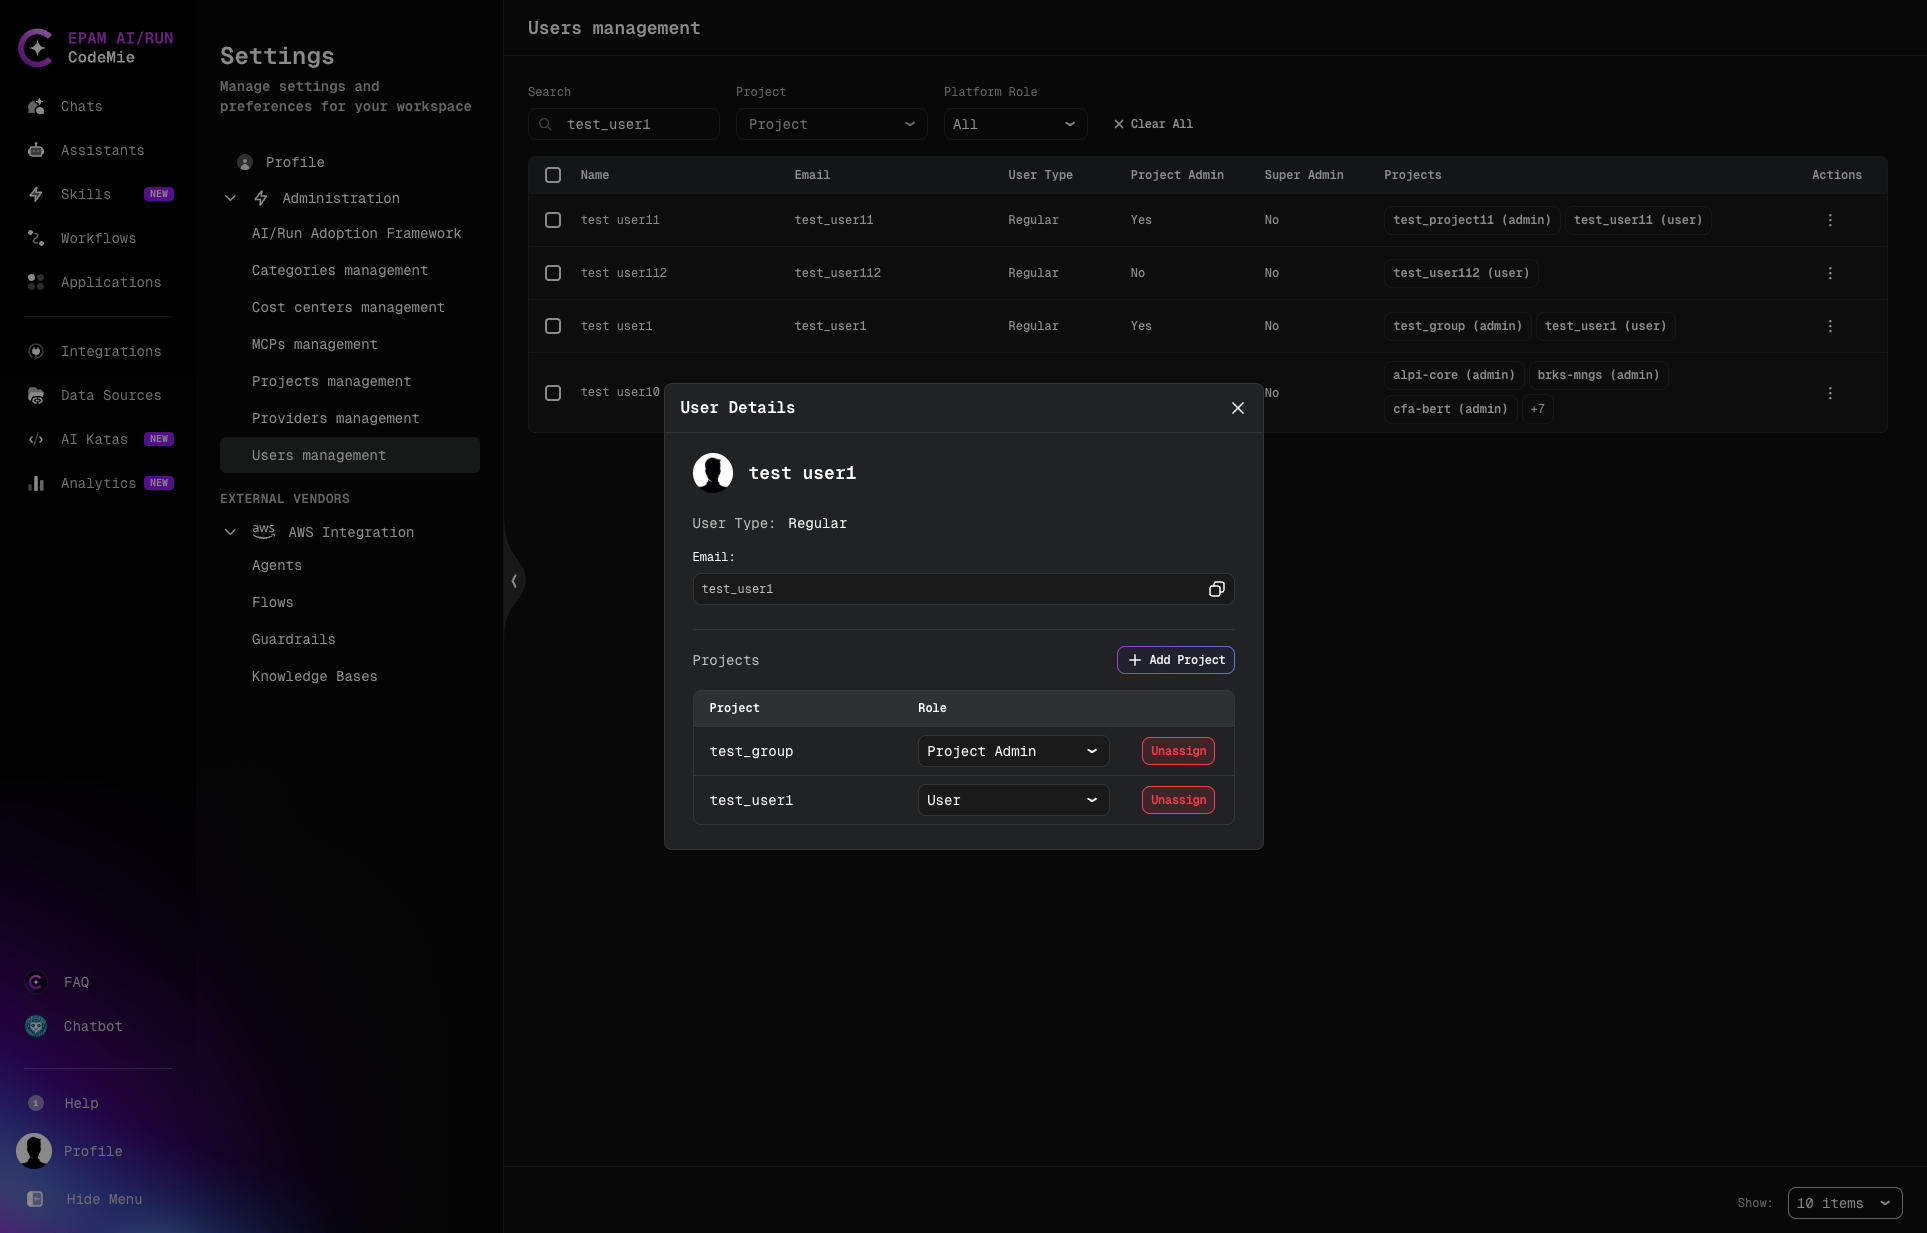
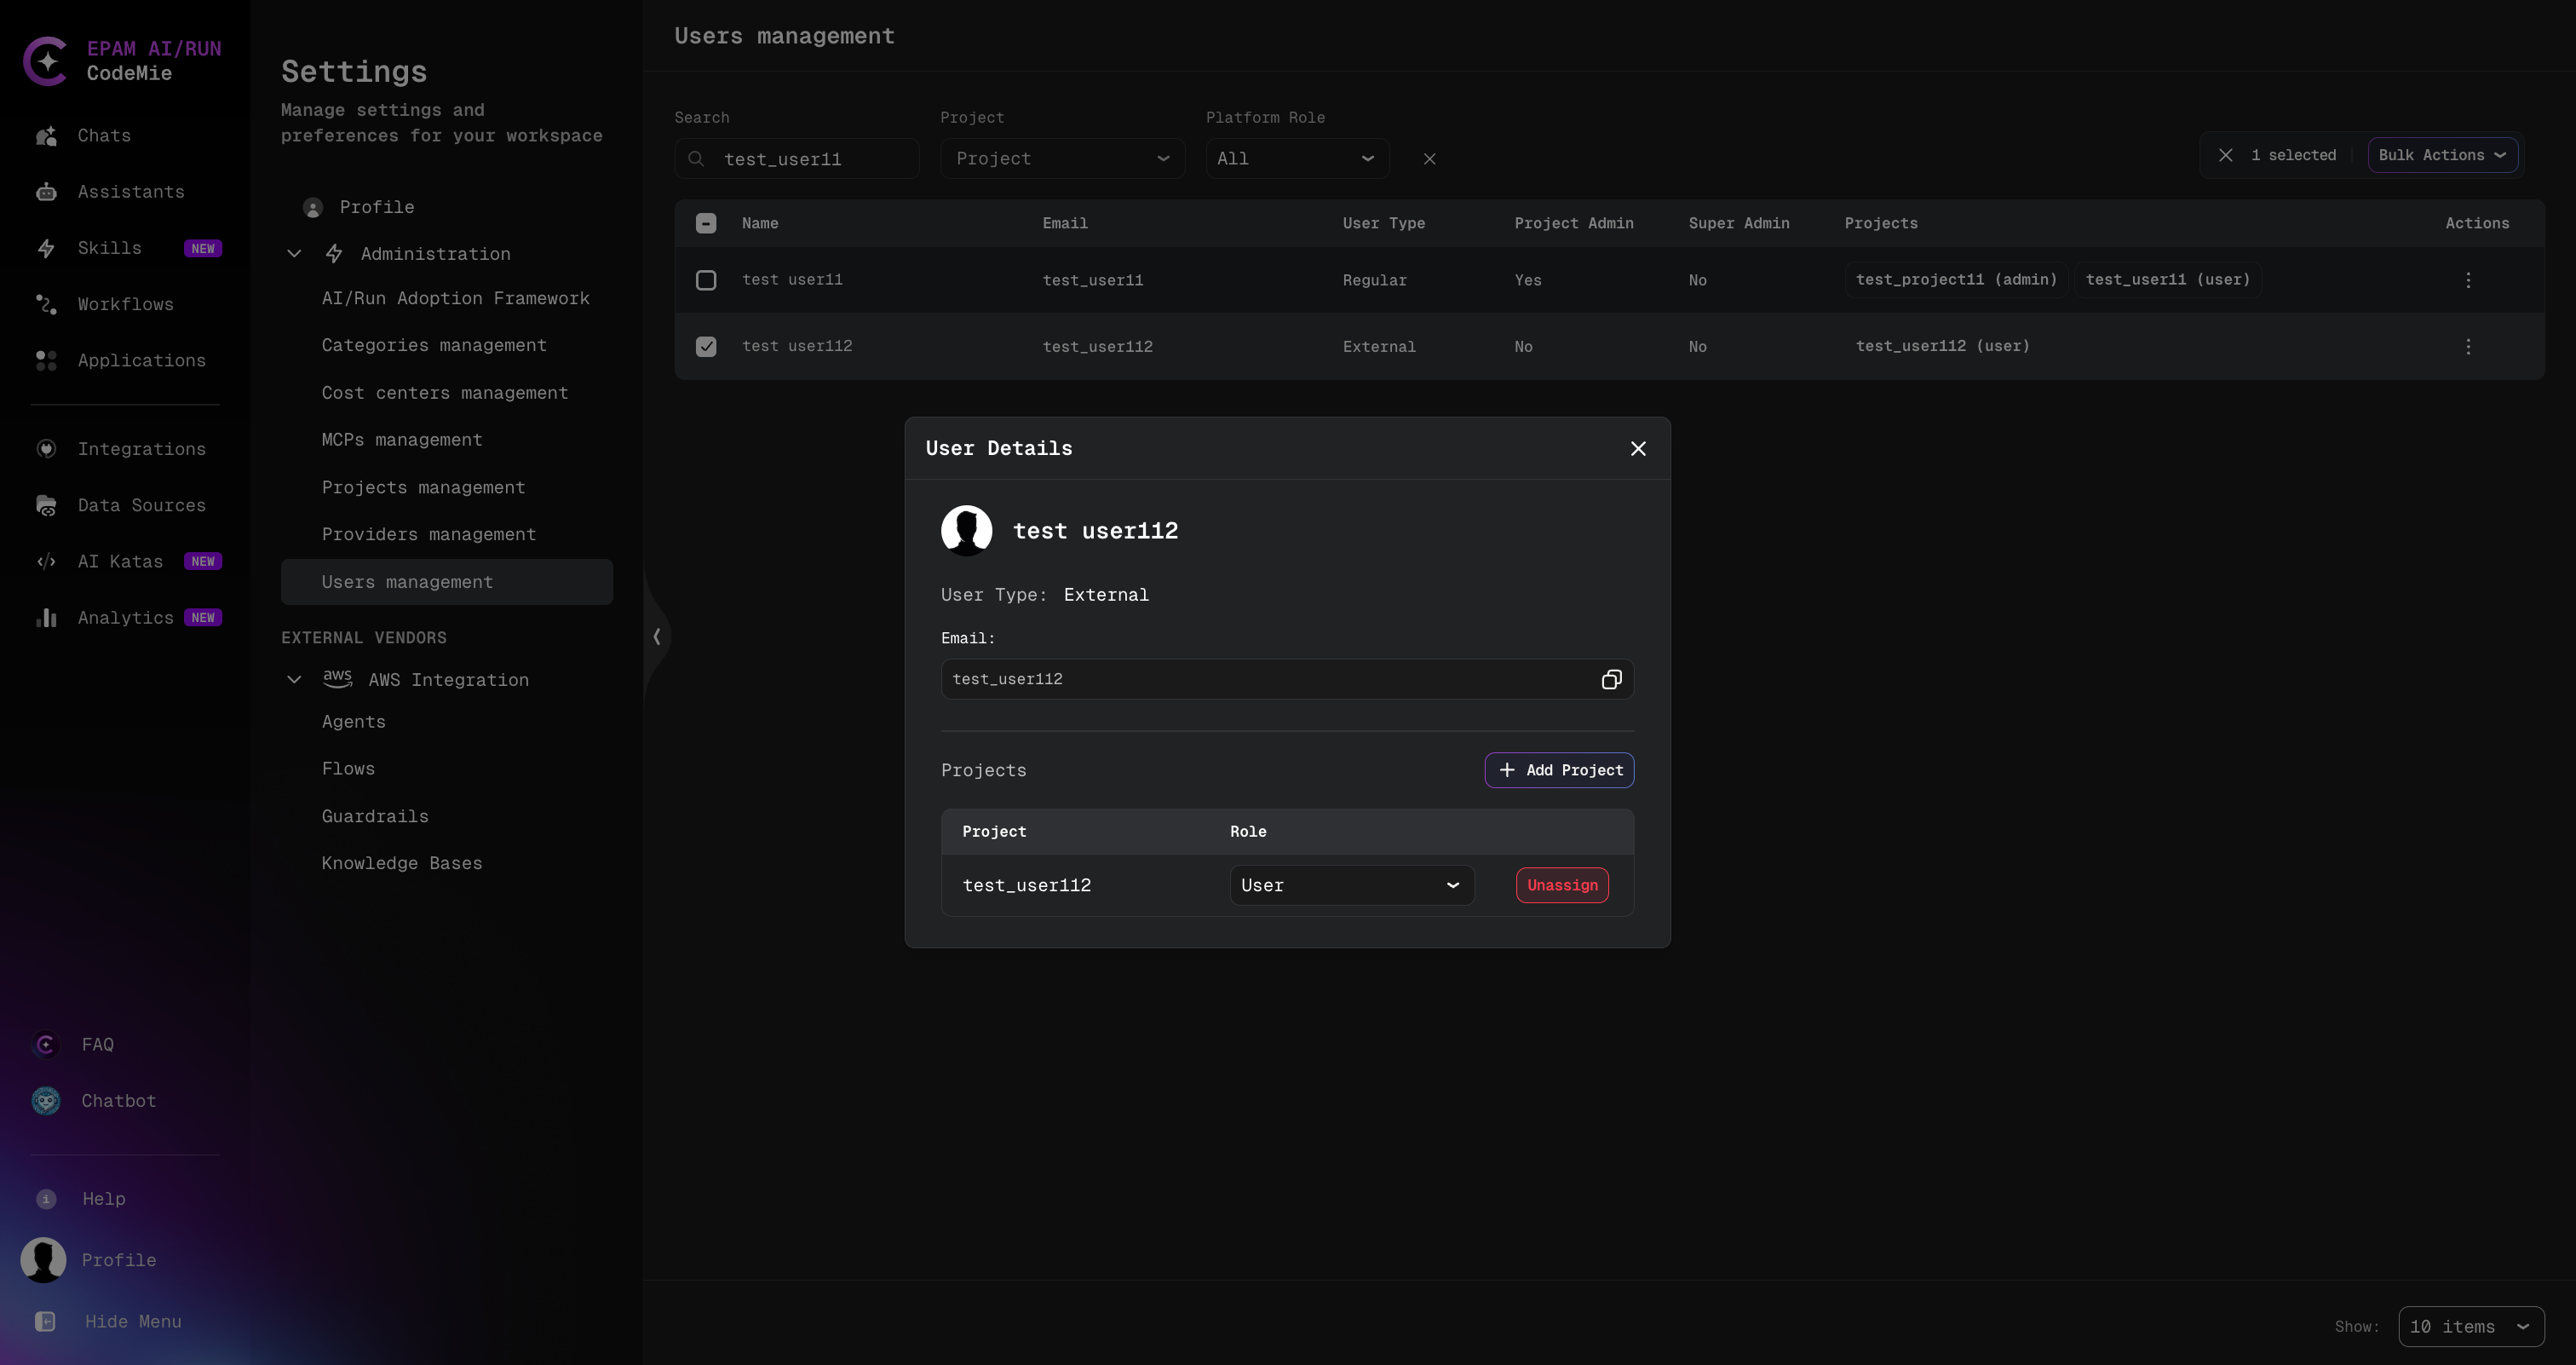
User Details
Click the ⋮ (Actions) menu on a user row, or click the user's name, to open the User Details panel.
The panel shows:
- Avatar and display name
- User Type:
RegularorExternal - Email: user's email address
- Projects table — list of projects the user is assigned to, with their role in each
- Budget Spending widget — current budget consumption for the selected user (see below)
Budget Spending
The Budget Spending widget is displayed at the bottom of the User Details panel and shows the current budget consumption for the selected user across all three budget categories.
| Column | Description |
|---|---|
| Category | Budget category: Platform, CLI, or Premium models |
| Current Spending | Amount spent in the current budget period (USD) |
| Budget Limit | The configured maximum spend for the period (USD) |
| Budget Reset | The date and time when the budget counter resets |
| Time Until Reset | Days, hours, and minutes remaining until the next budget reset |
| Progress | Visual progress bar showing consumption relative to the budget limit |
Each row represents one budget category. A row is shown only for categories that have a budget configured for the user.
If the widget shows no data, no budget has been configured for the selected user. Budget limits are set up by a platform administrator via the LiteLLM integration. See LiteLLM Budget Configuration for details.
The Budget Spending widget requires:
- Platform-managed mode enabled (
ENABLE_USER_MANAGEMENT=True). See Platform-managed Mode Configuration. - Budget management enabled (
viteEnableBudgetManagement: true). See Platform Administration.
Manage a User's Project Assignments
From the User Details panel you can add or remove project memberships without leaving the user record.
Add a Project Assignment
- In the User Details panel, click Add Project.
- Select a project from the dropdown.
- Choose the role: User or Project Admin.
- Click Add.
The new assignment appears in the Projects table immediately.
Remove a Project Assignment
- In the User Details panel, locate the project in the Projects table.
- Click Unassign next to that project.
- Confirm the removal.
The user loses access to that project immediately. Their account is not affected.