Platform Administration
This guide is for users who have been assigned the global admin role. It explains how to create new projects and access existing ones within the AI/Run CodeMie platform.
For a full guide to creating projects, managing project members, and the Users Management panel, see Project & User Management.
Creating a New Project
Follow these steps to create a new project:
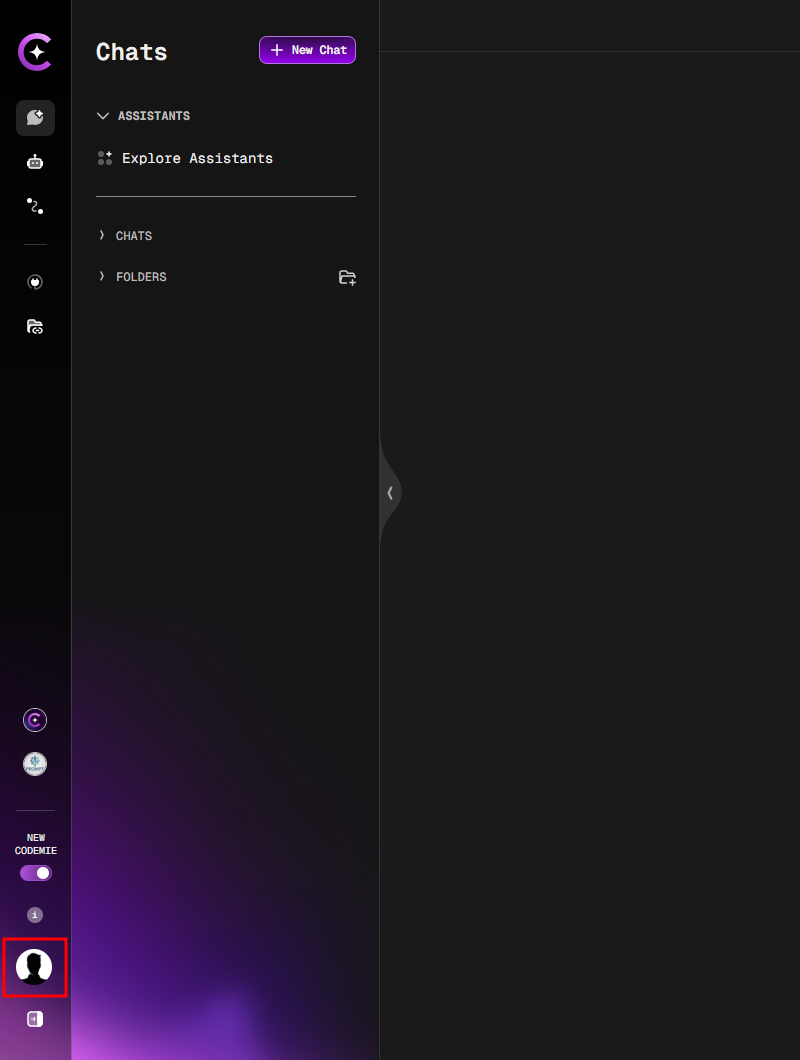
1. Open Settings
Click on your Profile icon in the bottom left corner and select Settings.

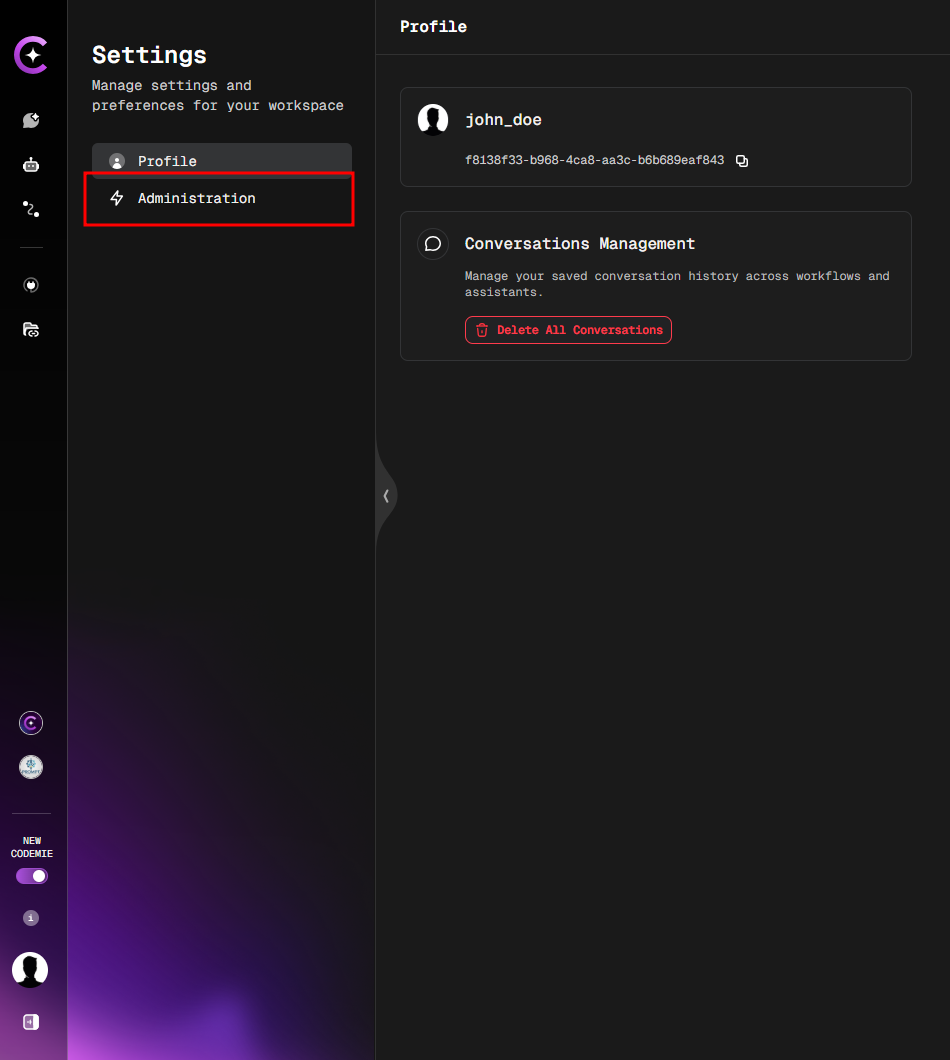
2. Navigate to Administration
In the Settings panel, click on the Administration tab.
The Administration menu and its items are controlled by the adminActions component. See Customer Feature Configuration to configure which menu items are visible to users.
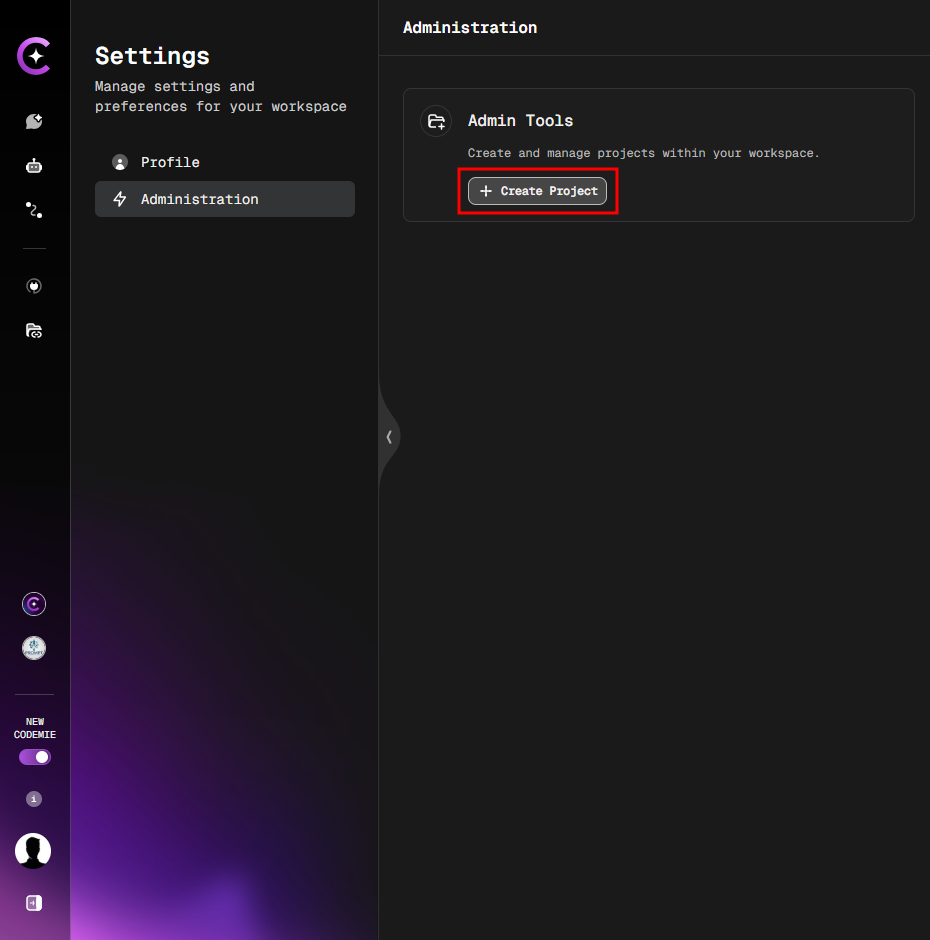
3. Create a New Project
Click on the Create Project button.
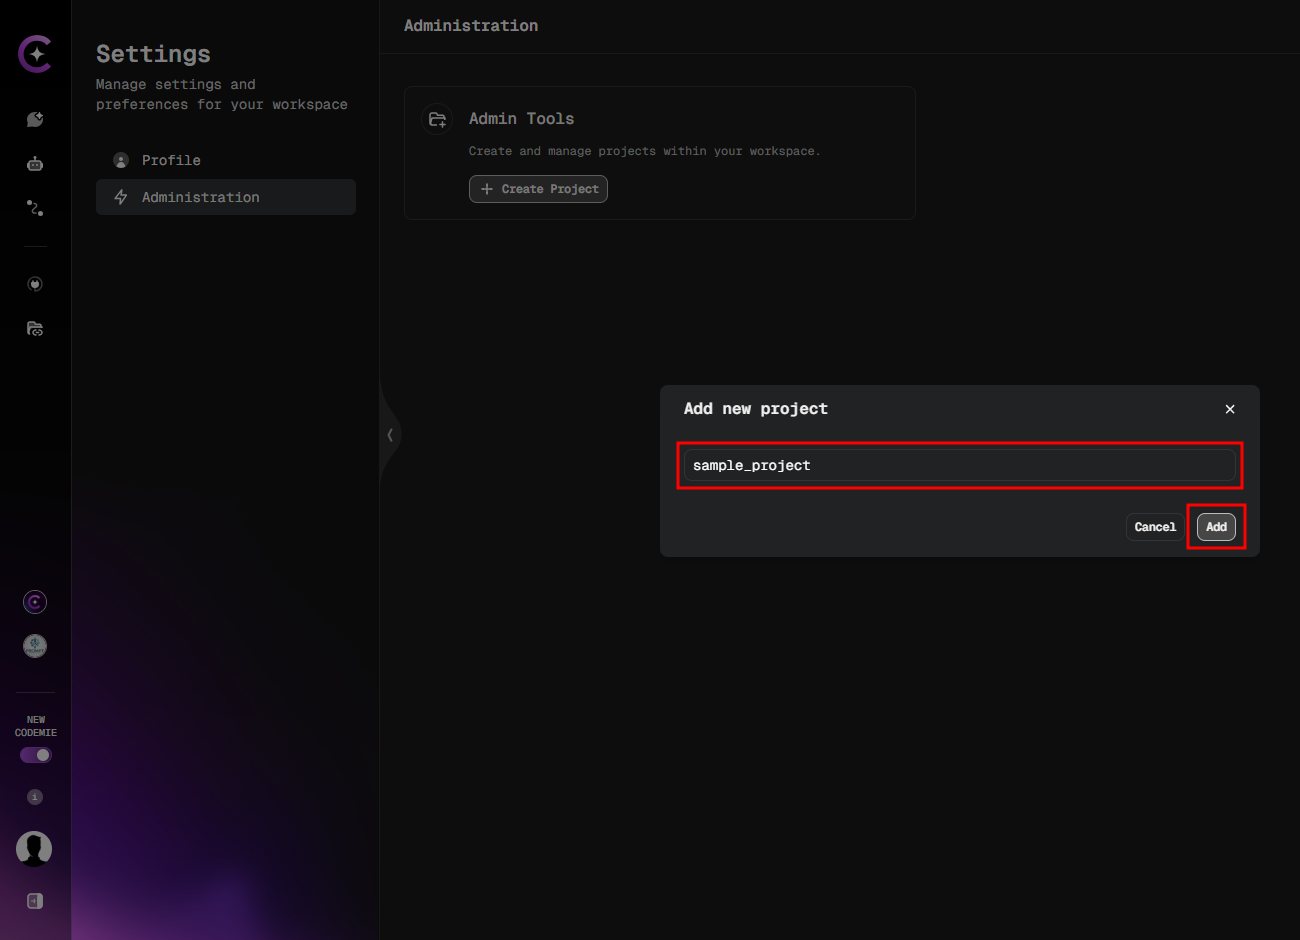
4. Enter Project Details
Fill in a unique Project Name (e.g., sample_project) and click Add.
After creating the project, assign users to it:
- Keycloak-managed mode — follow Step 2.2: Assign Attributes to add the project name to the user's
applicationsattribute in Keycloak. - Platform-managed mode — open the project in Settings → Administration → Projects management and add users directly from the Projects Management UI.
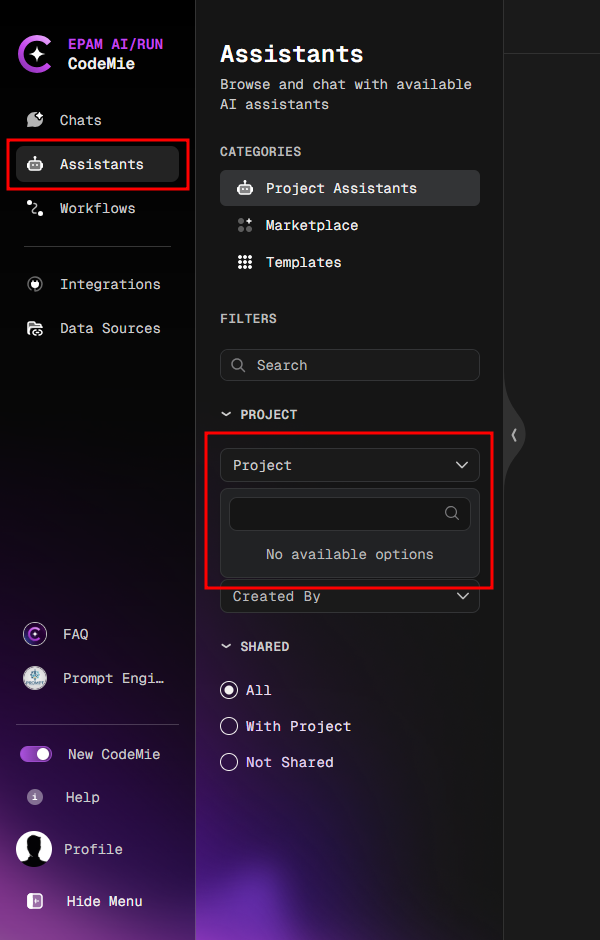
Accessing Existing Projects
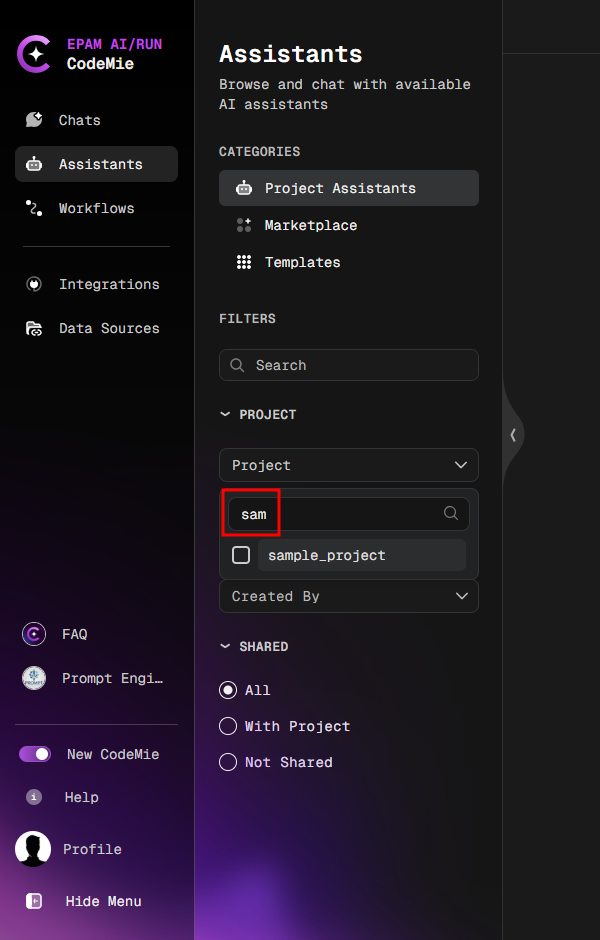
The project dropdown menu will initially appear empty for users with the admin role. To find and access any project, the administrator must start typing its name in the search bar (at least three characters are required).
Example: The project dropdown is initially empty, but projects appear after typing "sam".
Optional Convenience Tip (Keycloak-managed mode only): For frequently used projects, you can optionally assign the applications attribute to an admin user in Keycloak. Any projects listed in this attribute will then appear in their dropdown by default, without needing to search. For more details, see Assign Attributes.