Assign Attributes
This step applies only to deployments with ENABLE_USER_MANAGEMENT=False (Keycloak-managed mode),
where user roles and project access are controlled entirely by Keycloak JWT claims.
If your deployment has ENABLE_USER_MANAGEMENT=True (Platform-managed mode), skip this page.
Project and role assignments are managed through the in-app UI instead.
See Project & User Management.
Attributes define which projects a user with the developer role can access and what permissions they have within those projects. This step is required for all users with the developer role in Keycloak-managed mode.
Understanding Attributes
| Attribute (Key) | Grants Role | Permissions Within Assigned Projects | Value Configuration |
|---|---|---|---|
applications | Standard User | Allows the user to create, edit, delete, share, and publish their own assistants. | Enter a comma-separated list of project names where the user has standard access (e.g., my_awesome_project, example_project). |
applications_admin | Project Administrator | Allows the user to manage all assistants in the project and project-specific integrations. | Enter a comma-separated list of project names where the user has admin rights. |
The system is designed to streamline project setup. When you assign the applications attribute to a user, any project listed in the Value that does not already exist will be created automatically on the platform.
This behavior applies to both personal and shared projects:
- Personal Project Example: If you assign the value
john_doeto a user with the usernamejohn_doe, a personal project namedjohn_doeis created for them. - Shared Project Example: If you assign the value
team-alphato one or more users, a shared project namedteam-alphawill be automatically created the first time it is assigned.
Note for Administrators: Manual project creation (as described in the Platform Administration Guide) is now only necessary if a project needs to be set up for administrative purposes before any users are assigned to it.
To grant a user Project Administrator privileges, they must be assigned both the applications and applications_admin attributes:
- Assign the
developerrole (from Step 2.1). - Add the
applicationsattribute, listing all projects the user should have access to. - Add the
applications_adminattribute, listing the specific projects where they should have admin rights.
The applications attribute defines the base list of accessible projects, and applications_admin elevates their permissions within that list.
How to Assign Attributes
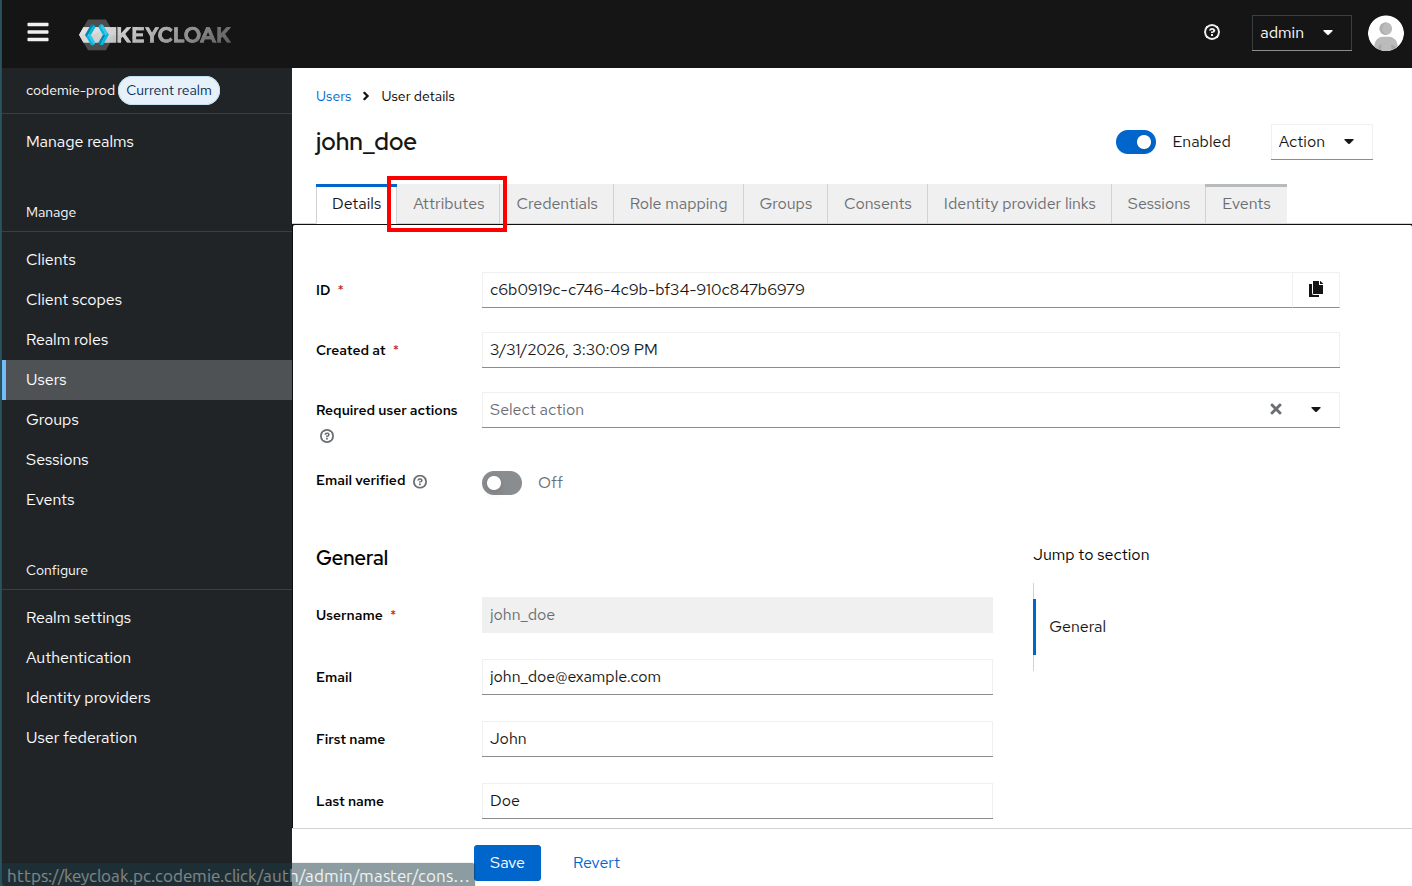
1. Navigate to User Attributes
In the user details page, click on the Attributes tab.
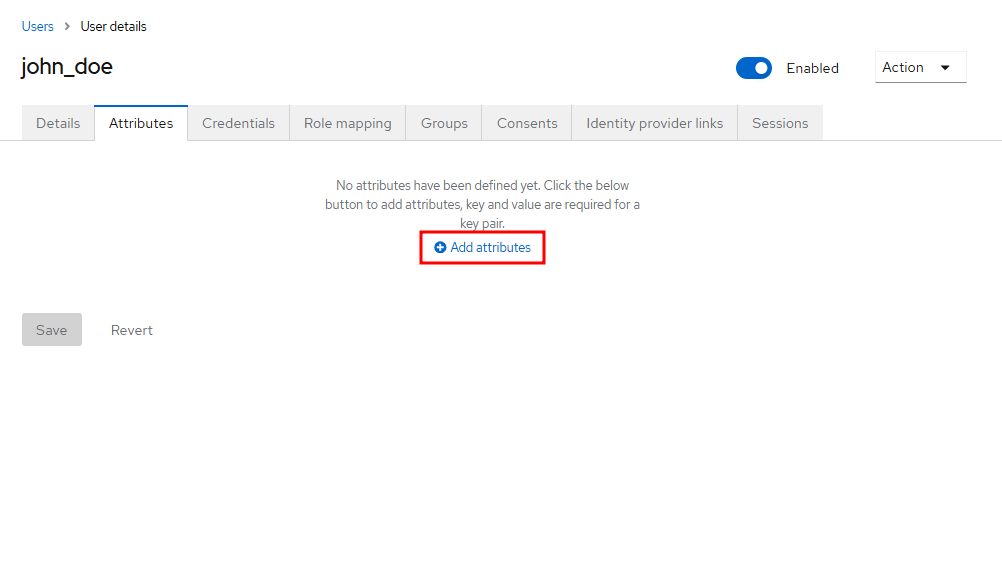
2. Add Attributes
Click the Add attributes button to create a new attribute.
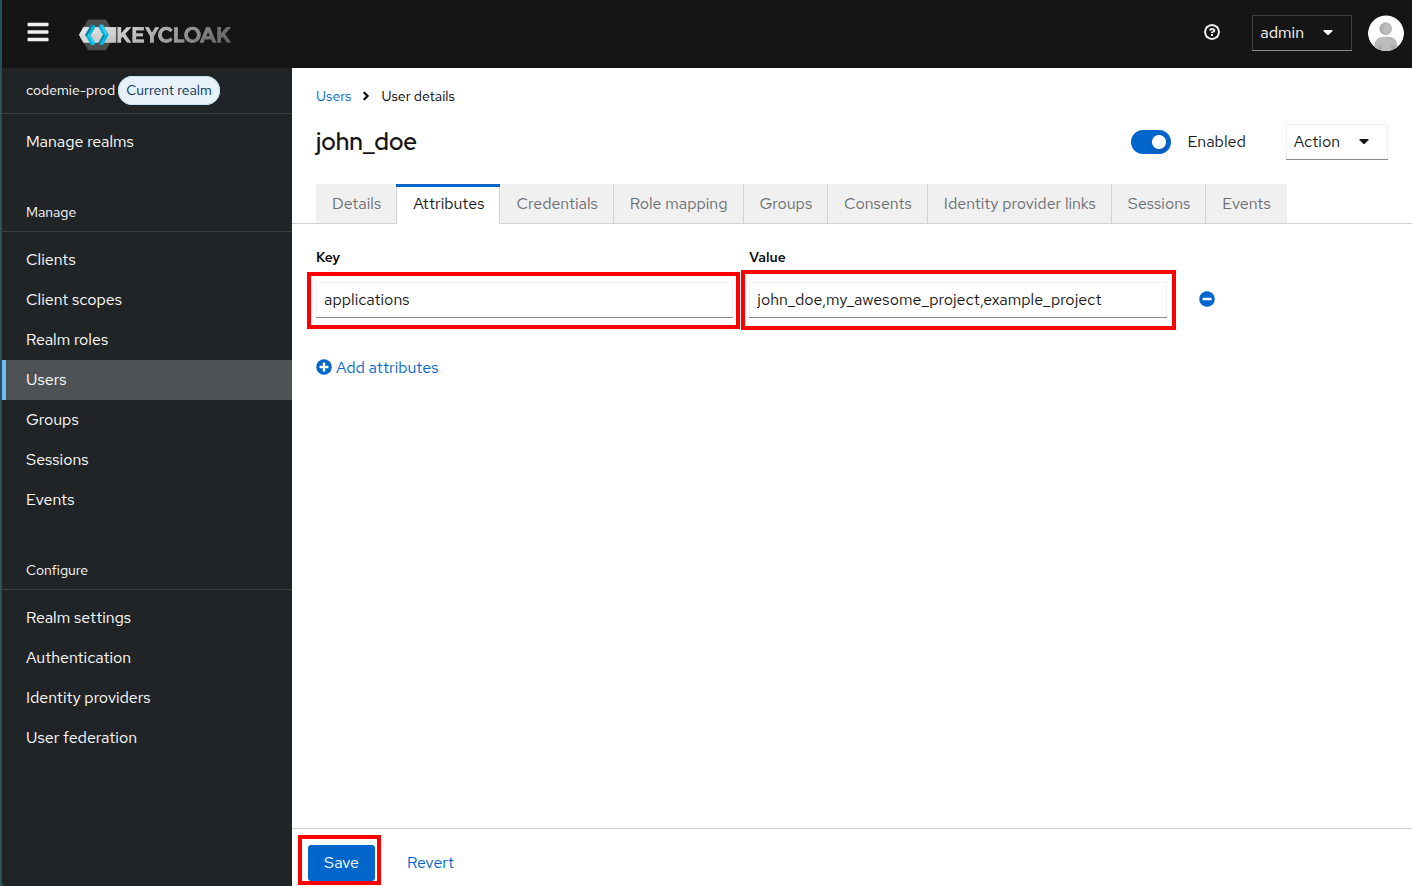
3. Configure Standard Access
For standard user access to projects:
- Key:
applications - Value: Comma-separated list of project names (e.g.,
my_project,team_project)
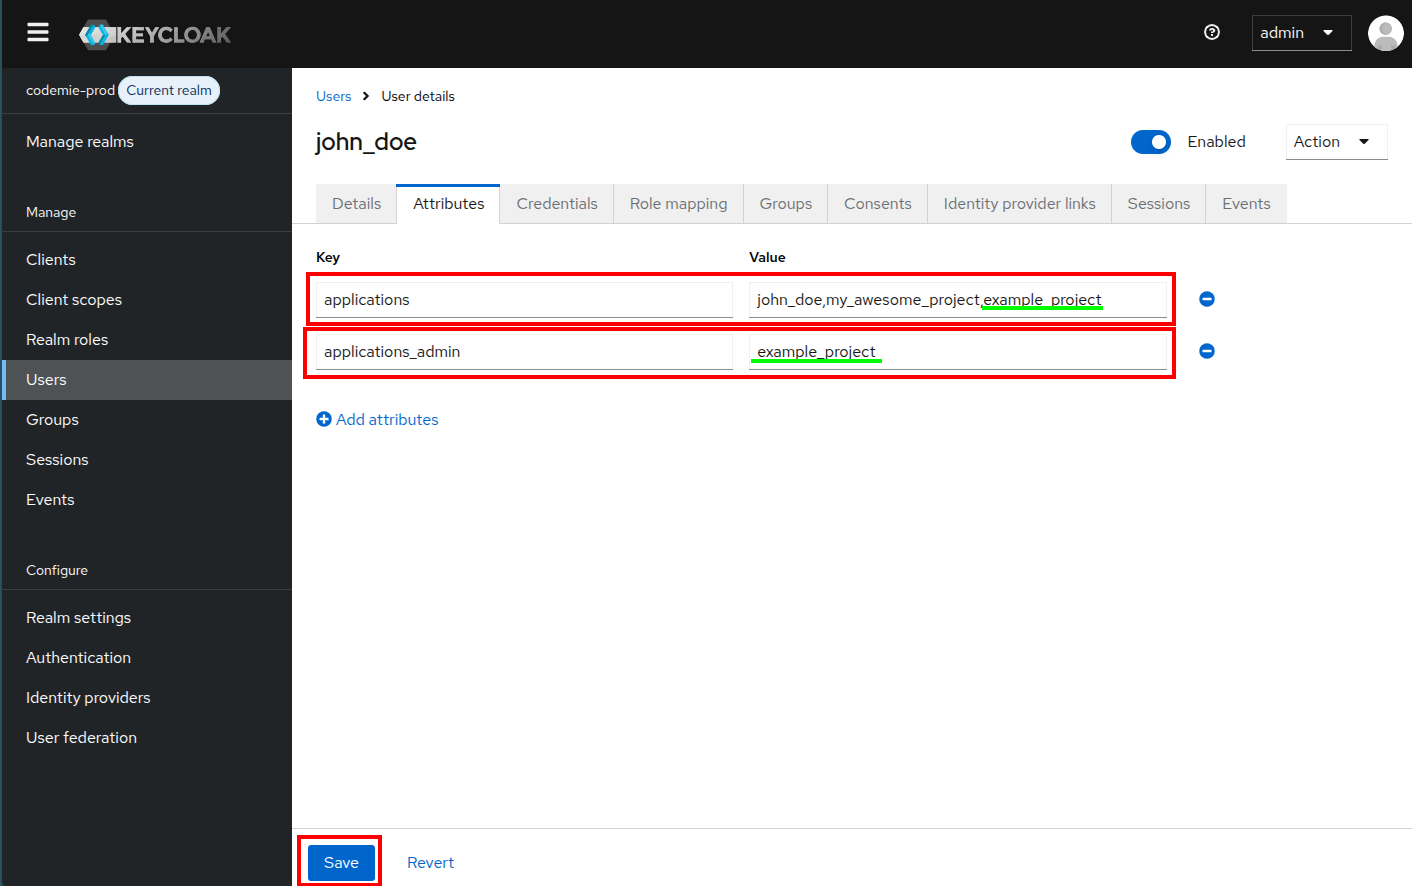
4. Configure Admin Access (Optional)
For project administrator access:
- First ensure
applicationsattribute includes the projects - Add another attribute:
- Key:
applications_admin - Value: Comma-separated list of projects to admin (must be subset of
applications)
- Key:
5. Save Changes
Click Save to apply the attributes. The user now has access to the specified projects.