LiteLLM Budget Configuration
LiteLLM allows you to set spending limits and rate limits through budgets. This guide explains how predefined budgets work in CodeMie and how to customize them via Helm.
Overview
Budgets in LiteLLM help you control costs and manage API usage by setting:
- Soft Budget: Spending threshold in USD that triggers warnings
- Max Budget: Hard spending limit in USD that blocks requests when exceeded
- Budget Duration: Reset period after which spending counters restart
- Budget Category: Logical grouping that determines how the budget is applied
Budget Types
LiteLLM supports two types of budgets for different use cases – API Key Budget and Predefined Budgets.
API Key Budget
This budget is assigned to the specific API key used to integrate CodeMie with LiteLLM.
Recommended Configuration: Set to unlimited to ensure CodeMie service is never interrupted at the integration level.
The API key budget should not be the primary cost control mechanism. Instead, use it as a safety net to prevent unexpected issues at the integration layer.
Predefined Budgets
Predefined budgets are applied automatically to end users based on their usage category (web/API, CLI, or premium models). These are defined in budgets-config.yaml and mounted into the CodeMie pod at startup – no manual creation in the LiteLLM UI is required.
By setting the API key budget to unlimited and configuring predefined budgets per category, you ensure:
- CodeMie service remains available (no integration-level blocking)
- Individual users have controlled spending limits by usage type
- Easy cost management per platform category
How Budget Configuration Works
CodeMie uses a budgets-config.yaml file to define predefined budgets. This file is mounted into the pod and applied at startup. Budgets are matched to usage by their budget_category field.
Default Platform Budget
By default, the following budget is pre-configured and applied to all end users:
predefined_budgets:
  - budget_id: default
    name: Default Budget
    description: Default platform budget for new LiteLLM customers.
    soft_budget: 50.0
    max_budget: 100.0
    budget_duration: 30d
    budget_category: platform
Budget Fields Reference
Each entry in predefined_budgets supports the following fields:
| Field | Type | Required | Description |
|---|---|---|---|
budget_id | string | Yes | Unique identifier used to reference this budget in LiteLLM |
name | string | Yes | Human-readable display name |
description | string | No | Description of the budget's purpose |
soft_budget | float | Yes | Soft limit in USD that triggers usage warnings |
max_budget | float | Yes | Hard limit in USD that blocks requests when exceeded |
budget_duration | string | Yes | Reset period, e.g. 30d for monthly or 7d for weekly |
budget_category | string | Yes | Category that determines how this budget is applied (see Budget Categories) |
Budget Categories
The budget_category field controls which type of usage the budget applies to:
| Category | Description |
|---|---|
platform | Default web/API usage for end users |
cli | CodeMie CLI proxy spending |
premium_models | Costly model spending via CLI |
Enabling Budget Enforcement
Budget enforcement is disabled by default. To activate it, set the following environment variables in the CodeMie API deployment:
| Variable | Type | Default | Description |
|---|---|---|---|
LLM_PROXY_BUDGET_CHECK_ENABLED | boolean | false | Enables budget limit checking for LLM proxy requests |
LLM_PROXY_BUDGET_SYNC_ENABLED | boolean | false | Syncs predefined budgets from budgets-config.yaml into the database on startup |
LLM_PROXY_BUDGET_BACKFILL_ENABLED | boolean | false | Backfills user budget assignments from LiteLLM on startup for existing users |
In Helm Values (values.yaml):
api:
  env:
    - name: LLM_PROXY_BUDGET_CHECK_ENABLED
      value: "true"
    - name: LLM_PROXY_BUDGET_SYNC_ENABLED
      value: "true"
    - name: LLM_PROXY_BUDGET_BACKFILL_ENABLED
      value: "true"
LLM_PROXY_BUDGET_SYNC_ENABLED must be true for predefined budgets from budgets-config.yaml to be loaded into the database. Without it, budget definitions in the config file have no effect.
Customizing Budgets via Helm
To override the default budget or add category-specific budgets, mount a custom budgets-config.yaml using the Helm chart's extraVolumeMounts, extraVolumes, and extraObjects values.
The custom budgets-config.yaml fully replaces the built-in default. Include all budgets you need – including the default platform budget – when providing a custom file.
Add the following to your Helm values:
extraVolumeMounts: |
  - name: codemie-budgets-config
    mountPath: /app/config/budgets/budgets-config.yaml
    subPath: budgets-config.yaml

extraVolumes: |
  - name: codemie-budgets-config
    configMap:
      name: codemie-budgets-config

extraObjects:
  - apiVersion: v1
    kind: ConfigMap
    metadata:
      name: codemie-budgets-config
    data:
      budgets-config.yaml: |
        predefined_budgets:
          - budget_id: default
            name: Default
            description: Default platform budget for new LiteLLM customers.
            soft_budget: 80.0
            max_budget: 120.0
            budget_duration: 30d
            budget_category: platform
          - budget_id: codemie_cli
            name: CodeMie CLI
            description: Budget for CodeMie CLI usage.
            soft_budget: 100.0
            max_budget: 150.0
            budget_duration: 30d
            budget_category: cli
          - budget_id: codemie_premium_models
            name: CodeMie Premium Models
            description: Budget for premium models usage.
            soft_budget: 20.0
            max_budget: 30.0
            budget_duration: 30d
            budget_category: premium_models
After applying the Helm values, the ConfigMap is mounted at /app/config/budgets/budgets-config.yaml inside the pod and picked up automatically.
Accessing the Budgets Page in LiteLLM UI
- Navigate to your LiteLLM Proxy UI endpoint
- Log in with your administrative credentials
- From the left sidebar, click on Budgets
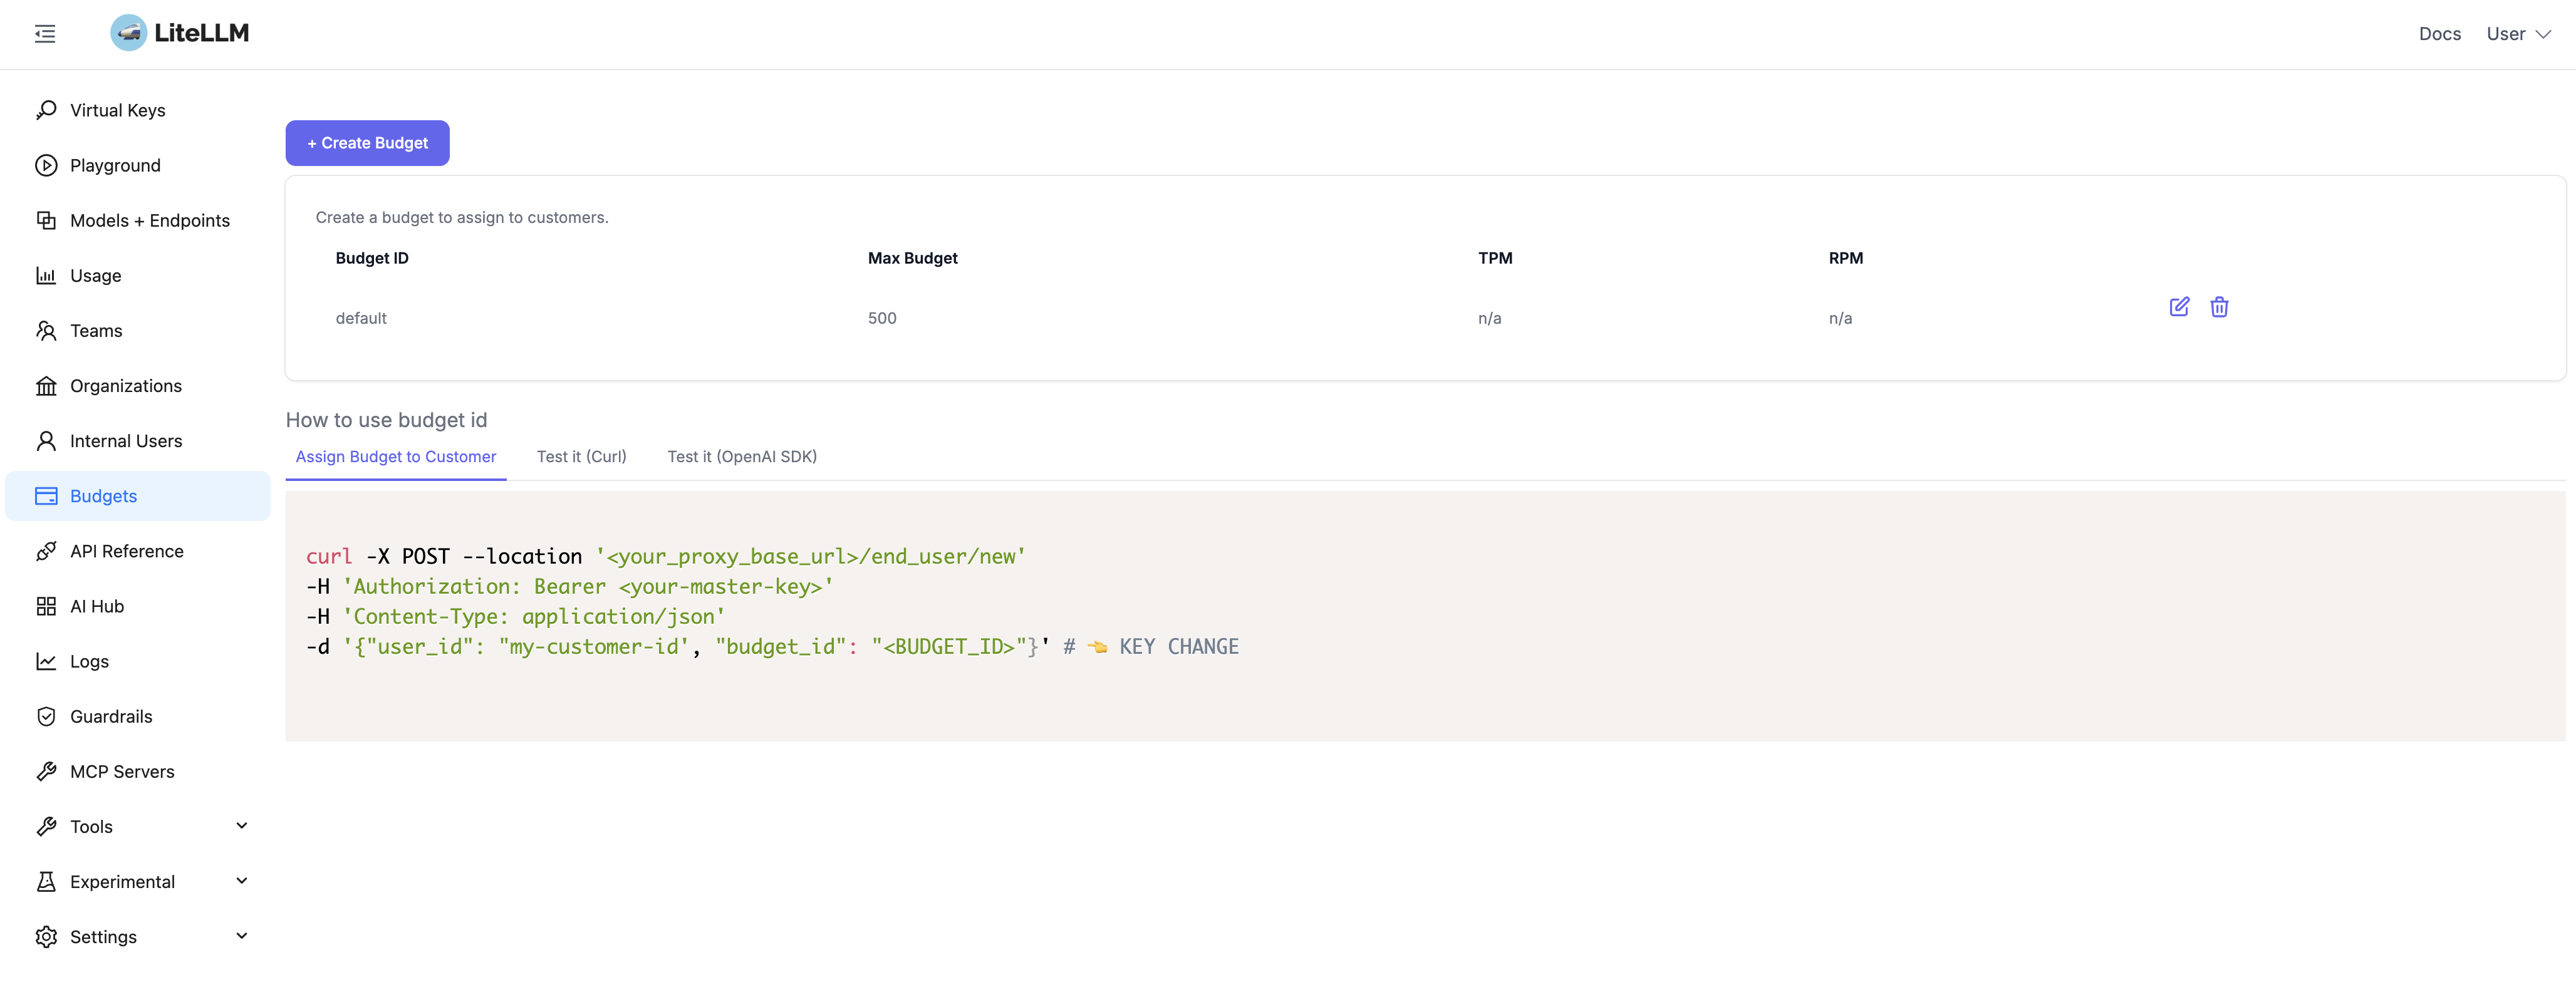
Creating a Budget in LiteLLM UI
Predefined budgets are managed via budgets-config.yaml (see Customizing Budgets via Helm). You can also create ad-hoc budgets directly in the LiteLLM UI for teams or projects not covered by predefined categories.
Step 1: Open Budget Creation Form
- On the Budgets page, click the + Create Budget button in the top-left corner
- The "Create Budget" dialog will appear
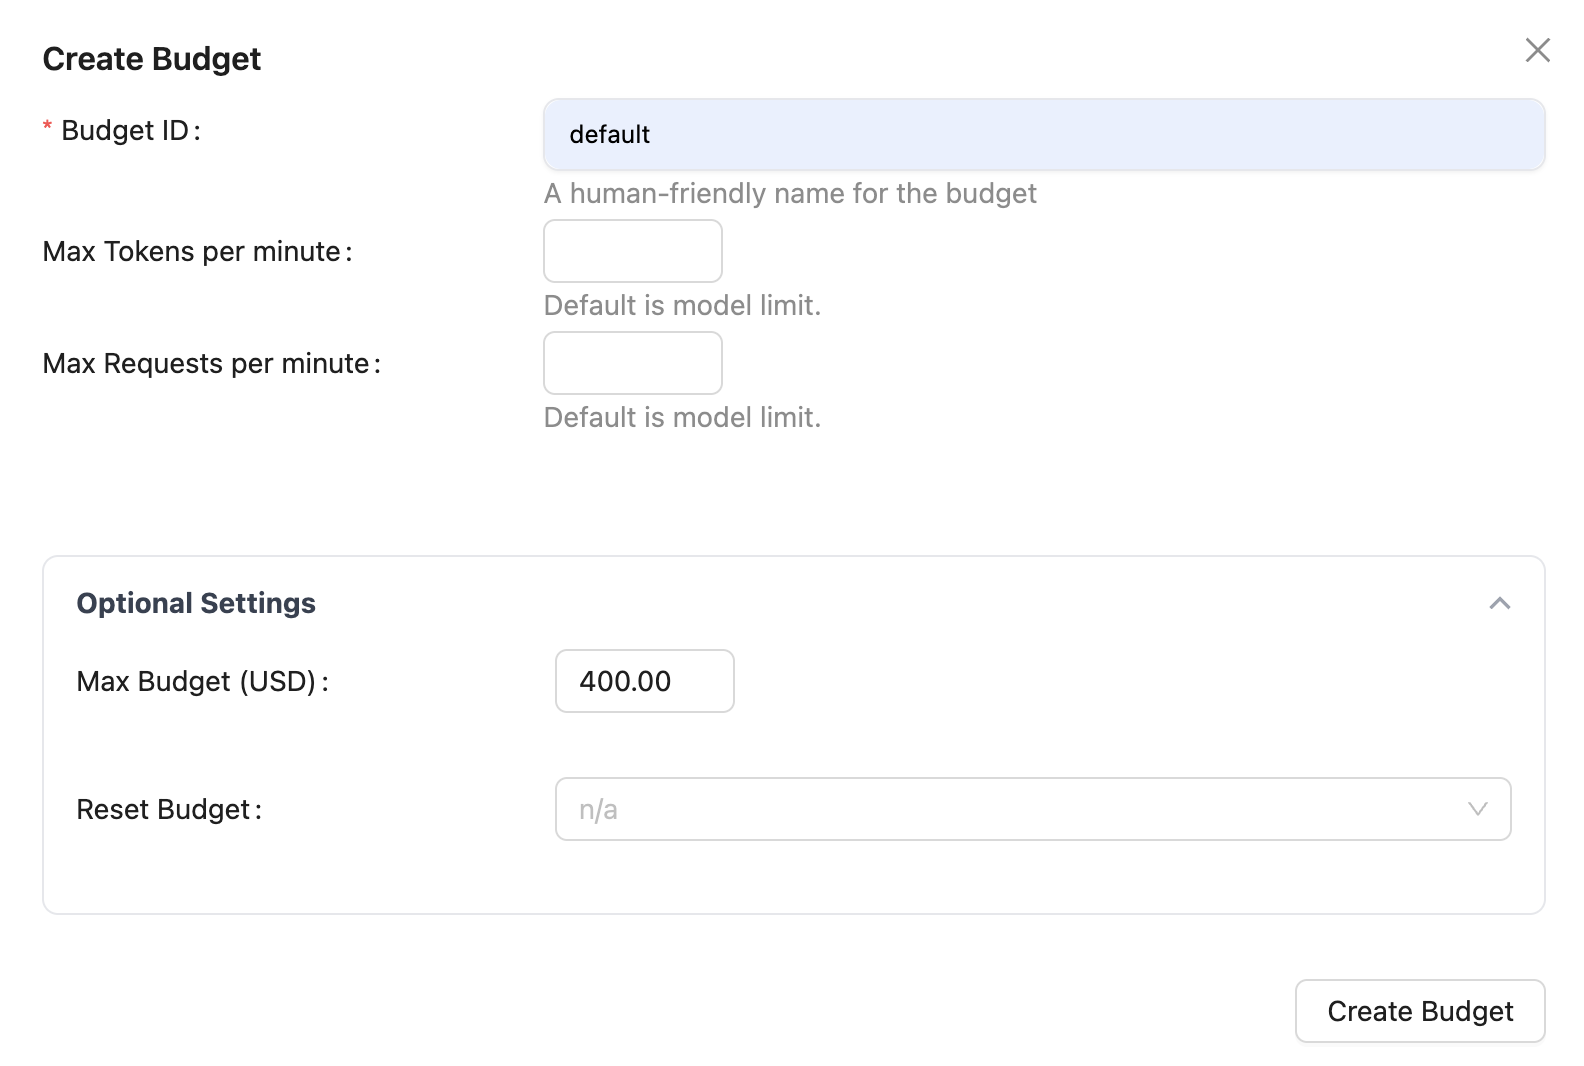
Step 2: Configure Budget Settings
Fill in the required and optional fields:
Budget ID (Required)
- Field: Budget ID
- Description: A human-friendly name for the budget
- Example:
team-alpha,project-x,integration-budget
Rate Limiting (Optional)
Configure rate limits to control usage:
- Max Tokens per Minute: Limits the number of tokens processed per minute (default is model limit if not set)
- Max Requests per Minute: Limits the number of API requests per minute (default is model limit if not set)
Step 3: Create the Budget
- Review your configuration
- Click the Create Budget button at the bottom-right of the dialog
- Your budget will appear in the budgets list
Premium Models Budget
For costly models such as Claude Opus or OpenAI o1, you can configure a separate budget to track and enforce spending independently from the default end-user budget. When configured, CodeMie automatically attributes premium model requests to a derived LiteLLM customer identity ({user_email}_codemie_premium_models), allowing you to apply stricter limits to expensive models without affecting the standard budget.
This budget applies only to requests made through the CodeMie Code CLI. UI requests to premium models are tracked against the default platform budget and are not affected by this configuration.
This feature activates when a budget with budget_category: premium_models is present in budgets-config.yaml and LITELLM_PREMIUM_MODELS_ALIASES is set. If neither is configured, all requests use standard budget behavior.
Step 1: Define the Premium Models Budget
Add a premium_models budget entry to your budgets-config.yaml (via Helm customization):
- budget_id: codemie_premium_models
  name: CodeMie Premium Models
  description: Budget for premium models usage.
  soft_budget: 20.0
  max_budget: 30.0
  budget_duration: 30d
  budget_category: premium_models
Step 2: Configure Premium Model Aliases
Set the LITELLM_PREMIUM_MODELS_ALIASES environment variable to a JSON array of model name substrings that qualify as premium:
LITELLM_PREMIUM_MODELS_ALIASES='["opus", "o1"]'
In AI/Run CodeMie Backend values (values.yaml):
extraEnv:
  - name: LITELLM_PREMIUM_MODELS_ALIASES
    value: '["opus", "o1"]'
To disable premium model tracking, remove the variable or set it to an empty array:
extraEnv:
  - name: LITELLM_PREMIUM_MODELS_ALIASES
    value: '[]'
How It Works
Model detection uses substring matching: a model is treated as premium if any configured alias appears as a substring of the model name (e.g., alias "opus" matches "claude-opus-4").
When a premium model is detected:
- CodeMie derives a separate LiteLLM customer identity:
{user_email}_codemie_premium_models(e.g.,john@company.com_codemie_premium_models) - The request is attributed to that identity for independent budget enforcement
- LiteLLM deducts spending from the budget identified by
budget_category: premium_modelsinbudgets-config.yaml(thecodemie_premium_modelscustomer identity), instead of the default platform budget
When LITELLM_PREMIUM_MODELS_ALIASES is set to an empty array ('[]'), premium model detection is disabled. No premium identity is created, all spending is charged against the default platform budget, and a generic budget error is returned if that limit is exceeded.
The /spending endpoint returns an additional premium_current_spending field when this feature is enabled, so you can monitor premium model costs separately.