Add and Index X-ray Data Source
Connect and index X-ray test cases as data sources.
X-ray is a comprehensive test management solution for Jira that enables AI/Run CodeMie assistants to access test cases, test plans, test executions, and test-related information. This guide walks you through the process of adding and indexing X-ray test data.
Prerequisites
This data source requires you to have at least one X-ray integration added to AI/Run CodeMie. For more details, please refer to the Integrations Overview guidelines.
Before adding an X-ray data source, ensure you have:
- X-ray API Keys (Client ID and Client Secret) - see Xray API Keys documentation
- Configured X-ray integration with API credentials
- Access to the X-ray instance and Jira project
- Appropriate permissions to read test cases and test-related issues
- Knowledge of JQL (Jira Query Language) for filtering test data
X-ray data sources require a valid JQL query. Test your JQL in Jira before adding the data source to avoid indexing errors.
Adding an X-ray Data Source
To add X-ray as a data source with AI/Run CodeMie platform, follow these detailed steps:
Step-by-Step Process
1. Preparation
Before adding a new X-ray data source, you need to create an integration with X-ray on the Integrations tab.
How to create an X-ray integration:
- Generate X-ray API Keys: Follow the Xray API Keys documentation to create API credentials in Xray Global Settings
- Navigate to the Integrations section in AI/Run CodeMie
- Select User Integrations or Project Integrations based on your needs:
- User Integrations: Available only to you across all projects
- Project Integrations: Shared with all members of the selected project
- Click + Create
- Select User or Project integration scope
- Choose X-ray as the Credential Type
- Provide your X-ray instance URL, Client ID, and Client Secret
- Save the integration for use in data sources
Refer to the Integrations Overview guidelines for detailed integration setup instructions.
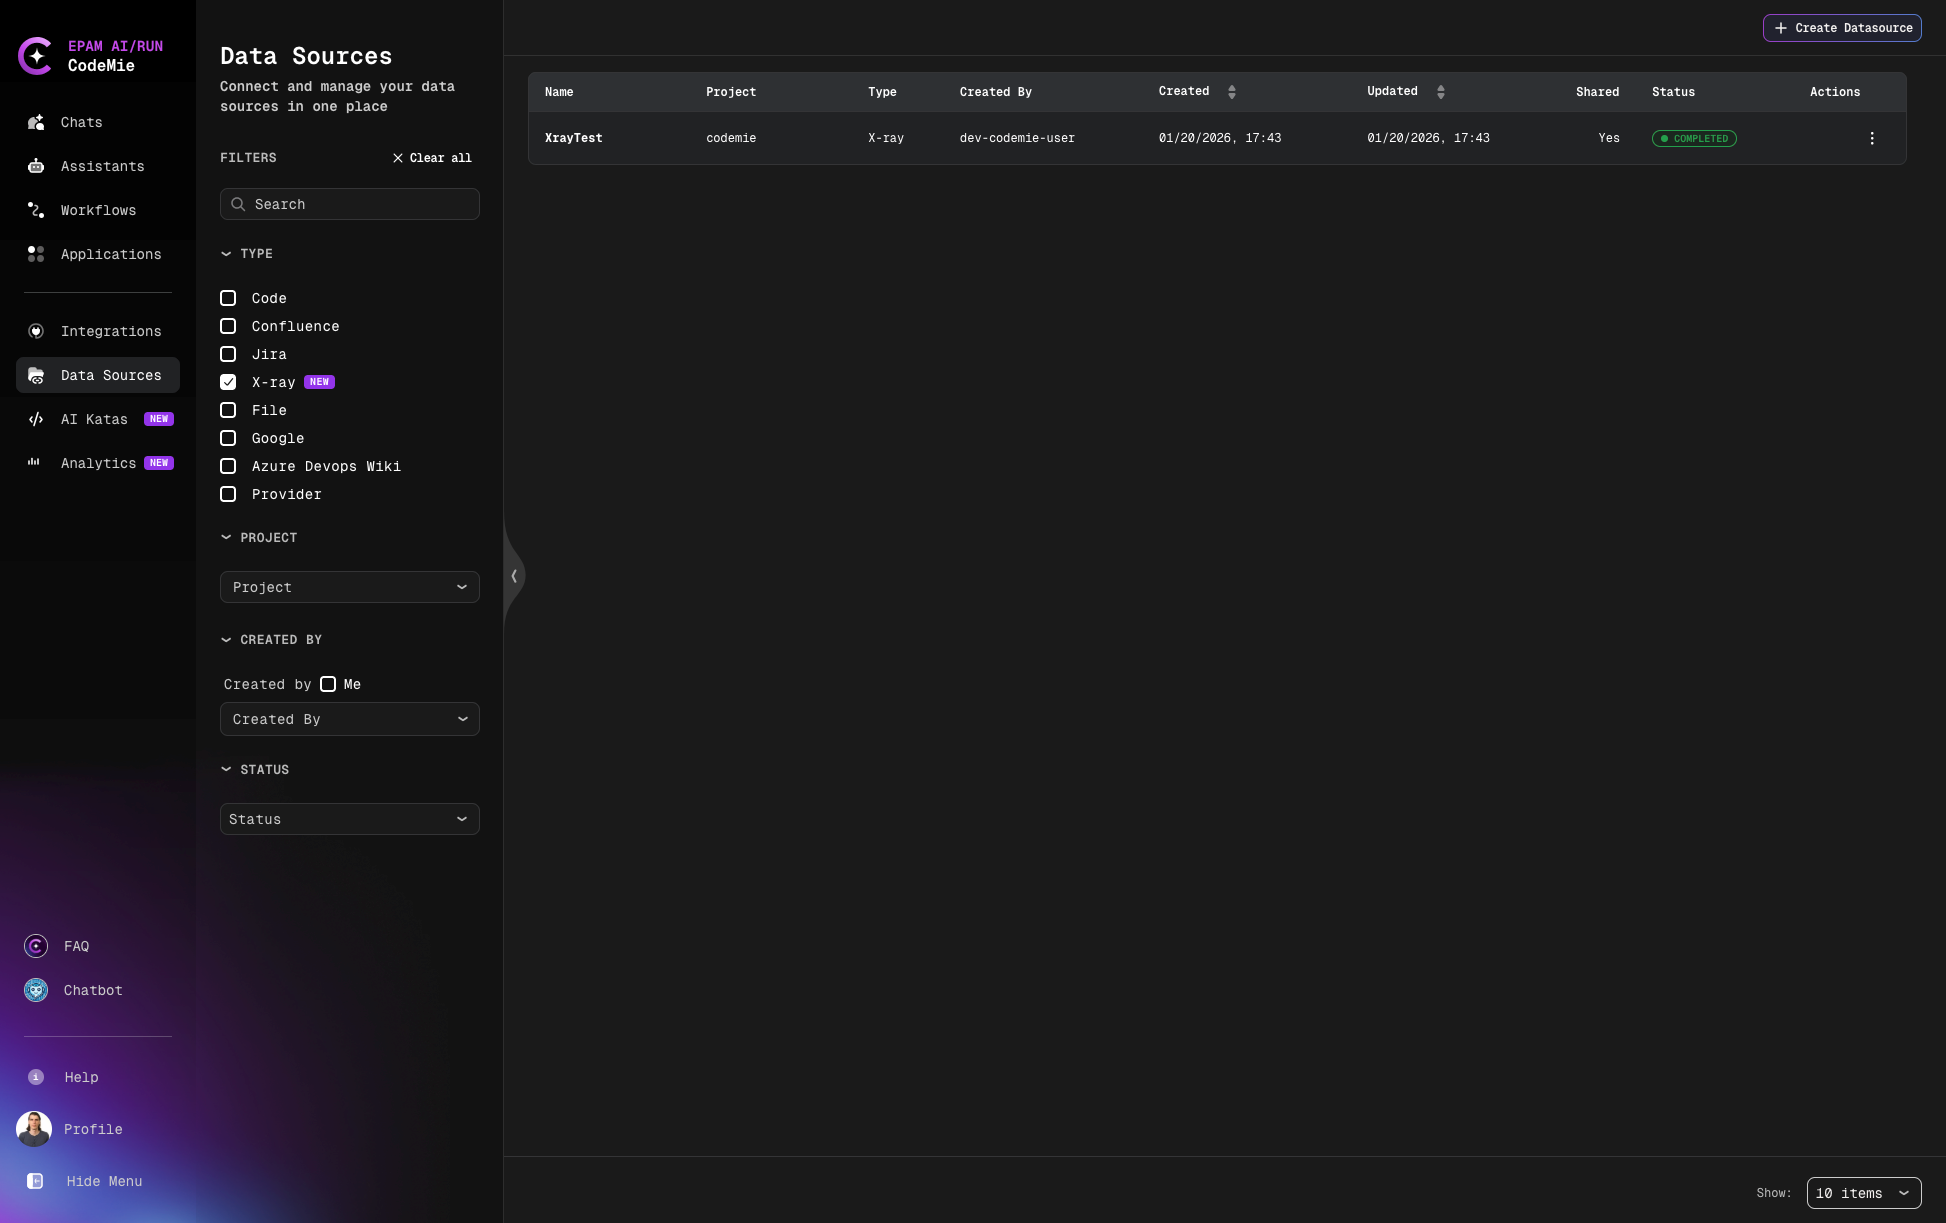
2. Navigate to Data Sources
Navigate to the Data Sources section in AI/Run CodeMie.
3. Create New Data Source
Click the + Create Datasource button and add all required data according to recommendations.
4. Select Source Type and Configure
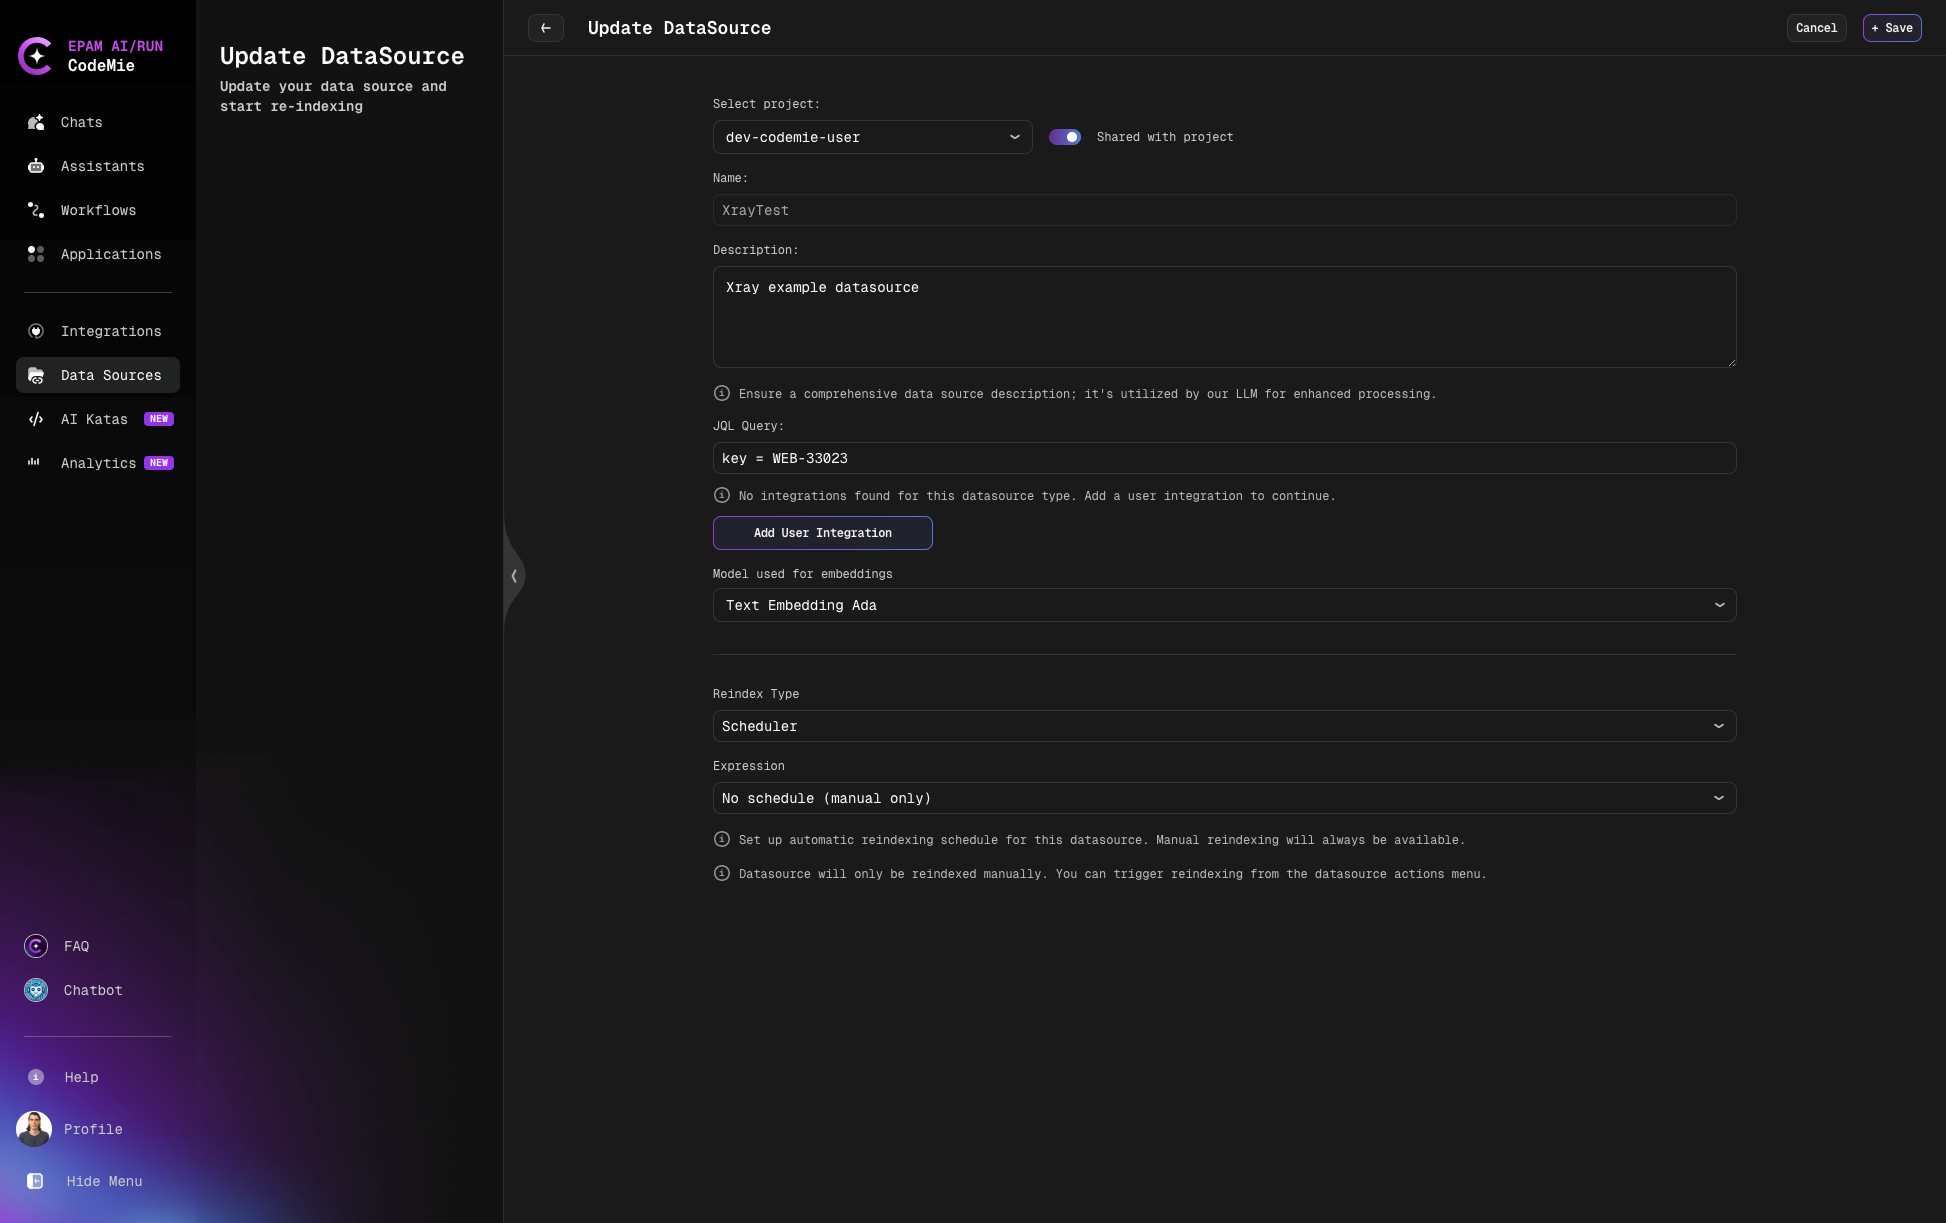
- Select Project: Select the project with which you want to associate this data source
- Shared with project: Enable to share this data source with the entire project
- Name: Alias for the data source for quick search in the data source list (e.g., "XrayTest")
- Description: Description for this data source (e.g., "XRAY example datasource")
- Choose Datasource Type: Select X-ray source type in the add new data source window
- JQL Query: Add JQL expressions to filter the test data you want to index. This field is required.
Common JQL Examples for X-ray:
# Index all tests from a specific project
project = "WEB" AND issuetype = "Test"

# Index manual tests only
project = "WEB" AND issuetype = "Test" AND "Test Type" = "Manual"

# Index tests from multiple projects
project IN ("WEB", "API") AND issuetype = "Test"
- Use
issuetype = "Test"to filter Xray test issues - Add
AND "Test Type" = "Manual"to filter by test type - Use
AND project = "PROJECT-KEY"to limit to specific projects - Add
AND key = ISSUE-KEYto index a specific test
5. Select Integration for X-ray
- Select integration for X-ray: Choose the X-ray integration you created earlier from the dropdown menu
6. Configure Model and Indexing
- Model used for embeddings: Select the embedding model for indexing (e.g., "Text Embedding Ada")
- This model converts test case text into vector embeddings for semantic search
- Default model is usually appropriate for most use cases
7. Configure Reindex Schedule (Optional)
In the Reindex Type section, configure automatic reindexing:
- Scheduler: Choose your preferred reindexing schedule
- No schedule (manual only) - Default, requires manual reindexing
- Every hour - Recommended for active test projects with frequent updates
- Daily at midnight - For test projects with regular daily activity
- Weekly on Sunday at midnight - For less active test projects
- Monthly on the 1st at midnight - For archived or completed test suites
- Custom cron expression - Enter custom cron expression (e.g.,
0 9 * * MON-FRIfor weekdays at 9 AM)
Test cases and test plans can change frequently. Scheduled reindexing ensures your assistants always have access to the latest test information, including new test cases, updated test steps, and recent test execution results.
8. Create Data Source
Click the + Create button to create the X-ray data source. Indexing will begin automatically based on your scheduler configuration.
What Gets Indexed
When you create an X-ray data source, the following information is indexed:
- Test Cases: Test issue summaries, descriptions, and test steps
- Test Details: Test type (Manual, Automated, Cucumber, etc.)
- Test Metadata: Labels, components, priority, status
- Custom Fields: Any custom fields associated with test issues
- Links and Relationships: Links to requirements, user stories, or defects
The indexed content allows assistants to understand test coverage, analyze test scenarios, suggest similar tests, and provide insights about test cases based on natural language queries.
Error Handling for X-ray Data Sources
Common Errors
Incorrect JQL Expression
Symptom: Error message appears at the top of the Add data source window
Cause: The JQL expression syntax is invalid or references non-existent projects/fields
Solutions:
- Verify JQL syntax is correct
- Check that project keys are spelled correctly
- Ensure field names exist in your Jira/Xray instance
- Test JQL in Jira search before using in AI/Run CodeMie
- Simplify complex expressions to identify the issue
Example of common JQL mistakes for X-ray:
# ❌ Incorrect - Missing issue type filter
project = "WEB"

# ✅ Correct - Include issue type for Xray tests
project = "WEB" AND issuetype = "Test"

# ❌ Incorrect - Wrong field name for test type
project = "WEB" AND testType = Manual

# ✅ Correct - Proper field name with quotes
project = "WEB" AND "Test Type" = "Manual"

# ❌ Incorrect - Invalid operator
project = "WEB" AND issuetype EQUALS "Test"

# ✅ Correct - Correct operator
project = "WEB" AND issuetype = "Test"
=: equals!=: not equalsIN: matches any value in a list~: contains (text search)IS EMPTY: field has no valueIS NOT EMPTY: field has a value
Using X-ray Data Source in Assistants
After successfully creating and indexing your X-ray data source, you can connect it to any assistant to provide access to test case information.
Adding Data Source to Assistant
- Navigate to Assistants section
- Click + Create Assistant or edit an existing assistant
- In the Data Source Context section, click the dropdown menu
- Select your X-ray data source from the list
- Save the assistant configuration
Now your assistant can access and analyze test cases from the indexed X-ray data source, enabling it to:
- Answer questions about test coverage
- Suggest similar test cases
- Analyze test scenarios
- Generate test documentation
- Provide insights about test distribution and patterns
Your X-ray data source is now configured and ready to enhance your assistants with comprehensive test management knowledge.