Adding an MCP Server
Configuration Steps
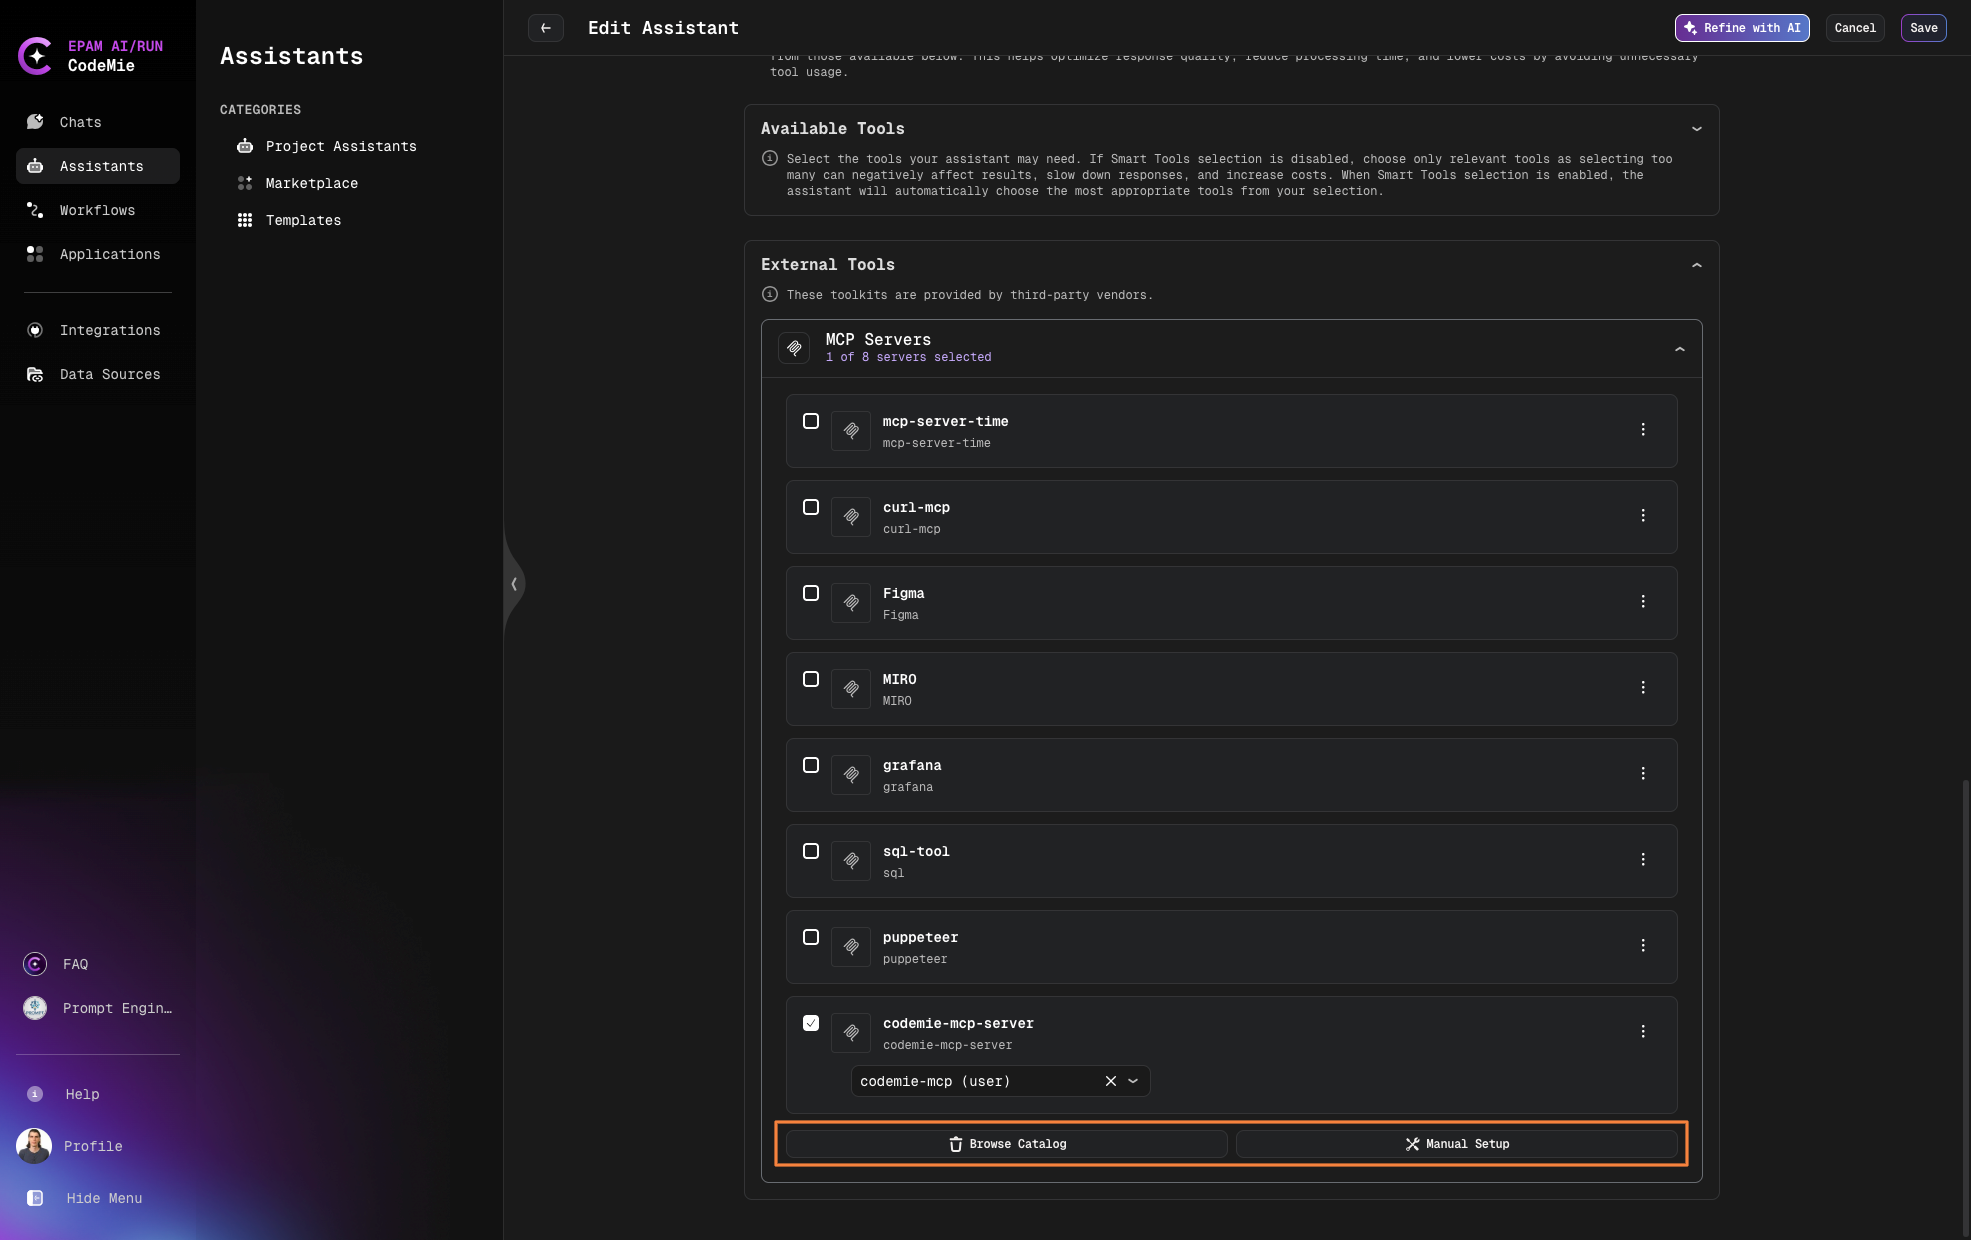
- Navigate to the Create Assistant or Edit Assistant page
- In the Available tools section, expand the External tools category
- Click on the External tools card to expand it
- Select Browse Catalog for already predefined MCP servers or Manual Setup for adding your own MCP server
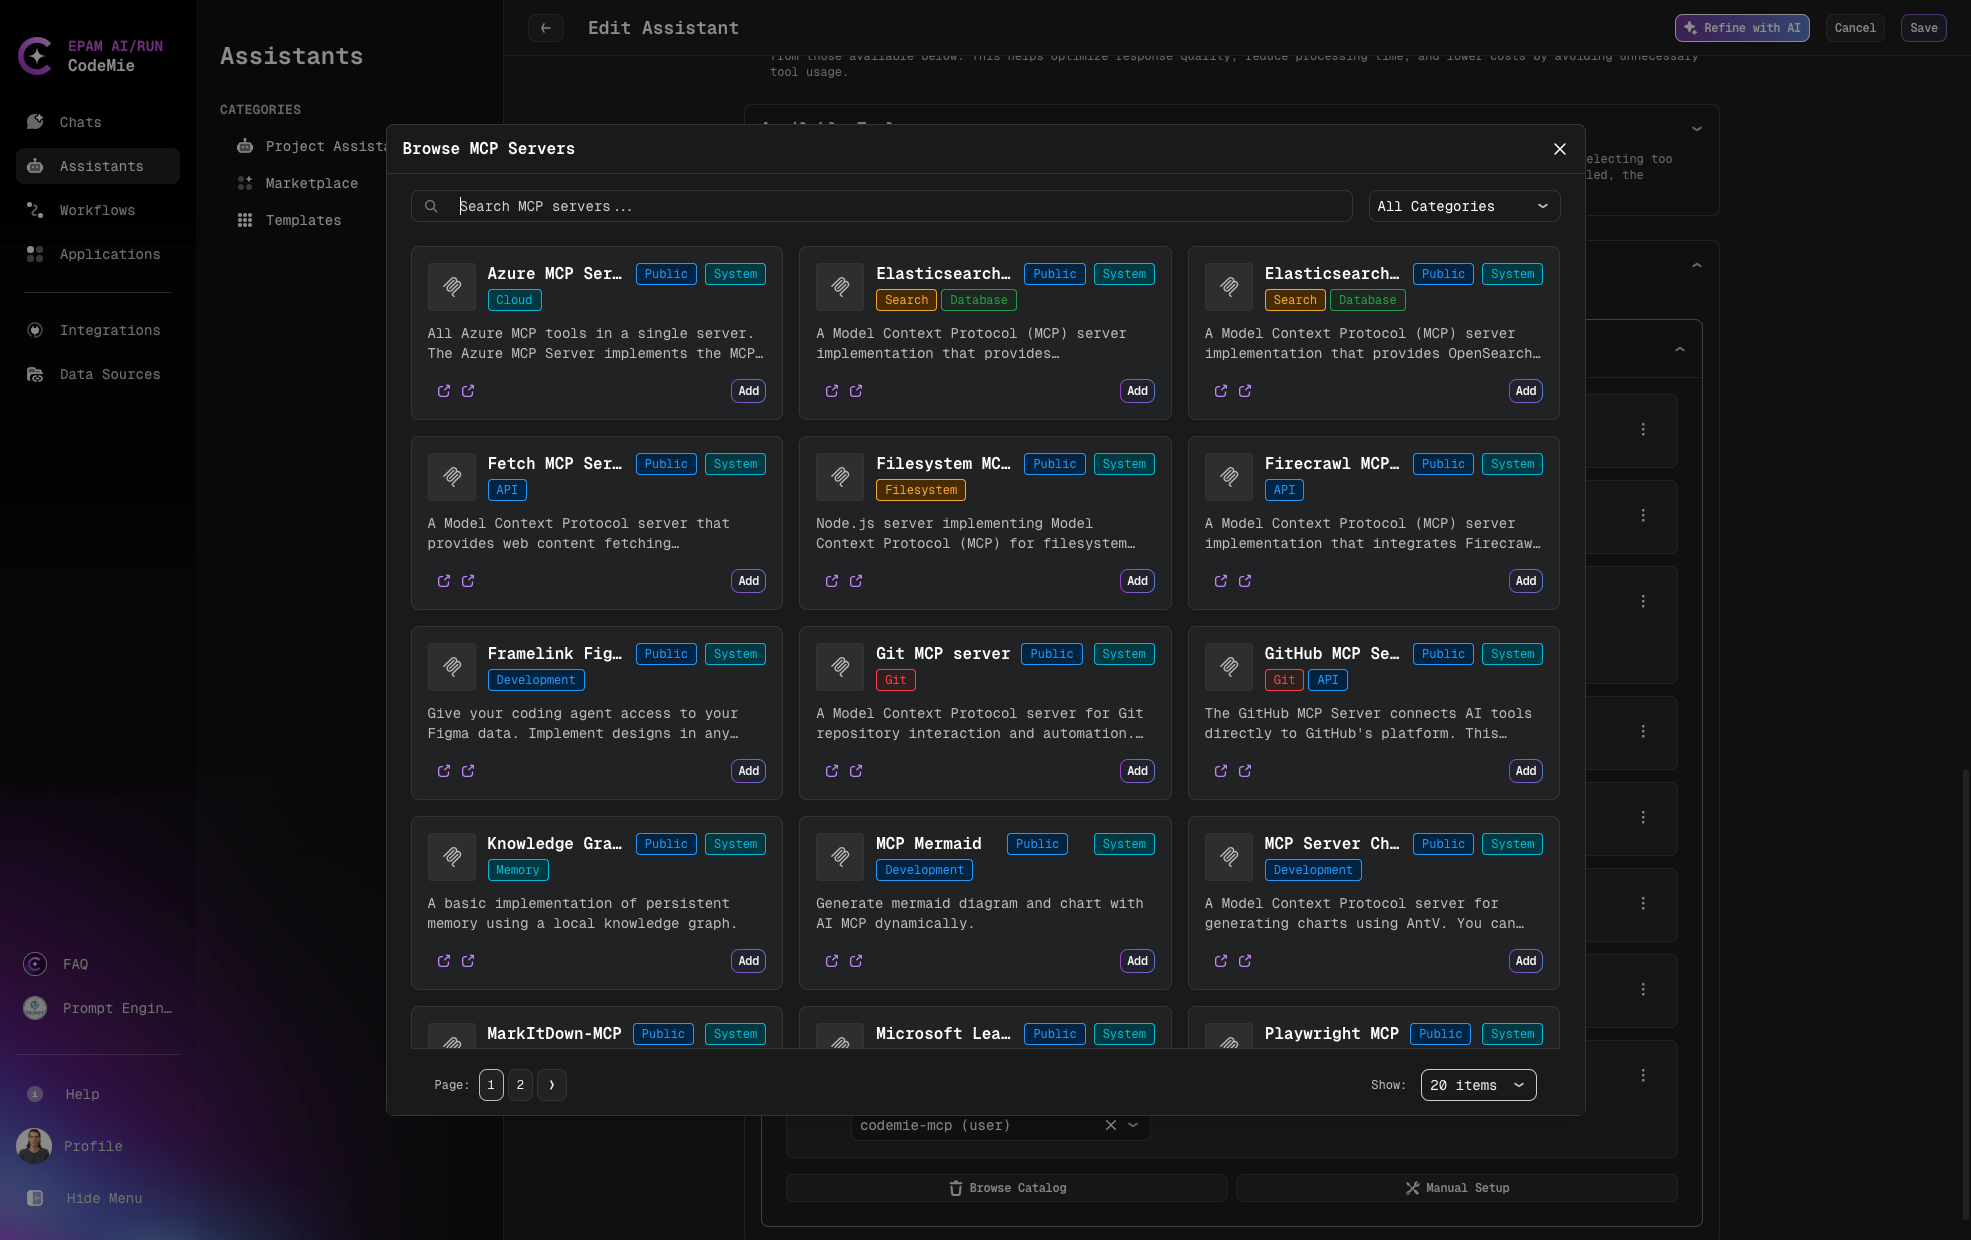
Add Predefined MCP Servers from Browse Catalog
- Search MCP with Categories filter or by name and click Add
- Add required Environment Variables
- Add or select environment variables from the dropdown list if needed
- And click Save
- Click Test Integration and Add to complete the configuration
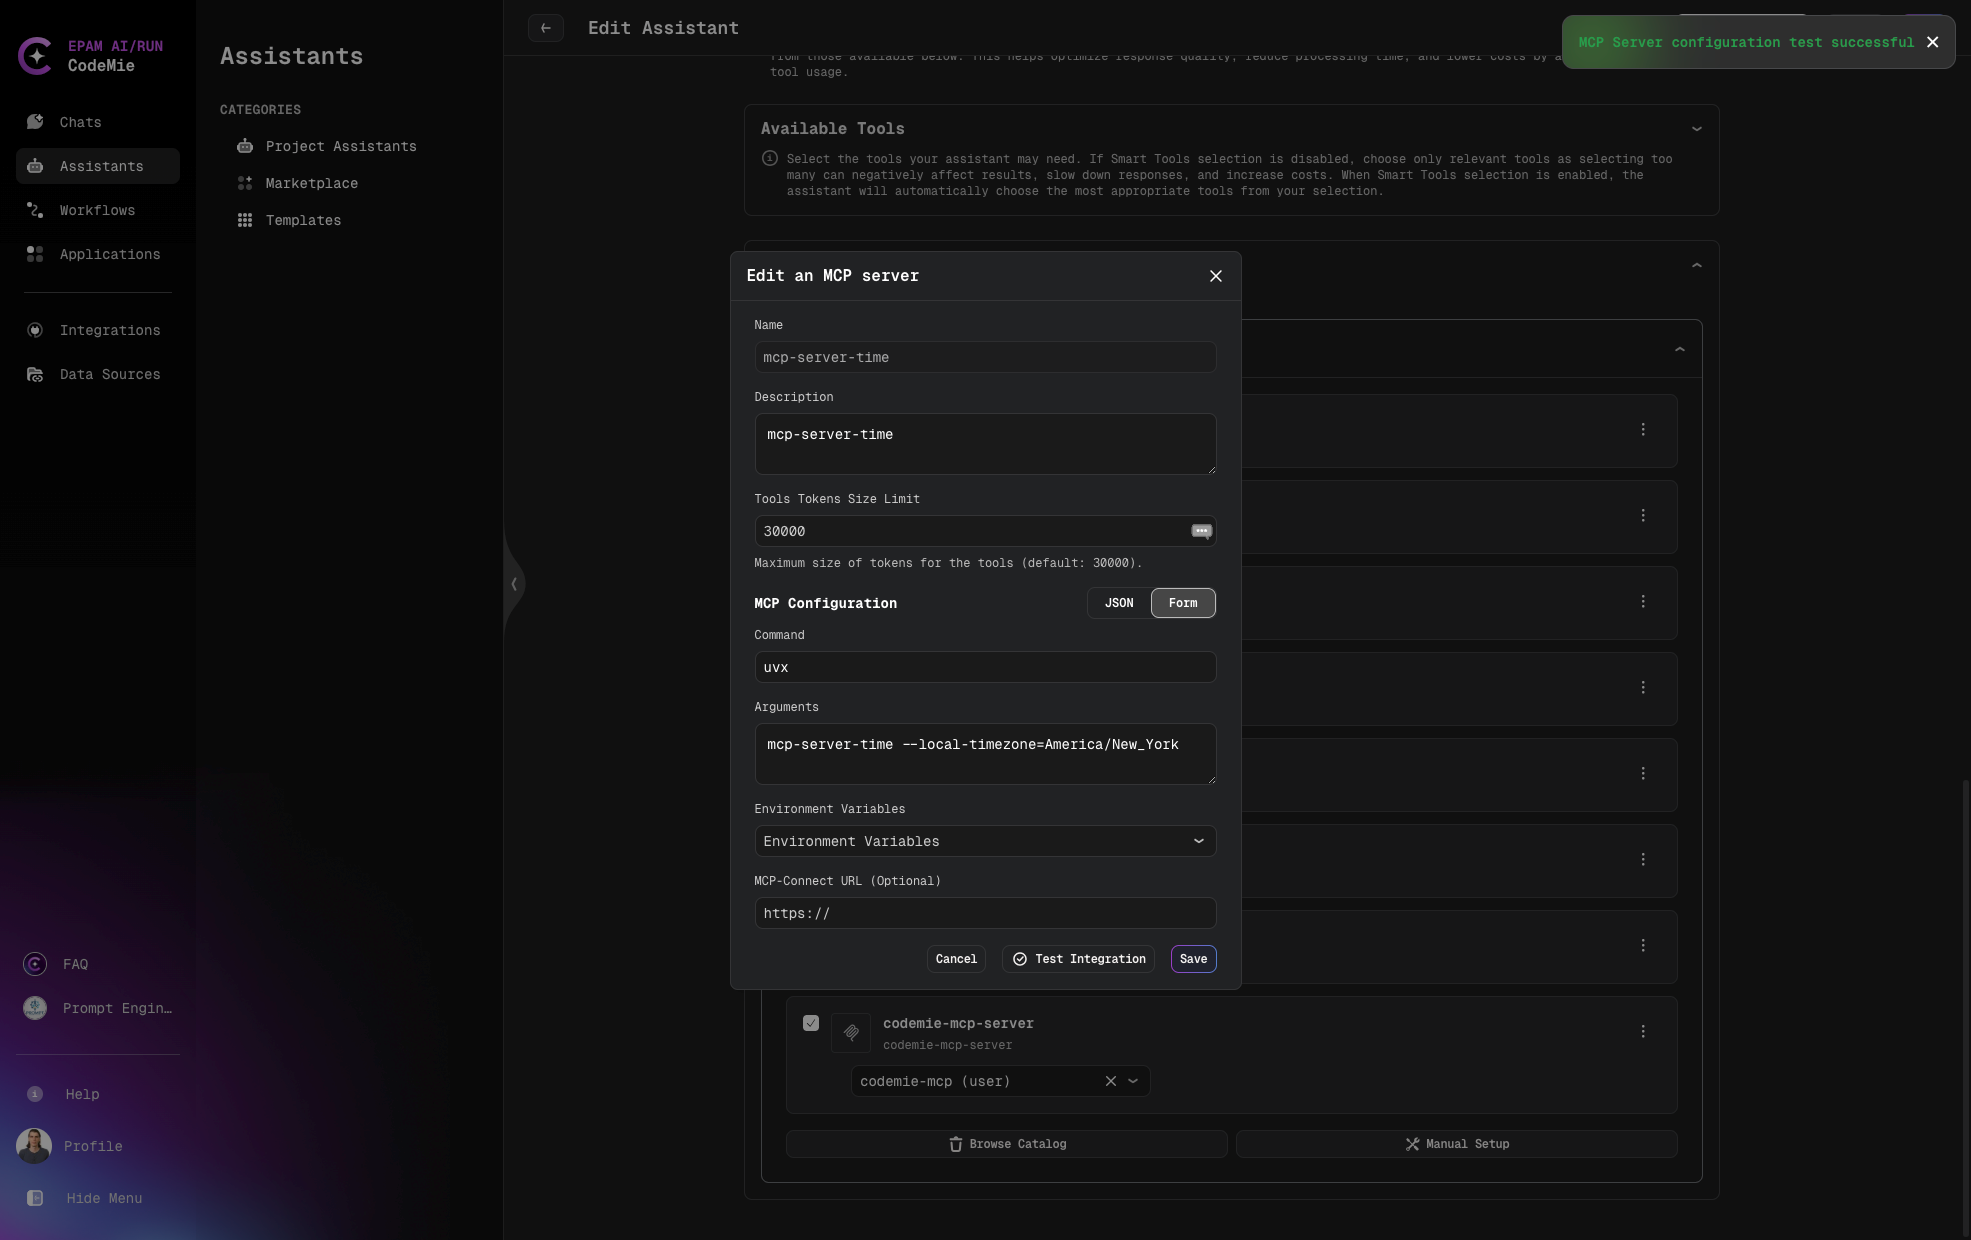
Add MCP Server with Form Manual Setup
When configuring an MCP server using the Form method:
- Fill in the required fields:
- Name: A unique identifier for your server (required)
- Description: Details about the server's purpose (optional)
- Tools Tokens Size Limit: in need to change value by default
- Command: The command used to invoke the server (required)
- Arguments: Any additional parameters needed, space-separated (optional)
- Select environment variables from the dropdown if needed
- Click Test Integration and Add to complete the configuration
Example:
- Name: time-mcp-server
- Description: time-mcp-server
- Command: uvx
- Arguments:
mcp-server-time --local-timezone=America/New_York
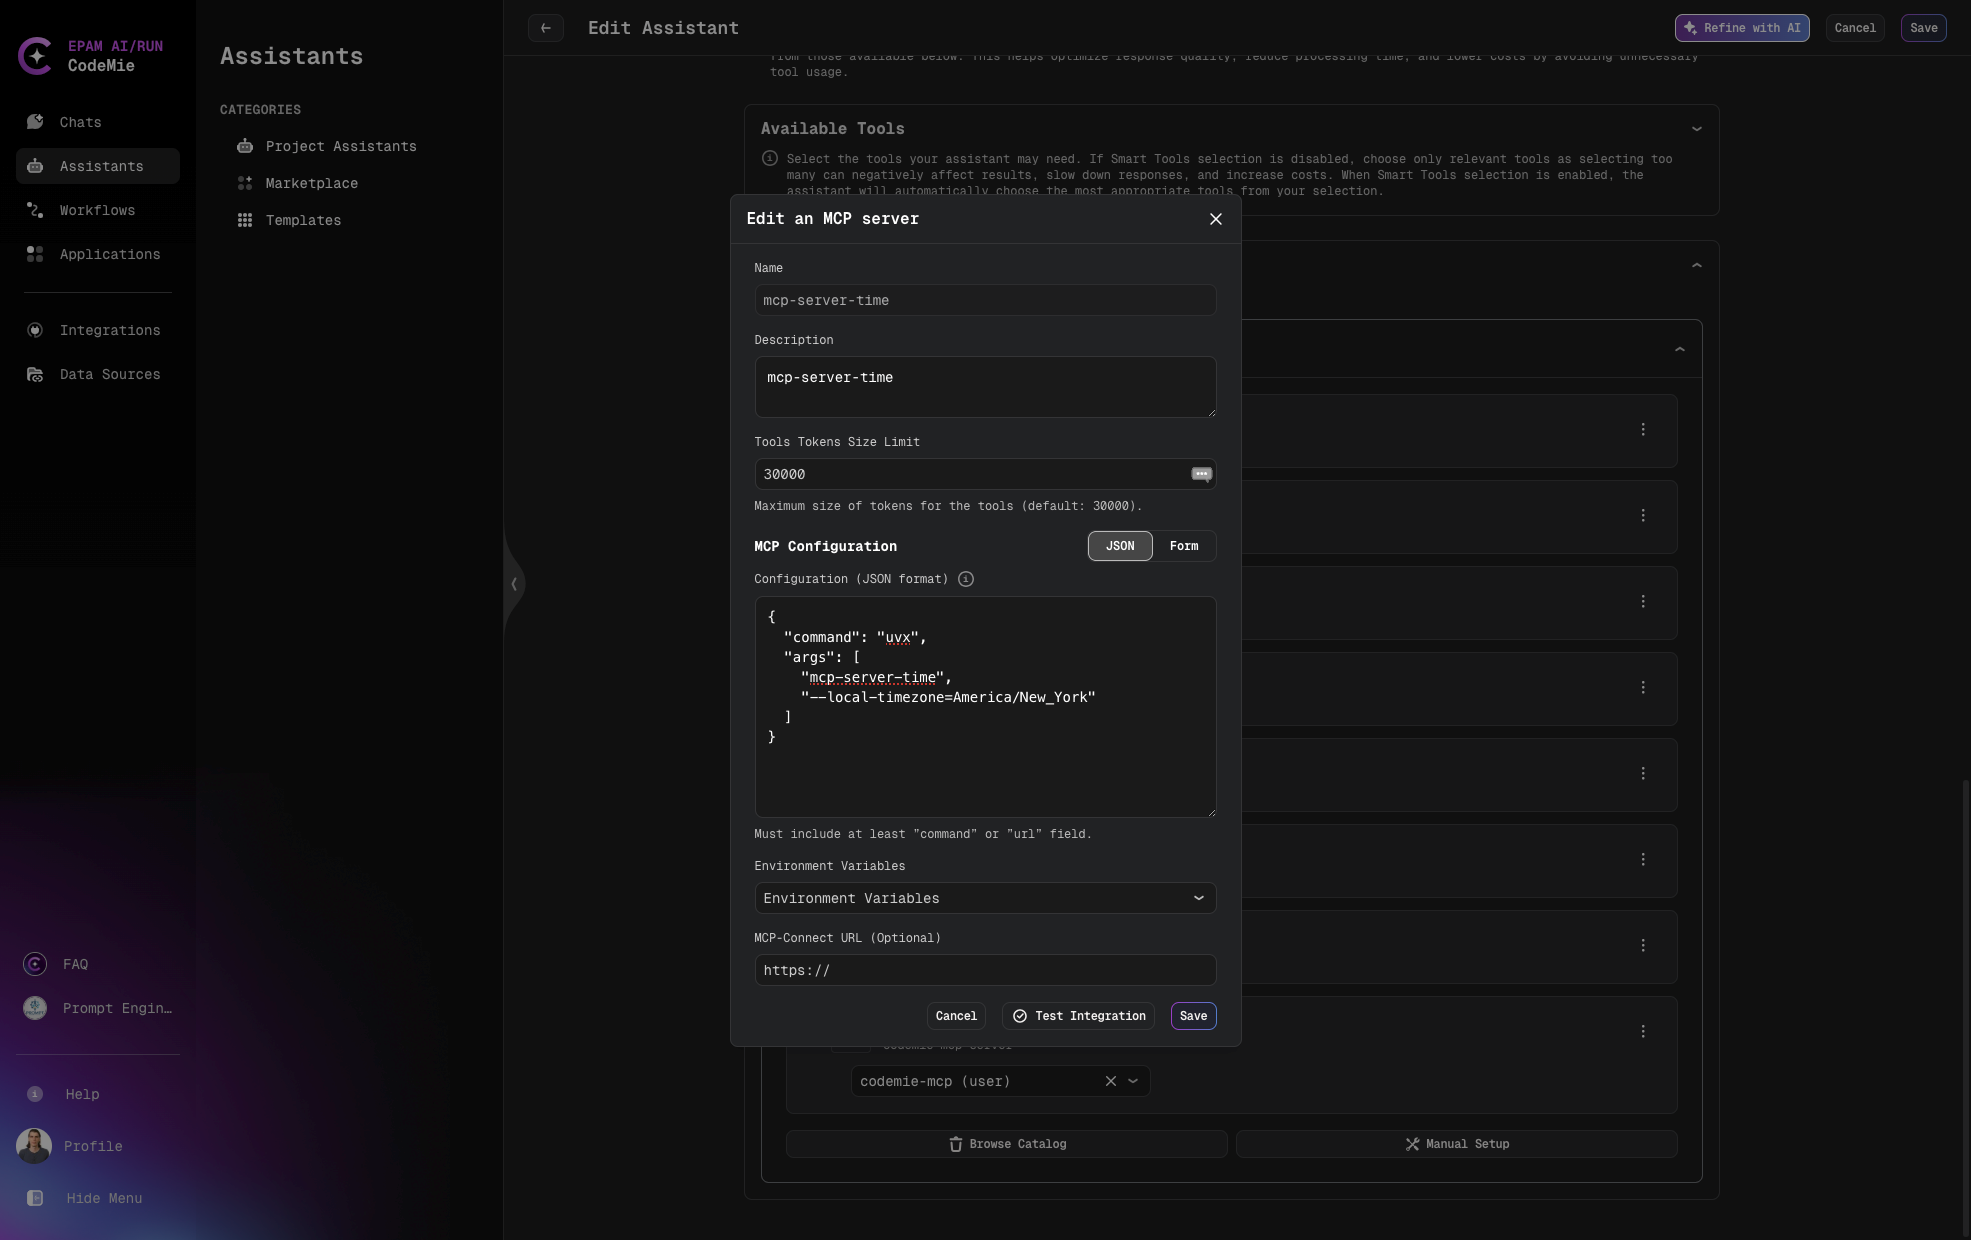
Add MCP Server with JSON Method Manual Setup
For advanced configurations, you can use the JSON method:
- Fill in the basic fields (Name, Description, Command, Tools Tokens Size Limit)
- Enter valid JSON data in the JSON format field
- Select environment variables as needed
- Click Add Server to complete the configuration
Example:
{
  "command": "uvx",
  "args": ["mcp-server-time", "--local-timezone=America/New_York"]
}
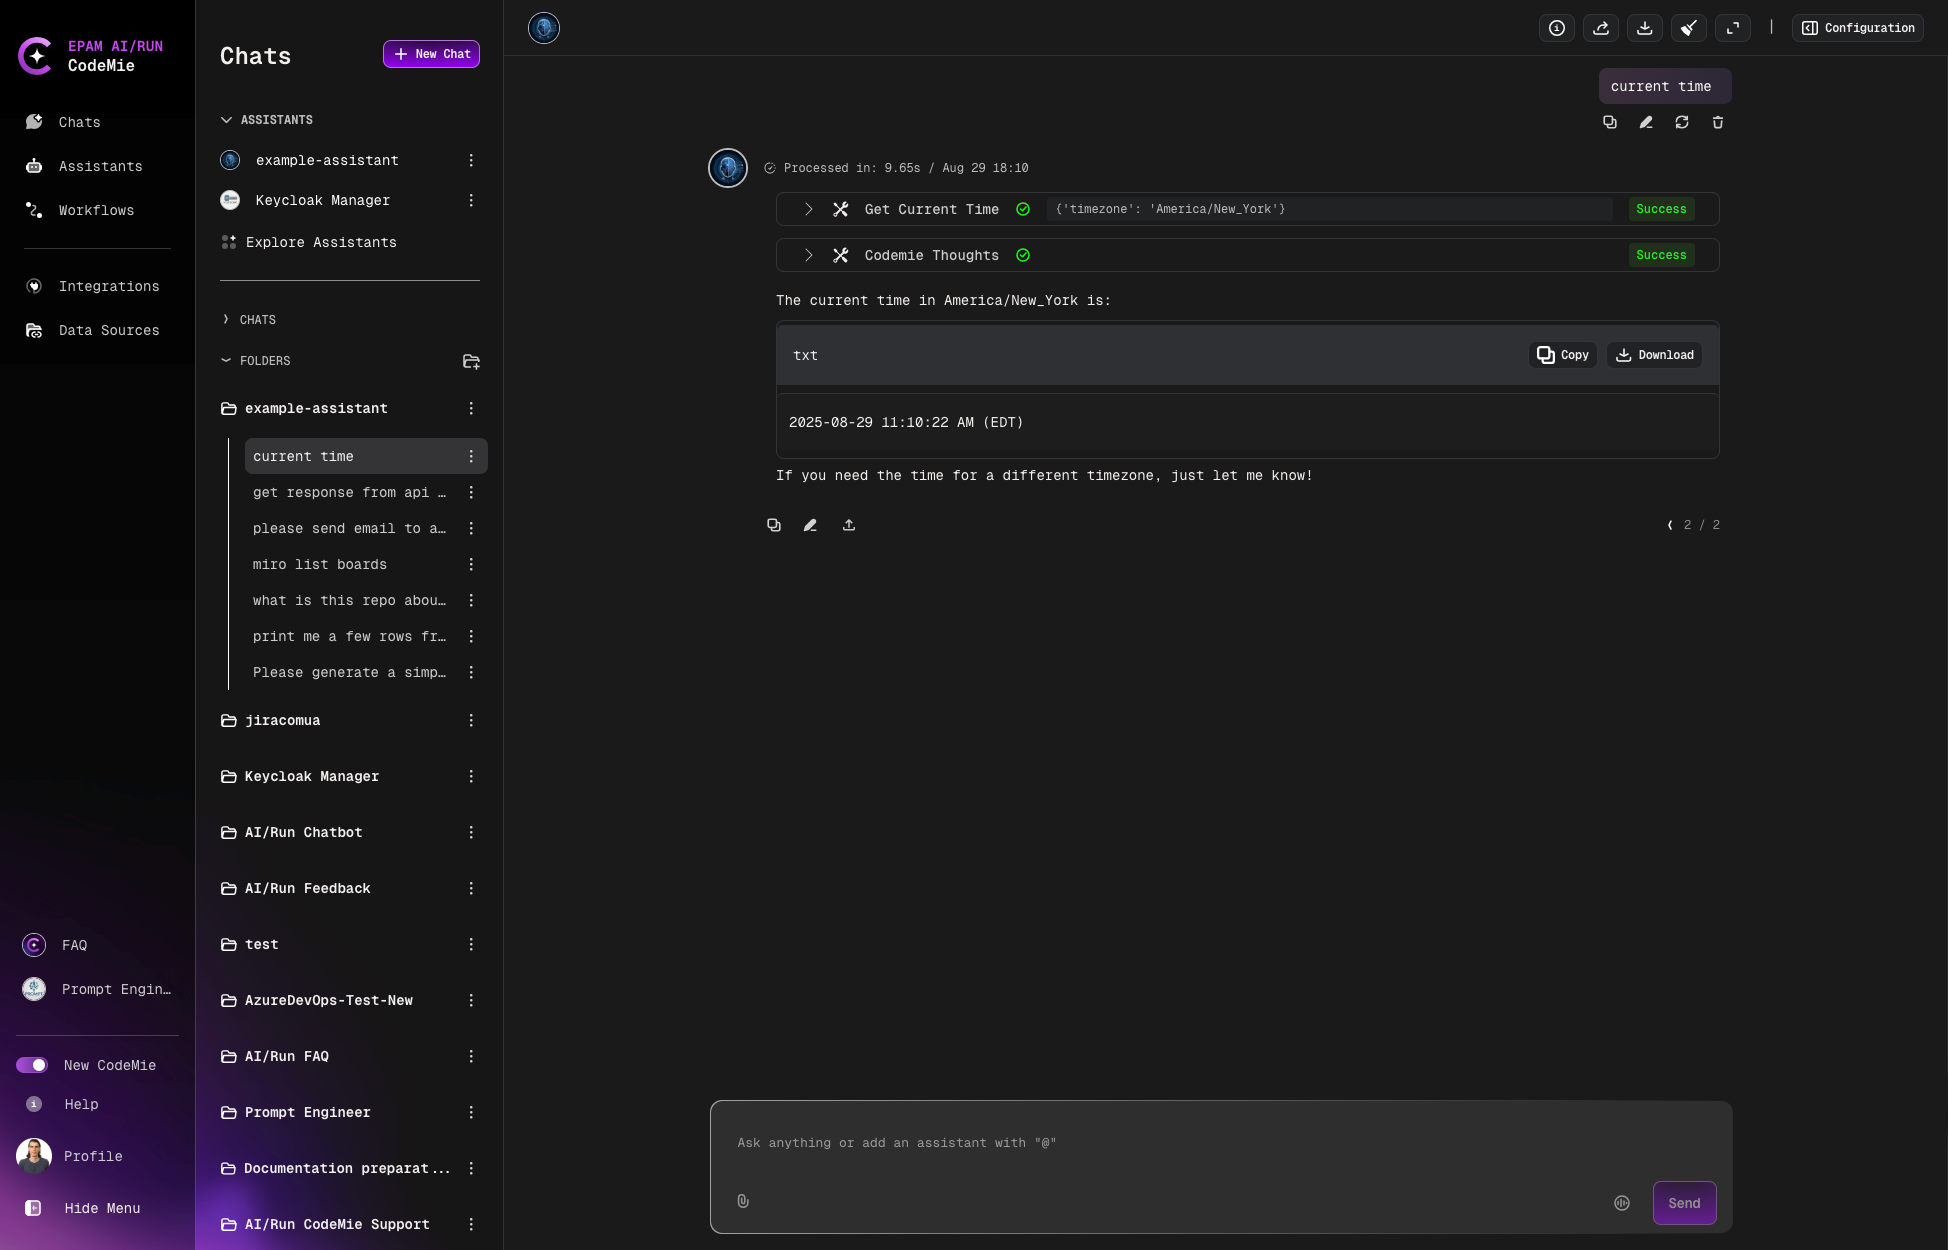
Example of the conversation:
Managing Environment Variables
MCP servers often require environment variables for proper operation:
- Click Add environment variables on the expanded MCP tool card
- Choose between Project Environment Variables or User Environment Variables
- Fill in the required fields:
- Alias: A user-friendly name for the variable
- Key: The environment variable key name
- Value: The value to assign (will be securely stored)
- Click Add Environment Variables to save the configuration
Configuring Headers with User Context Placeholders
For Streamable HTTP MCP servers, you can configure custom headers with dynamic placeholders that are automatically resolved at request time. This feature enables user-specific routing, audit logging, and context propagation.
Available Placeholders
User Context Placeholders:
{{user.name}}- Resolves to the authenticated user's full name (e.g., "John Doe"){{user.username}}- Resolves to the authenticated user's username/email (e.g., "John.Doe@epam.com")
Environment Variable Placeholders:
{{VARIABLE_NAME}}- Resolves to values from configured environment variables
Example Configuration
{
  "name": "example-http-server",
  "type": "streamable-http",
  "url": "http://127.0.0.1:3001/mcp",
  "headers": {
    "Content-Type": "application/json",
    "X-User-Name": "{{user.name}}",
    "X-Username": "{{user.username}}",
    "X-Project": "{{PROJECT_NAME}}",
    "X-API-KEY": "{{API_KEY}}",
    "Authorization": "Bearer {{ACCESS_TOKEN}}"
  },
  "env": {
    "PROJECT_NAME": "my-project",
    "API_KEY": "my-api-key",
    "ACCESS_TOKEN": "secret-access-token"
  }
}
When an authenticated user "John Doe" (username: John.Doe@epam.com) makes a request, the headers sent to the HTTP MCP server will be resolved to:
Content-Type: application/json
X-User-Name: John Doe
X-Username: John.Doe@epam.com
X-Project: my-project
X-API-KEY: my-api-key
Authorization: Bearer secret-access-token
Use Cases
User context placeholders are beneficial for:
- User-specific routing: Route requests to different backends based on user identity
- Audit logging: Track which user triggered specific MCP server operations
- Authorization: Pass user information to downstream services for access control
- Context propagation: Maintain user context across microservices architecture
User placeholders are resolved securely at request time and are isolated between concurrent requests to ensure thread safety.
Testing MCP Server Integration
To ensure your MCP server is correctly configured and accessible, CodeMie provides a convenient Test integration feature:
Testing from the Edit MCP Server Page
- Navigate to the Edit assistant page
- Find and expand the MCP server tool card
- Click on the three dots menu, then click Edit
- On the Edit an MCP server page, locate the Test integration button next to Cancel and Save
- Click the Test integration button
- The system will immediately verify the connection and display the result:
- Success: The MCP server is properly configured and accessible
- Failure: Troubleshooting information will be provided
Testing from the MCP Server Card
- Navigate to the Edit assistant page
- Find and expand the MCP server tool card
- Click on the three dots menu
- Select the Test integration option
- The system will perform the verification and display results immediately
This feature helps you quickly confirm that your MCP server connection is working properly without having to test it through actual assistant conversations.